I decided to document my Skill-Ed work day-by-day. This will help me document what I learn here at the workshop more systematically, and use it for future reference.
Day 1 - 17 October 2019 (Thursday), 1.45pm
I started my first day at the Skill-Ed training today. As soon as I came in, Divakar helped me set up my wifi connection, and connect to the internet so I can access the fab academy website.
Once in, Richard and I had a discussion on why I am here. I may not be able to recreate the discussion verbatim, but I will try my best to recollect the conversation for the reader
R: Why are you here? What do you hope to get out of this?
A: To make something and to gather the knowledge and tools to make it.
R: What is the age we are in currently?
A: I don’t know
R: We are in the age of information – everything is available in the form of some information. How things have progressed over the ages is first there was the artisanal age where things were handmade and in small quantities. They were customised items sometimes serving very specific needs. Then came the industrial age, where people invented machines that could make the same items that the artisans were making but on a larger scale and more quickly. Then came the corporate age, which continued the scaling up, and now we are in the information age. The Skill-Ed programme allows us to return to the artisan’s age, but taking with us the advancements that the industrial, corporate and information ages have to offer to us. Fab labs are these communities that allow you to make anything. After the first lab that was set up in the US, the second one was set up in a village near Pune (Vigyan Ashram). This is often referred to as ground zero because the lab mentors wanted to test if the skills provided through the workshop and training actually help upskill people with no prior skills. The main purpose of all these labs are to democratise learning and make learning accessible. What is one thing that is not accessible to you as an individual today?
A: The knowledge and tools to make the product that I want to.
R: Exactly, and Skill-Ed will help you gain that knowledge and provide you with access to those tools.
Richard then showed me all the resources available on the fab academy page. I watched a presentation by Neil Gershenfeld.
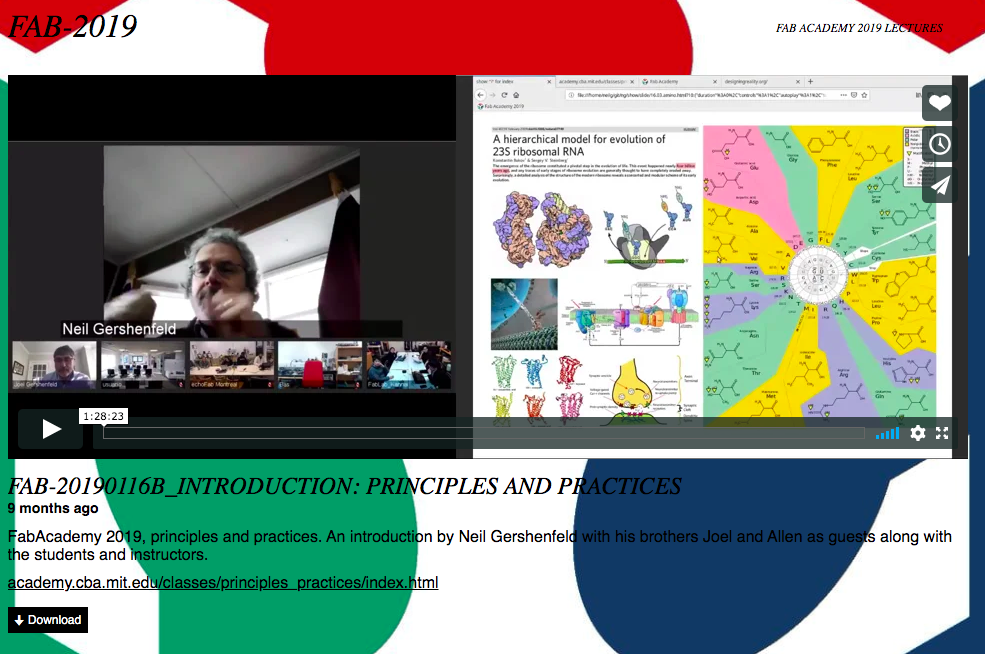
I will need to rewatch the video as I didn’t fully grasp some of the references he makes in the first half an hour of the video. Neil spoke about how there are 1600 fab labs across the world, and that the purpose of these labs are to create an ecosystem and an institutional framework that will allow makers to create value and reduce harm. Risk mitigation is an important aspect of these fab labs. The speakers in the presentation also spoke about integrating social systems into these fab lab ecosystem. I can’t recollect clearly how they proposed to do that integration. Neil went through how a fab academy student should go about their final project – they have a list of things that the final presentation should be able to demonstrate and cover.
What I got out of this video is that the programme is not only about creating a new product, but also understanding how to create the machinery that will create this product, especially if it is a new product.
Once I finished watching the video, Richard took me through what a documentation process should look like. I should have the following sections: about me, my course journey -ideally split week-wise and module-wise, and related assignment, and project work.
In the about me section, I can share as much or as little about myself that I want. But it will good to share details about,
-
Who I am?
-
Why am I here?
-
What motivates me?
-
What I hope to accomplish? And, why I want to do what I want to do?
The assignments, course journey section should document what I learn from each module.
The final project section should have a detailed write-up or video or images on how I have used all the knowledge I have gained to create the product that I plan in the first two weeks of the course.
A good way to figure out what a good project will be is to do soemthing that is likely to add value to some existing product. This needn’t always be the case - replications of existing products are also alright. Have a lot of ideas in the first week, and brainstorm them with the mentor, Richard in this case, and in the second week figure out a way to detail out how to implement the project.
For documentation purposes, there are a number of ways to do so:
Both have their own features on what is feasible - so I need to use one that best suits my needs.
Task for Week 1: Identify the best way to document my work.
Day 2 - 18 October 2019 (Friday), 1:29pm
In today’s class, Richard took me through the workbench project phase. I think the broad classification of spaces are as follows:
Maker spaces workshop, with section on digital fabrication and wood workshop, Cubicles for startups – one is working on electric vehicles, another on making school work fun, another on stem education for children, another on making rockets, and academy space for individuals who are learning as a part of Skill-Ed, a cafeteria and open space with a garden where there are projects on aquaponics and hydroponics (I have made a mental note to look up both).
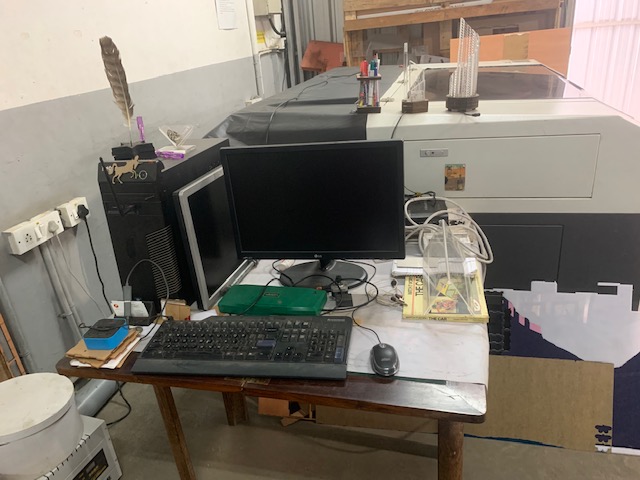
Today, I covered two things – firstly, I documented each of the items in the maker spaces workshop and made note of what each of these machines do, and secondly, I reviewed the different documentation tools available online.
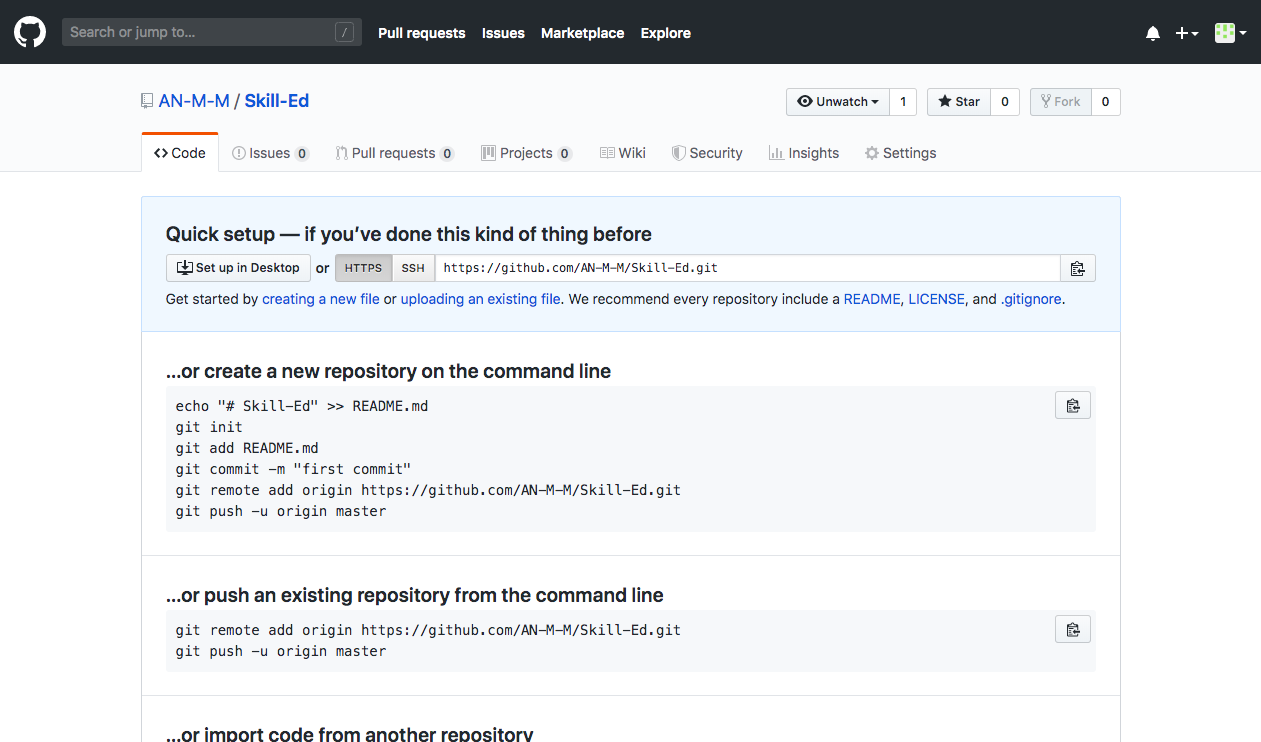
I signed up on github yesterday, but the user interface looks intimidating – something that a coder may be familiar with, but looks completely alien to me.This is what the landing page looks like:
I took a break from the video tutorials to speak with Saali, the in-house digital fabricator.
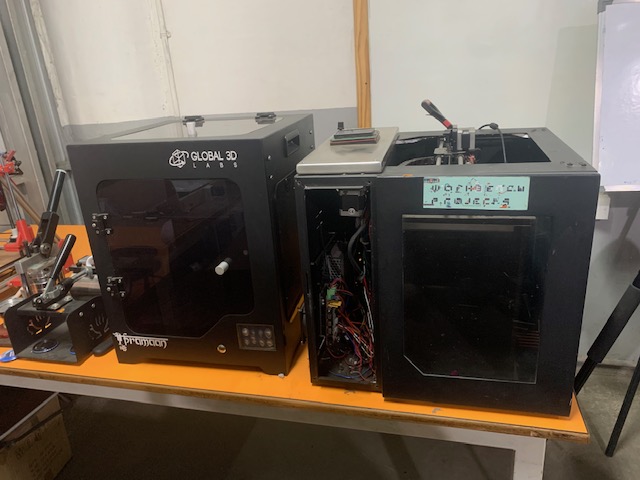
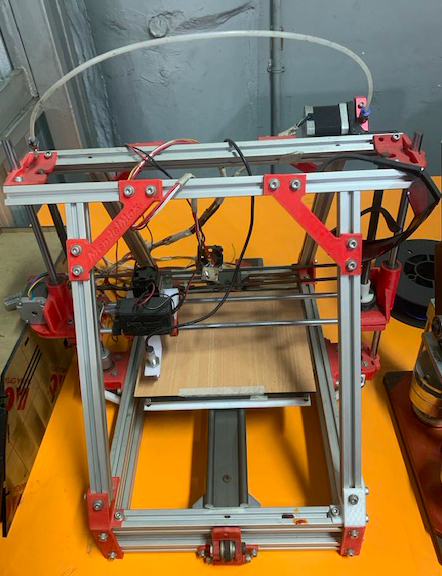
In the digital fabrication workshop, they have the following machines:
-
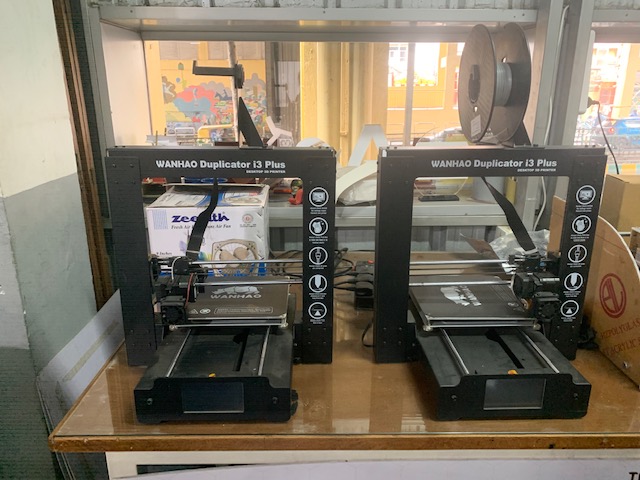
3D printers - 4 nos.
-
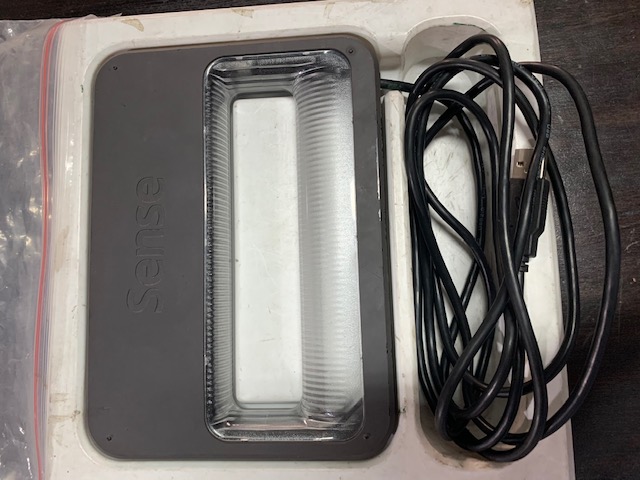
Handheld 3D scanner - 1 no.
-
PCB (Printed Circuit Board) maker - 1 no.
-
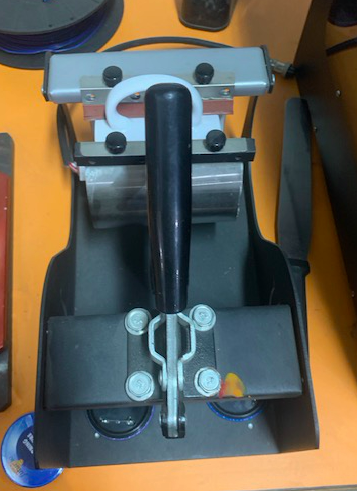
Mug printer - 1no.
-
Cap printer - 1no.
-
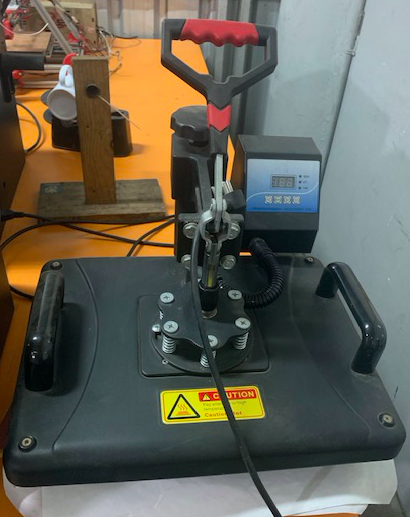
Tshirt printer - 1no.
-
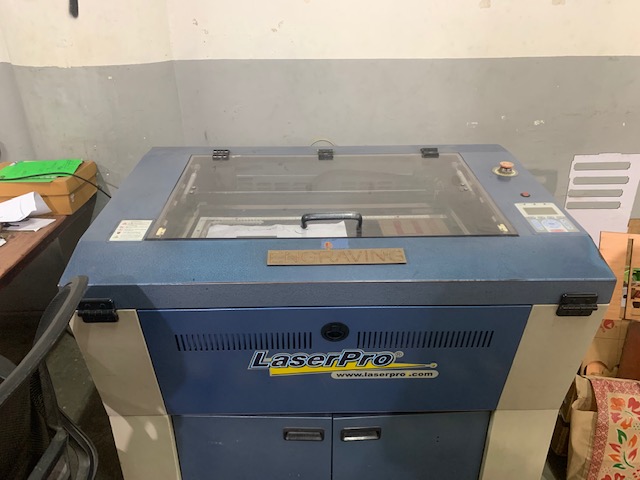
Miniature laser cutting machine (3D printer, PCB plotter, engraving) - 1 no.
-
Sticker/Vinyl cutter - 1 no.
-
Laser engraver - 1 no.
-
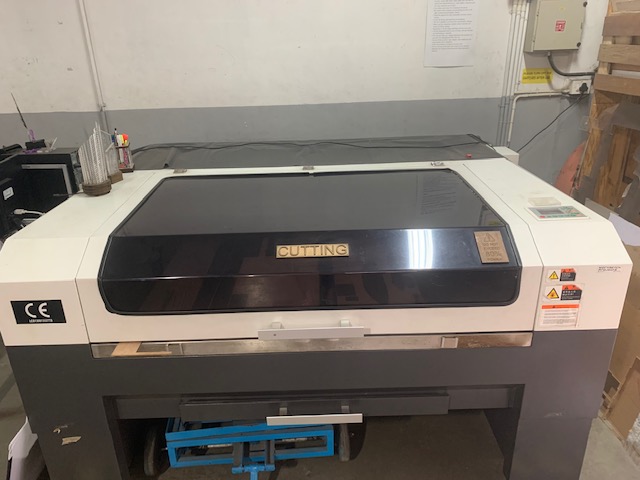
Laser cutter - 1 no.
-
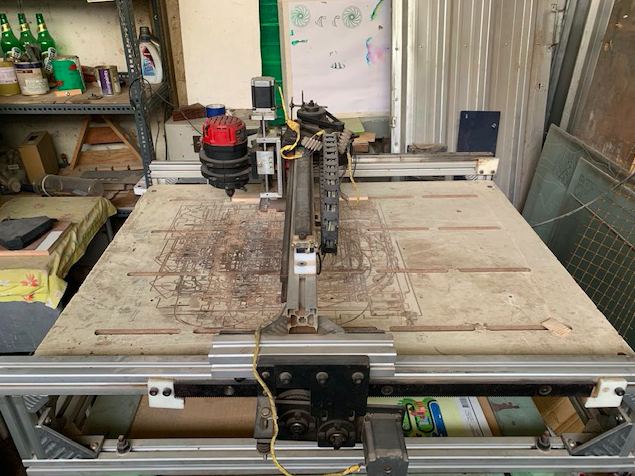
CNC router - 1 no.
-
Design computer - 1 no.
-
Badge printer - 1 no.
Now each of these in a little bit of detail.
- 3D printers
Every 3D printer model will come with its own list of specifications that will outline what kind of inputs can be used. These 3D printers are predominantly used for rapid protoyping using a method called fusion deposition modelling. For instance, the standard 3D printers, including the ones here in the workshop use spools or filament of different types of plastic. The prominent ones that are used are – PLA (Poly Lactic Acid), ABS (Acrylonitrile Butadiene Styrene), FLEX (combination of PET-G and TPU), and PET-G. Each material has its own strength and weaknesses and hence different uses. For instance, ABS is typically used in car interiors and panelling. These printers can print objects with dimensions: 20cm by 20cm by 20cm. The spool of plastic that is used in the printers usually has a diameter of 1.7mm.
- Handheld 3D scanner
This is quite an interesting tool – it is first connected to a laptop using a wire. The 3D scanner has a camera and a gyroscope, which is moved gently around the object or person that needs to be scanned – moving slowly from left to right, keeping the object/person at a distance. I watched a 3D scan of the digital fabricator mentor, Saali. This can be fed into the 3D printer for printing.
- PCB maker
This machine allows for the electrical circuit design to be engraved on the board. The gel purpose PCB generally has a plastic base, with a 0.1mm thickness of copper layered on top of it. The PCB maker is fed the electrical circuit design, and all it does is leave an engraving on the board. This is called a milling process and is a form of subtractive manufacturing.

- Mug printer
This can print on top of mug – need to check with Saali if printing means adding something colourful or its black and white? It can take only flat surface and regular shaped mugs, but not urn shaped mugs.
- Cap printer
I have not seen it yet, since it is not with the other tools on the workshop floor.
- Tshirt printer
This can print on top of tshirts. How it works, is that a sticker is first printed (using an external vendor), and the sticker is pressed on to the tshirt with some heat to imprint the design on the sticker onto the tshirt. Cotton tshirts work best, because polyester may melt.
- Miniature laser cutting machine (3D printer, PCB plotter, engraving)
This machine has been designed in-house – unclear to me if an existing 3D printer was converted to serve all three purposes or it was fully made from scratch here. But it is mostly used for the three purposes mentioned here, and not much for laser cutting. It uses a 5W diode laser.
- Sticker/Vinyl cutter
If you have a sticker design and want that shaped cut out of a sheet of paper, the sticker/vinyl cutter can do it.

- Laser engraver
This can be used to engrave on top of wood and acrylic.
- Laser cutter
This can be used to cut through wood and acrylic.
- CNC router
While the laser cutter can cut through wood and acrylic, the CNC router is for cutting through metal. This is referred to as a 2.5D carving machine. It can also create 3D-looking images on wood, much like relief structures that we see in buildings.
- Design computer
If you create a design for an object, any one of the above machines can then be used to create the physical form of the object.
Apart from exploring the digital fabrication machines, I will take some time to explore other forms of documentation as well, like wikifactory and inventables.
Day 3 - 21 October 2019 (Monday), 1:40pm
After having reviewed wikifactory and inventables, both seemed similar to instructables, with a focus on showcasing and explaining project-specific work. While they seem suitable for a final project, to document my day-to-day work here at Skill-Ed, github seems more appropriate. Also, most members at Skill-Ed community seem to be working and documenting on github, so it seems like an appropriate tool to learn and use as a part of this programme.
Since I was not familiar with github, I reached out to Richard for help, and he shared the link to a tutorial on setting up a website on github. This guide has a detailed step-by-step guide on how to set up a personal website on github.
I used this tutorial to set up my personal page
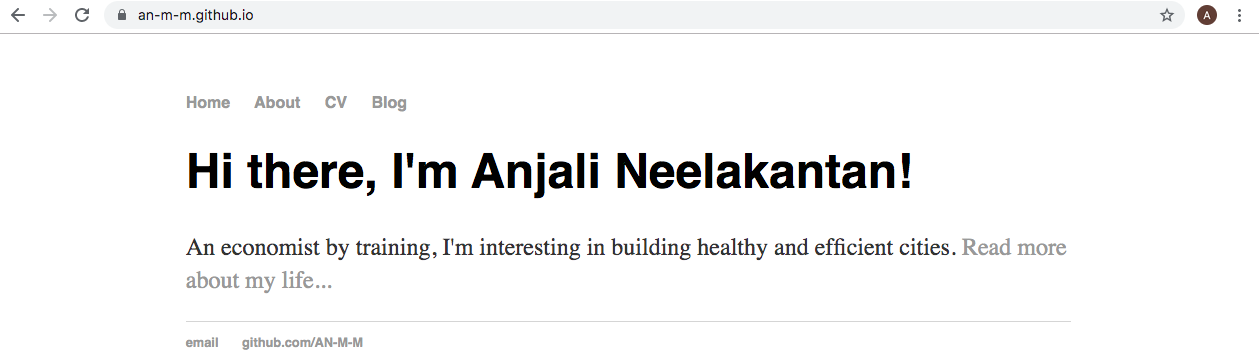
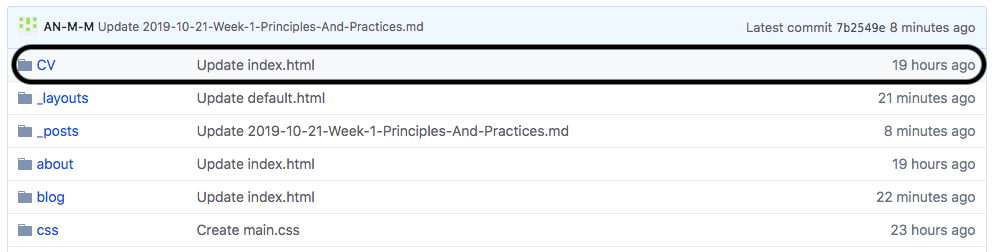
Each of the grey words on the page are hyperlinks that will take the reader to a new page. This is the home page. When you select ‘About’, it will take you to a new page, which currently does not have any content. However, the other two hyperlinks on top are currently not working:
CV - I have only created an index.html file like I did for ‘About’ (as outlined in Step 16 of the tutorial), but it is throwing the following error.
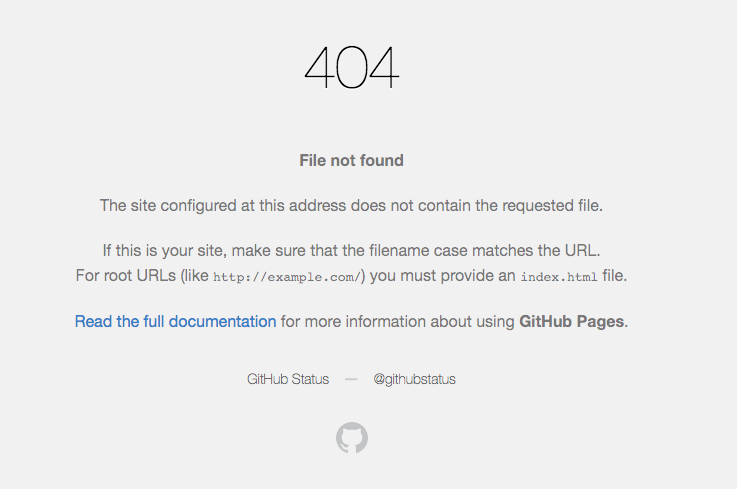
We have not figured out how to fix the error yet, but will be creating another repository from scratch to see what the error could be.
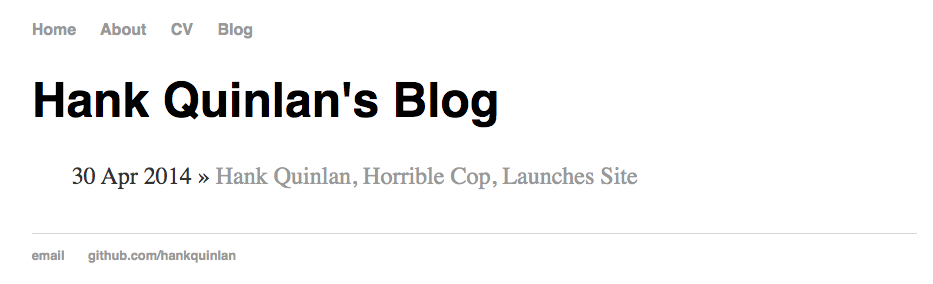
Blog - Steps 11 to 15 in the tutorial are supposed to yield a blog page that is supposed to look like this.
However, on clicking blog on my webpage, it does not throw an error or move to the blog page. Instead it continues to remain on the same home page. There is some link missing here, but it is unclear what that link is.
As a way to check the codes and the links between the multiple files, I went through the steps one-by-one and rechecked the codes, but I couldn’t spot anything that was different and could cause an error.
Richard suggested I create another repository in my account. So I created a second website
While creating this from scratch, using the same tutorial, I completed steps 1 to 6 and loaded my personal website on github and it would not load. It threw up the 404 error again.
I have shared this repository with Richard who will review the existing codes to see what has gone wrong and how it can be fixed.
Day 4 - 22 October 2019 (Tuesday), 1:00pm
Last evening, I spent a fair bit of time trying to debug the errors. Both Richard and my husband, Manu, said that 95% of the errors can be because of wrong syntax - usage of capital letters instead of small (or vice versa), unnecessary spaces or lack of spaces, and small, often unnoticeable changes in the code. Here’s how I corrected the errors to get my website up and going.
CV page
Since this showed a 404 error, I looked up my directories and files related to the CV page for anything that looked different between my codes and those of the tutorial. I found that I had capitalised the directory name for CV.
However, the codes in ‘layout/defaults.html’ was referring to cv in small letter (see below).
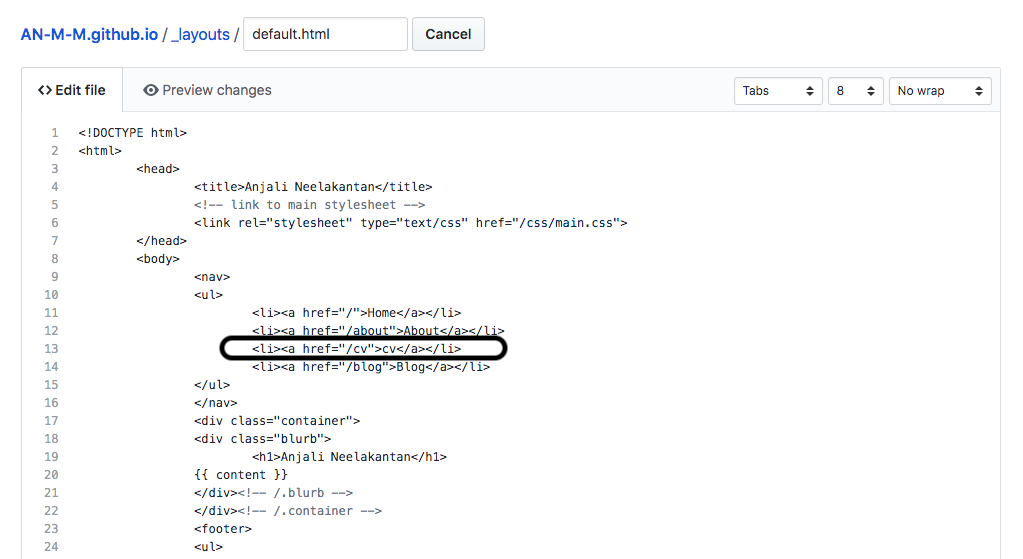
So while I had copied the code in the defaults.html file directly from the online tutorial. I had typed out the name of the directory and by force of habit, I name the directory CV in capitals, since we generally write CV in capitals.
So instead of changing the directory name, I modified the code to change the “cv” to “CV.”
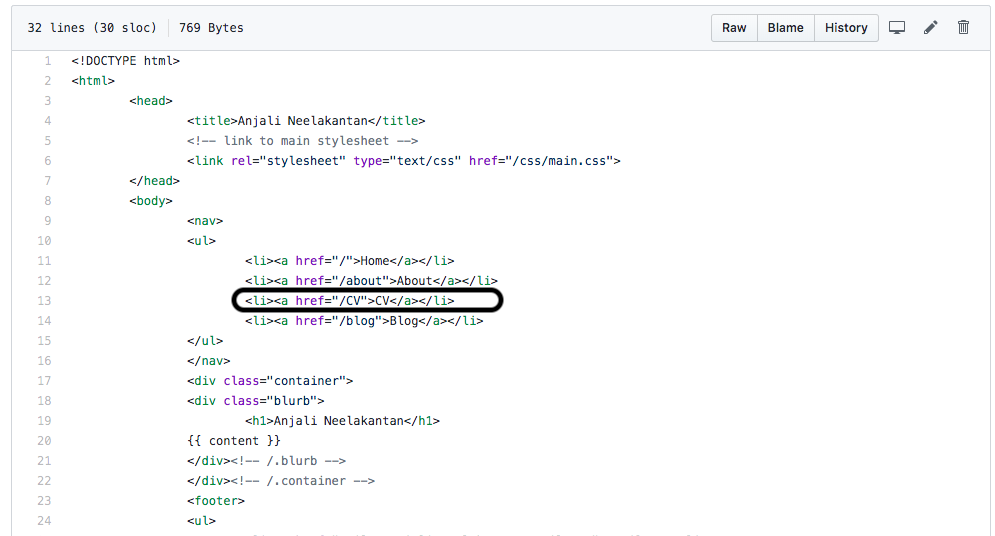
Once, I made this change, committed it and reloaded the website, the CV page opened up without any errors.
Blog
As seen earlier, when I selected the blog page, I continued to remain on the home page. The website did not show any error. So I decided to go through my codes line by line and I detected two errors that were preventing the page from loading.
Error 1: Incorrect date format
As I was hesitant to make errors, I copied the codes from the tutorial verbatim in all places, including for the date format for posts directory.

This is incorrect, because the code was converting the numbers, which it expected as an input, into string or text. So when I changed that to a proper date, like below, the blog page opened up as expected.

Error 2: Missing Jekyll code
In layouts/posts.html, while comparing my code with the tutorial, I noticed that “content” in flower brackets, jekyll code, was missing.
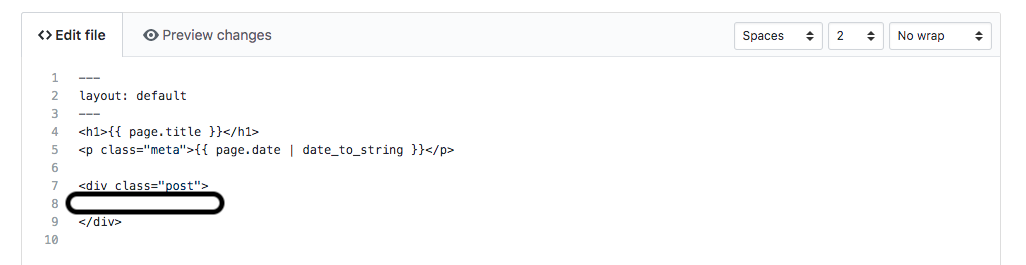
I had inadvertently deleted the jekyll code while typing out the code for this file. I corrected it and the corrected version looks like this.

With the errors corrected, the other thing I noticed while correcting and testing the codes was that there was a significant lag between the time I correct the code and the corrected code getting reflected on the website. Manu said that I might have to do a hard refresh (command + shift + R) on Mac to remove the caches and get the website to work with the new codes. So every time I commit a new code, I now do a hard refresh - sometimes it works, sometimes it still doesn’t work and I need to give it some time. Every time I make changes to the code page, I refresh both the code page as well as the website.
Day 5 - 23 October 2019 (Wednesday), 12:24pm
While adding content to the website, here are some of the other errors I encountered, along with steps on how I resolved these errors.
Adding the Linkedin hyperlink to my CV page
In the interest of avoiding redundancies between my multiple social media accounts (and at the risk of sounding lazy), I linked my linkedin page to the CV page. However, on committing the code and refreshing the page, I found the 404 error again.
On reviewing the index file within the CV directory, I noticed that the index file was saved as a html file. For the file to work and the webpage to load, I required it to be saved as a markdown file. So I changed the file from “index.html” to “index.md”. The CV page was now linked and opened up.
Adding images to the blog page
The code to add images to the blog page is

Example: 
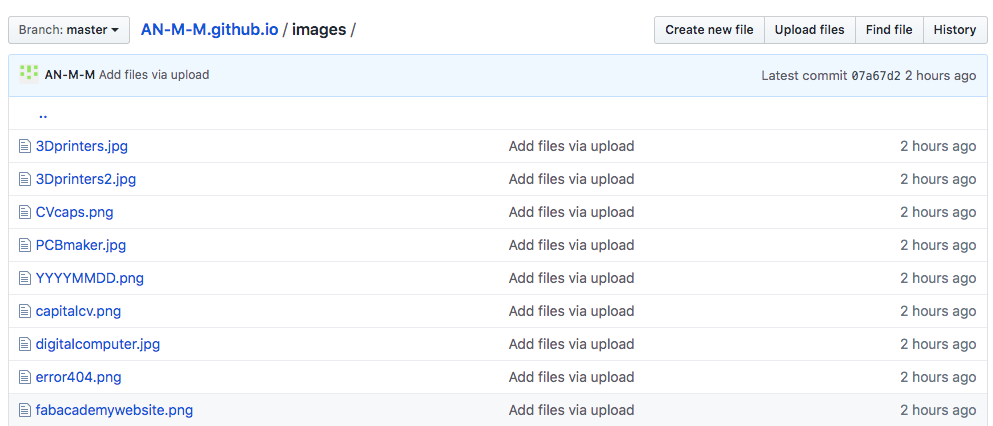
For this I created a new directory in my repository called images, and uploaded all the images I had taken so far while documenting my learning and code errors.
However, despite adding the code, the image did not show up on committing the changes. It showed the entire code in text format, and not as a picture.
I tried converting the image file from JPG to PNG – the image still did not show up.
Then while researching on possible solutions to this error, I noticed that the forward slash was missing in the code.
Here’s the incorrect code:

Here’s the corrected code with the right syntax:

Changing the name of the repository
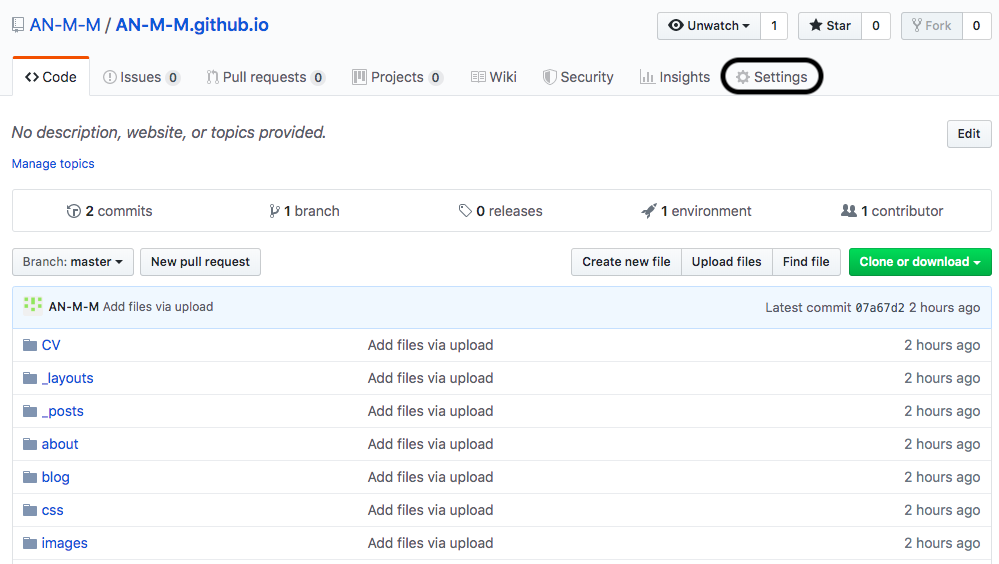
On documenting my learning for week 1, and once my website was fully up and running, I decided to see if the website would still work if I changed the name of the repository from AN-M-M.github.io to atelieranjou.github.io.
To do this, I selected settings in the repository page:
Found the repository name with a ‘Rename’ button next to it.
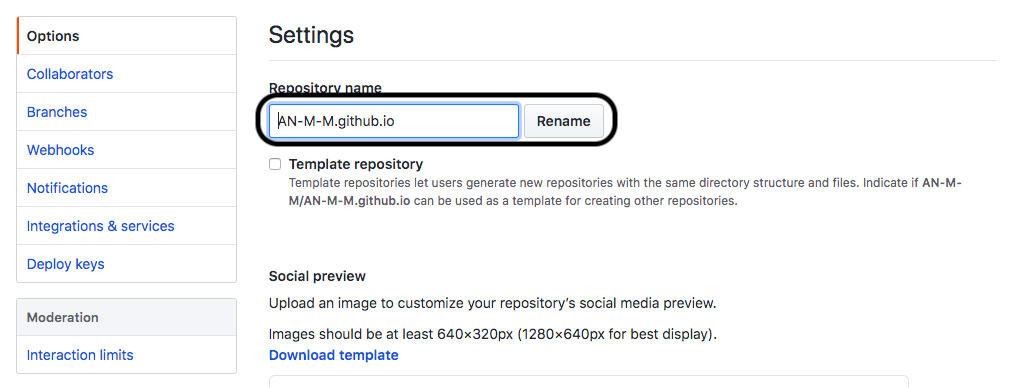
Changed the repo name to ‘atelieranjou.github.io
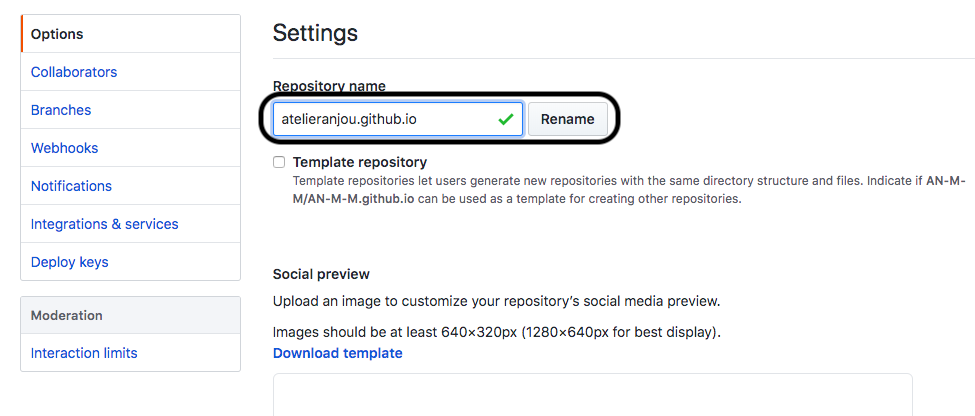
Once I clicked on rename, I did a hard refresh on this page, and my website. However, my website broke, and showed a 404 error. I waited for 30mins to see if it was because of a lag effect, which is often the case. But even after 30mins, the website did not load.
So I downloaded all the files in the AN-M-M.github.io repository onto my local desktop.

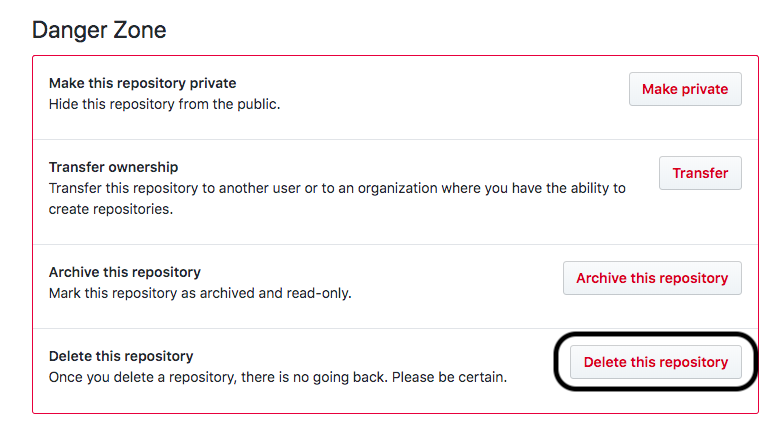
Deleted the existing repository. To delete an existing repository, again select settings, and scroll down to the bottom of the page and select the ‘delete repository’ button.
I then recreated a new repository and uploaded all the files I had downloaded, and voila, the website was again up and running.
Manu’s theory is also that github will only allow you to set up those websites that are the same as your user name, which is why AN-M-M/AN-M-M.github.io will work, but AN-M-M/anjalineelakantan.github.io will not. I need to run this theory by Richard and conduct some additional research on this.
Day 6 - 24 October 2019 (Thursday), 1:37pm
Yesterday, once I was done with setting up my personal website and having it fully up and running, I decided to play around with my website to create some fun personalisation to it. I had noticed favicons on my web browser.
Favicons are the little icons that we see on our web browser next to the name of the website. The envelope next to our gmail accounts, the notepad icon next to the google docs link, the colourful G next to the google search page. Favicons allow us to immediately understand which websites are open when we have multiple tabs open on our browser.

So here’s how I set up a favicon image on my personal website:
Step 1: I started off by creating a simple image that I wanted to use for my website. For this I used a desktop version of Sketch to create a logo with my initials.

Step 2: For github to recognise a favicon it has be a .ico file. So, I first converted the logo from a sketch drawing file to a PNG file and subsequently used an online converter to convert the file from a PNG file to an ICO file.
Step 3: I then uploaded the ICO file into my image folder on the github repository.
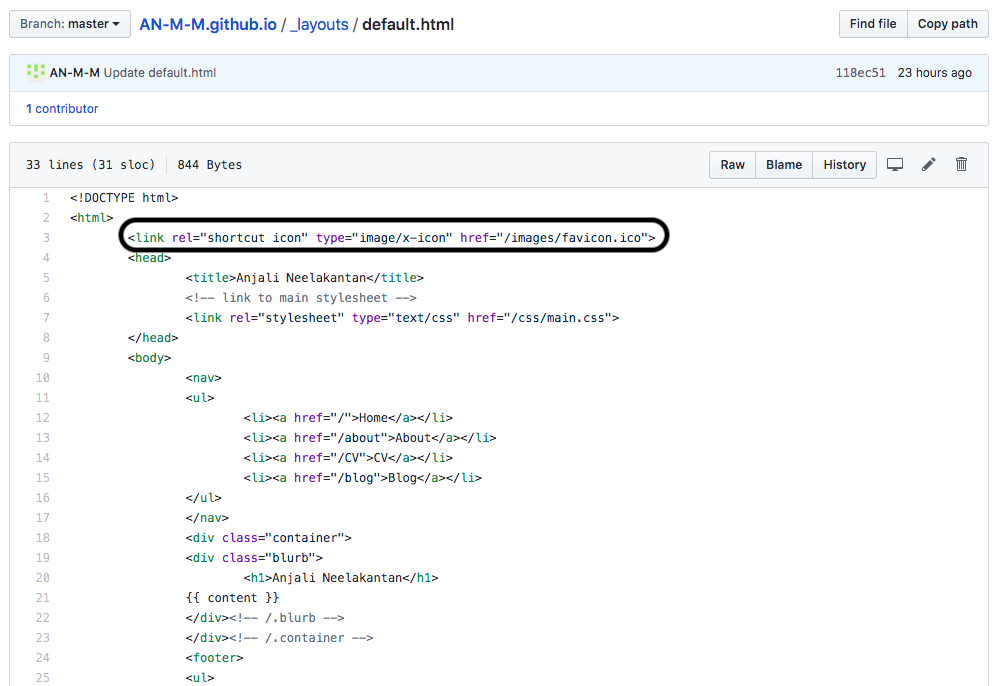
Step 4: Using the instructions I found online on a Medium blog, I used the code from the page and inserted it into the defaults file in the layouts folder.
<link rel="shortcut icon" type="image/x-icon" href="favicon.ico">
I knew this to be the right place for the code, because all the code in the defaults file replicate across all the pages on my website — which is why the ‘Home’, ‘About’, ‘CV’, and ‘Blog’ headings in grey can be seen on every page on my website.
Voila! With this, my personal website also has a favicon that is unique to the website.

My initials are not clear because of design issues, and I will rework the design over the next few weeks. Here’s what my favicon looks like on my browser. So now, everytime I want to look for my website, I know which tab is my website with just one quick look!