As with every week, this week also kickstarted with a fabacademy video.
The assignment for this week as a part of the fabacademy course is to make one’s own programmer this week. The objective is also to make a circuit.
Notes from the video:
- PCB - stands for printed circuit board - the industrial way to make it is to etch it. Etchants are nasty materials like ferric/cupric, or chloride, ammonium or sodium per sulfate - so they need to be disposed properly.
- Machining - required holding the board down and milling it. Below the board is a tape and then a sacrificial layer/board (This usually has a lifetime), and finally a millbed. The set screws should be just snug.
- Vinyl cutter
- Ordinary laser cutter doesn’t cut copper, so need fiber laser - let’s you make high-resolution board but very expensive.
- Printing
- Plating
- Sewing (using conducting threads)
- PCB materials include: a) common PCB material is fr4 - should not go near milling machine. We use fr1 instead - this is phenolic paper & machines beautifully. fr1 is slightly yellowish. b) flexible circuits use epoxy film and copper tape. c) for high frequency, use teflon & glass. d) Copper.
- Boards - a) PCB:NG, AP circuits, Advanced Sierra, Screaming circuits, AQS, Gold phoenix, 3PCB, speed, PCB way, JLCPCB, PCB kit, BOM (bill of materials), b) design rules - width spacing (15,5 mils) - each mil is 1/1000th of an inch, c) layers - 1, 1.5, 2, 4, N, d) mechanical, drill, solder mask, silk screen, and e) rivets, plated, blind, buried.
- Components - a) through - hole, b) surface - mount, c) chip - scale. [Chinese vendors are competitive and make really cheap PCBs].
- Breadboards - we won’t be using it, popular among hobbyists, they sometimes have bad electrical performance.
- Assembly - a) solder (lead + tin) - entectic, wetting, flux, wire, paste bar, manual, reflow, wave, ROHS, b) stuffing - component orientation, tacking down parts, bottom to top, inside to outside, fumes, washing, b) desoldering - braid, hot air, gravity, c) cutting traces/adding jumpers, d) pick and place, and e) encapsulation.
- CAM - a) formats (gerber/RS-274X, PNG resolution), b) mods - video, c) trace width - traces, interior, 1/64 inch, 0.010 inch.
After watching the video, Richard suggested I do some additional reading on the following topics (my reading is ongoing):
- Programming of microchips and microcontrollers
- Programmers for microchips and microcontrollers
- Programming code - Integrated Development Environment (IDE)
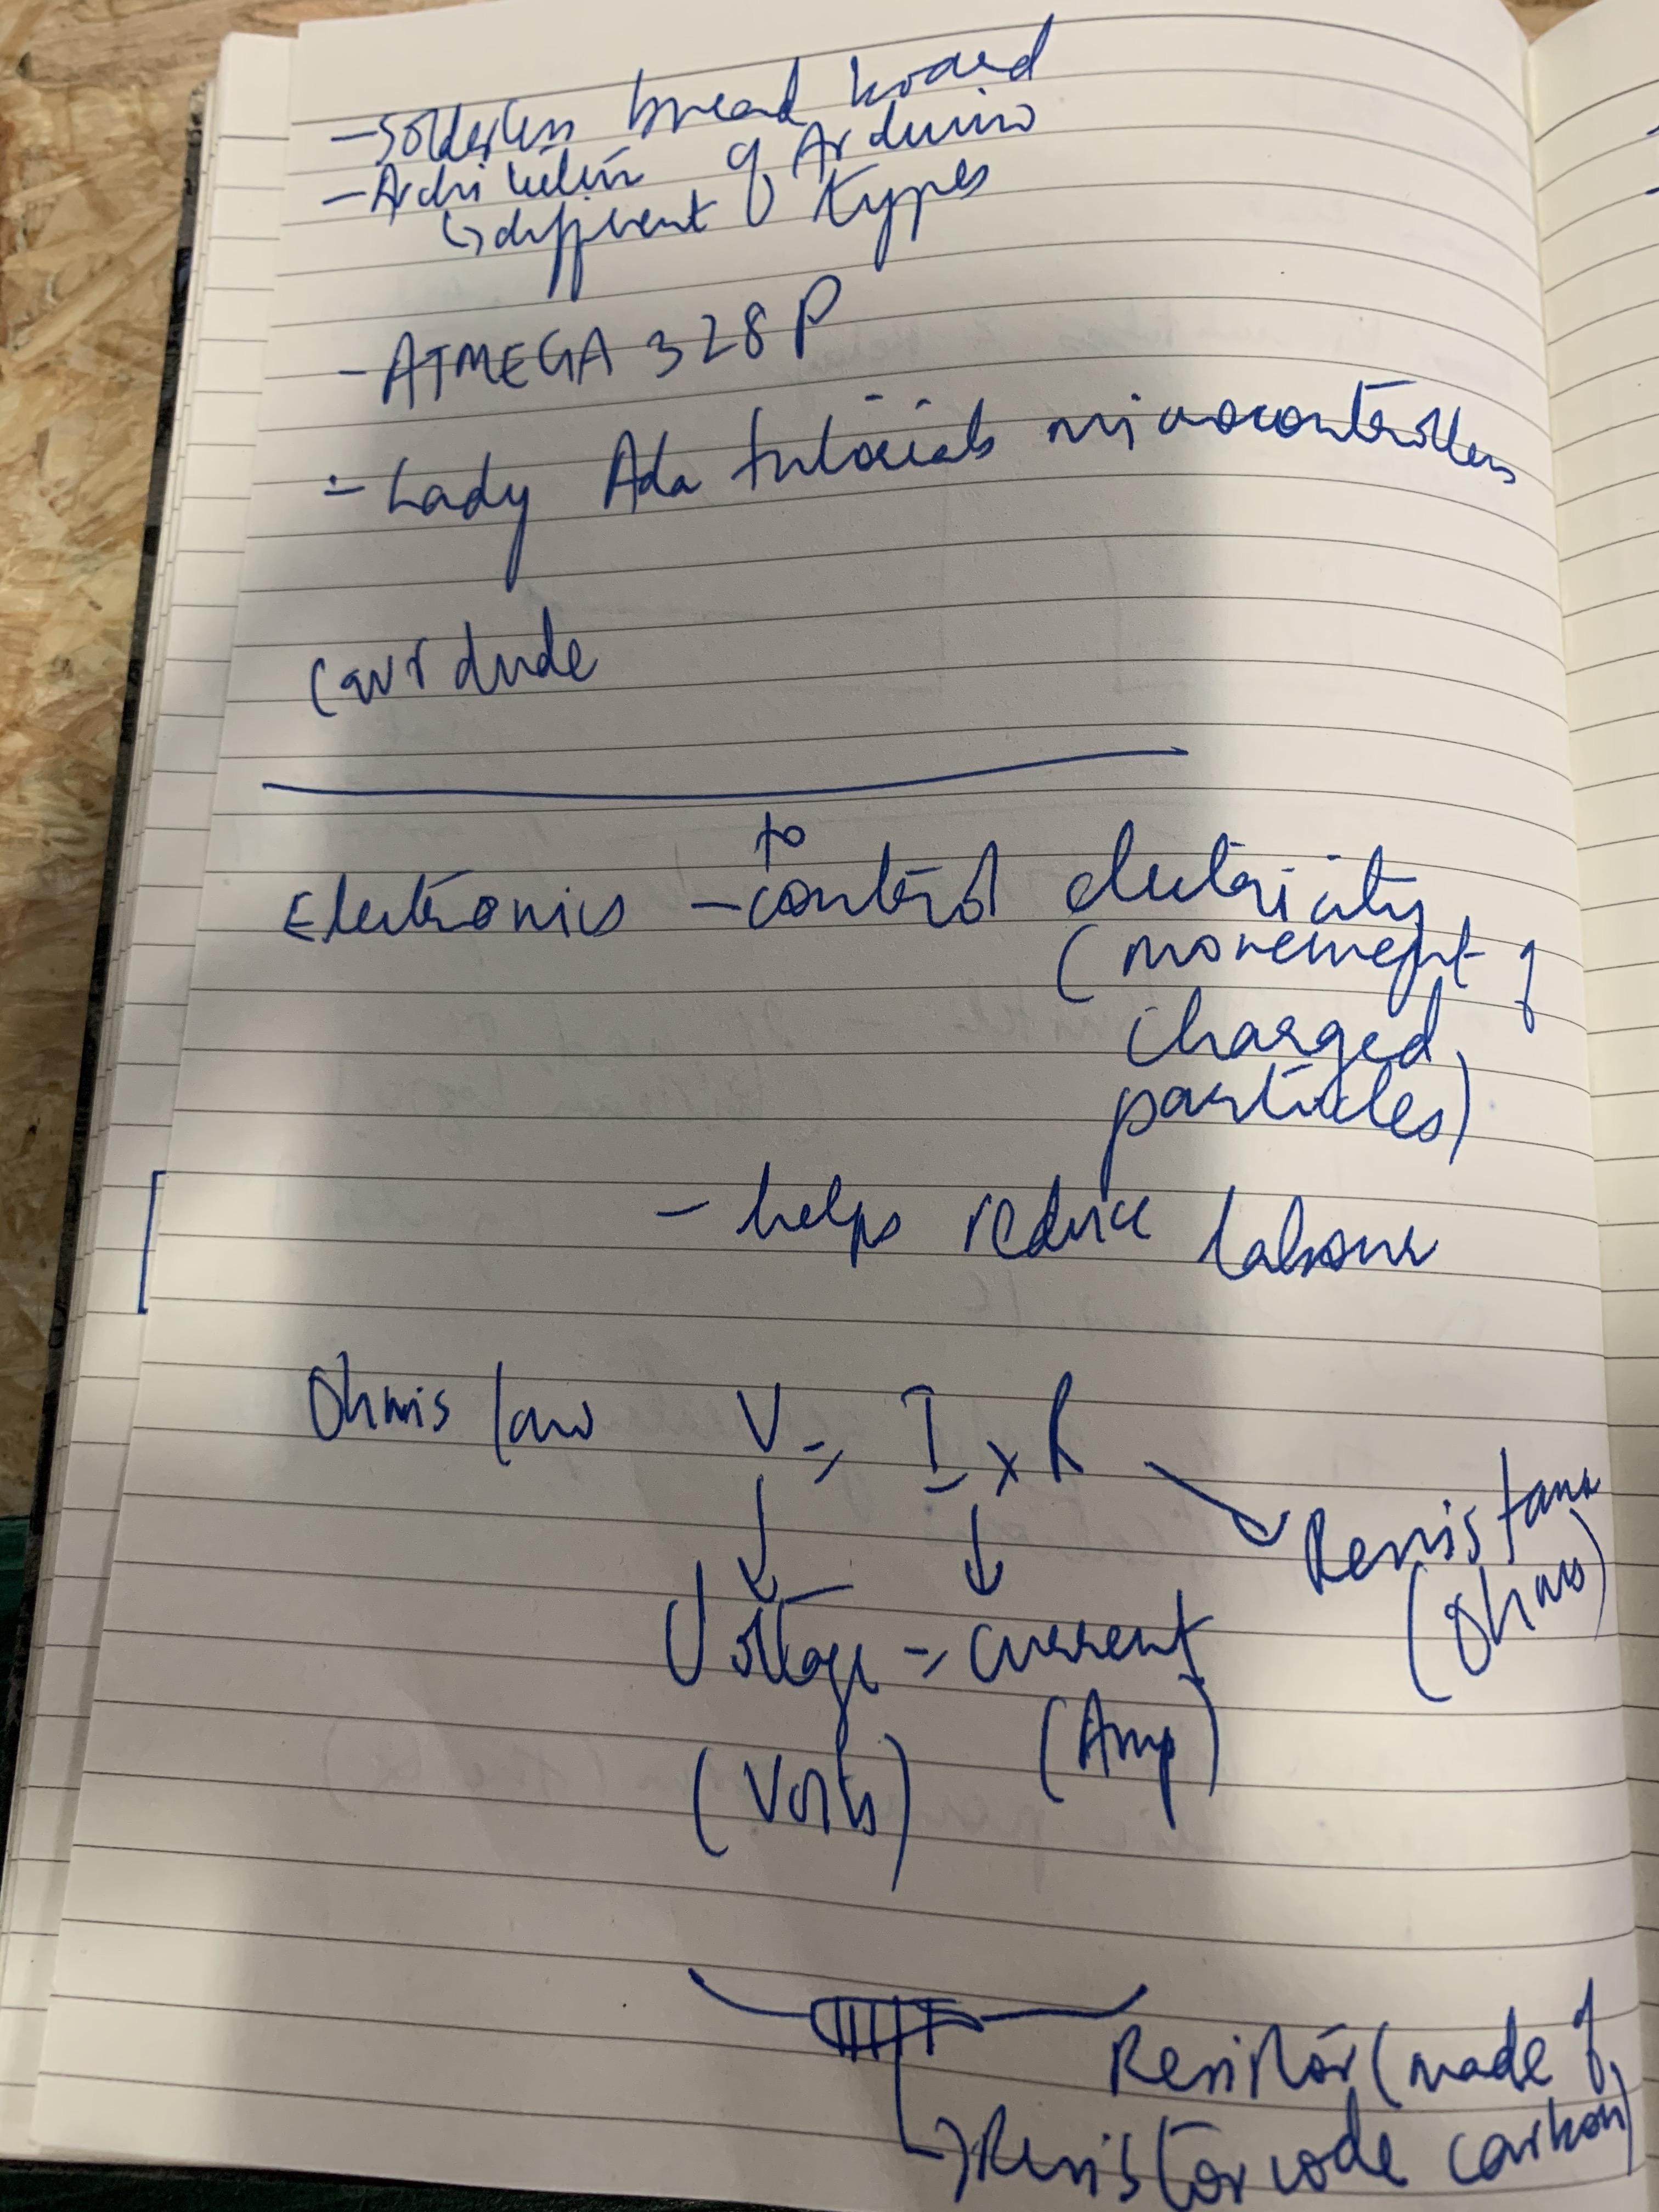
- Evolution of electronics - basic electronics, power electronics, vacuum tubes & relays, transistors (which were a major breakthrough), and integrated circuits.
- 555 timer microchips - useful for timer, pulse generator, oscillator applications
- Interesting youtube channels to follow for pet projects and inspiration: Blackfish and the Q.
- Solderless breadboards
- Architecture of the Arduino - different types of Arduino
- ATMEGA 328P
- Ladyada tutorials on microcontrollers
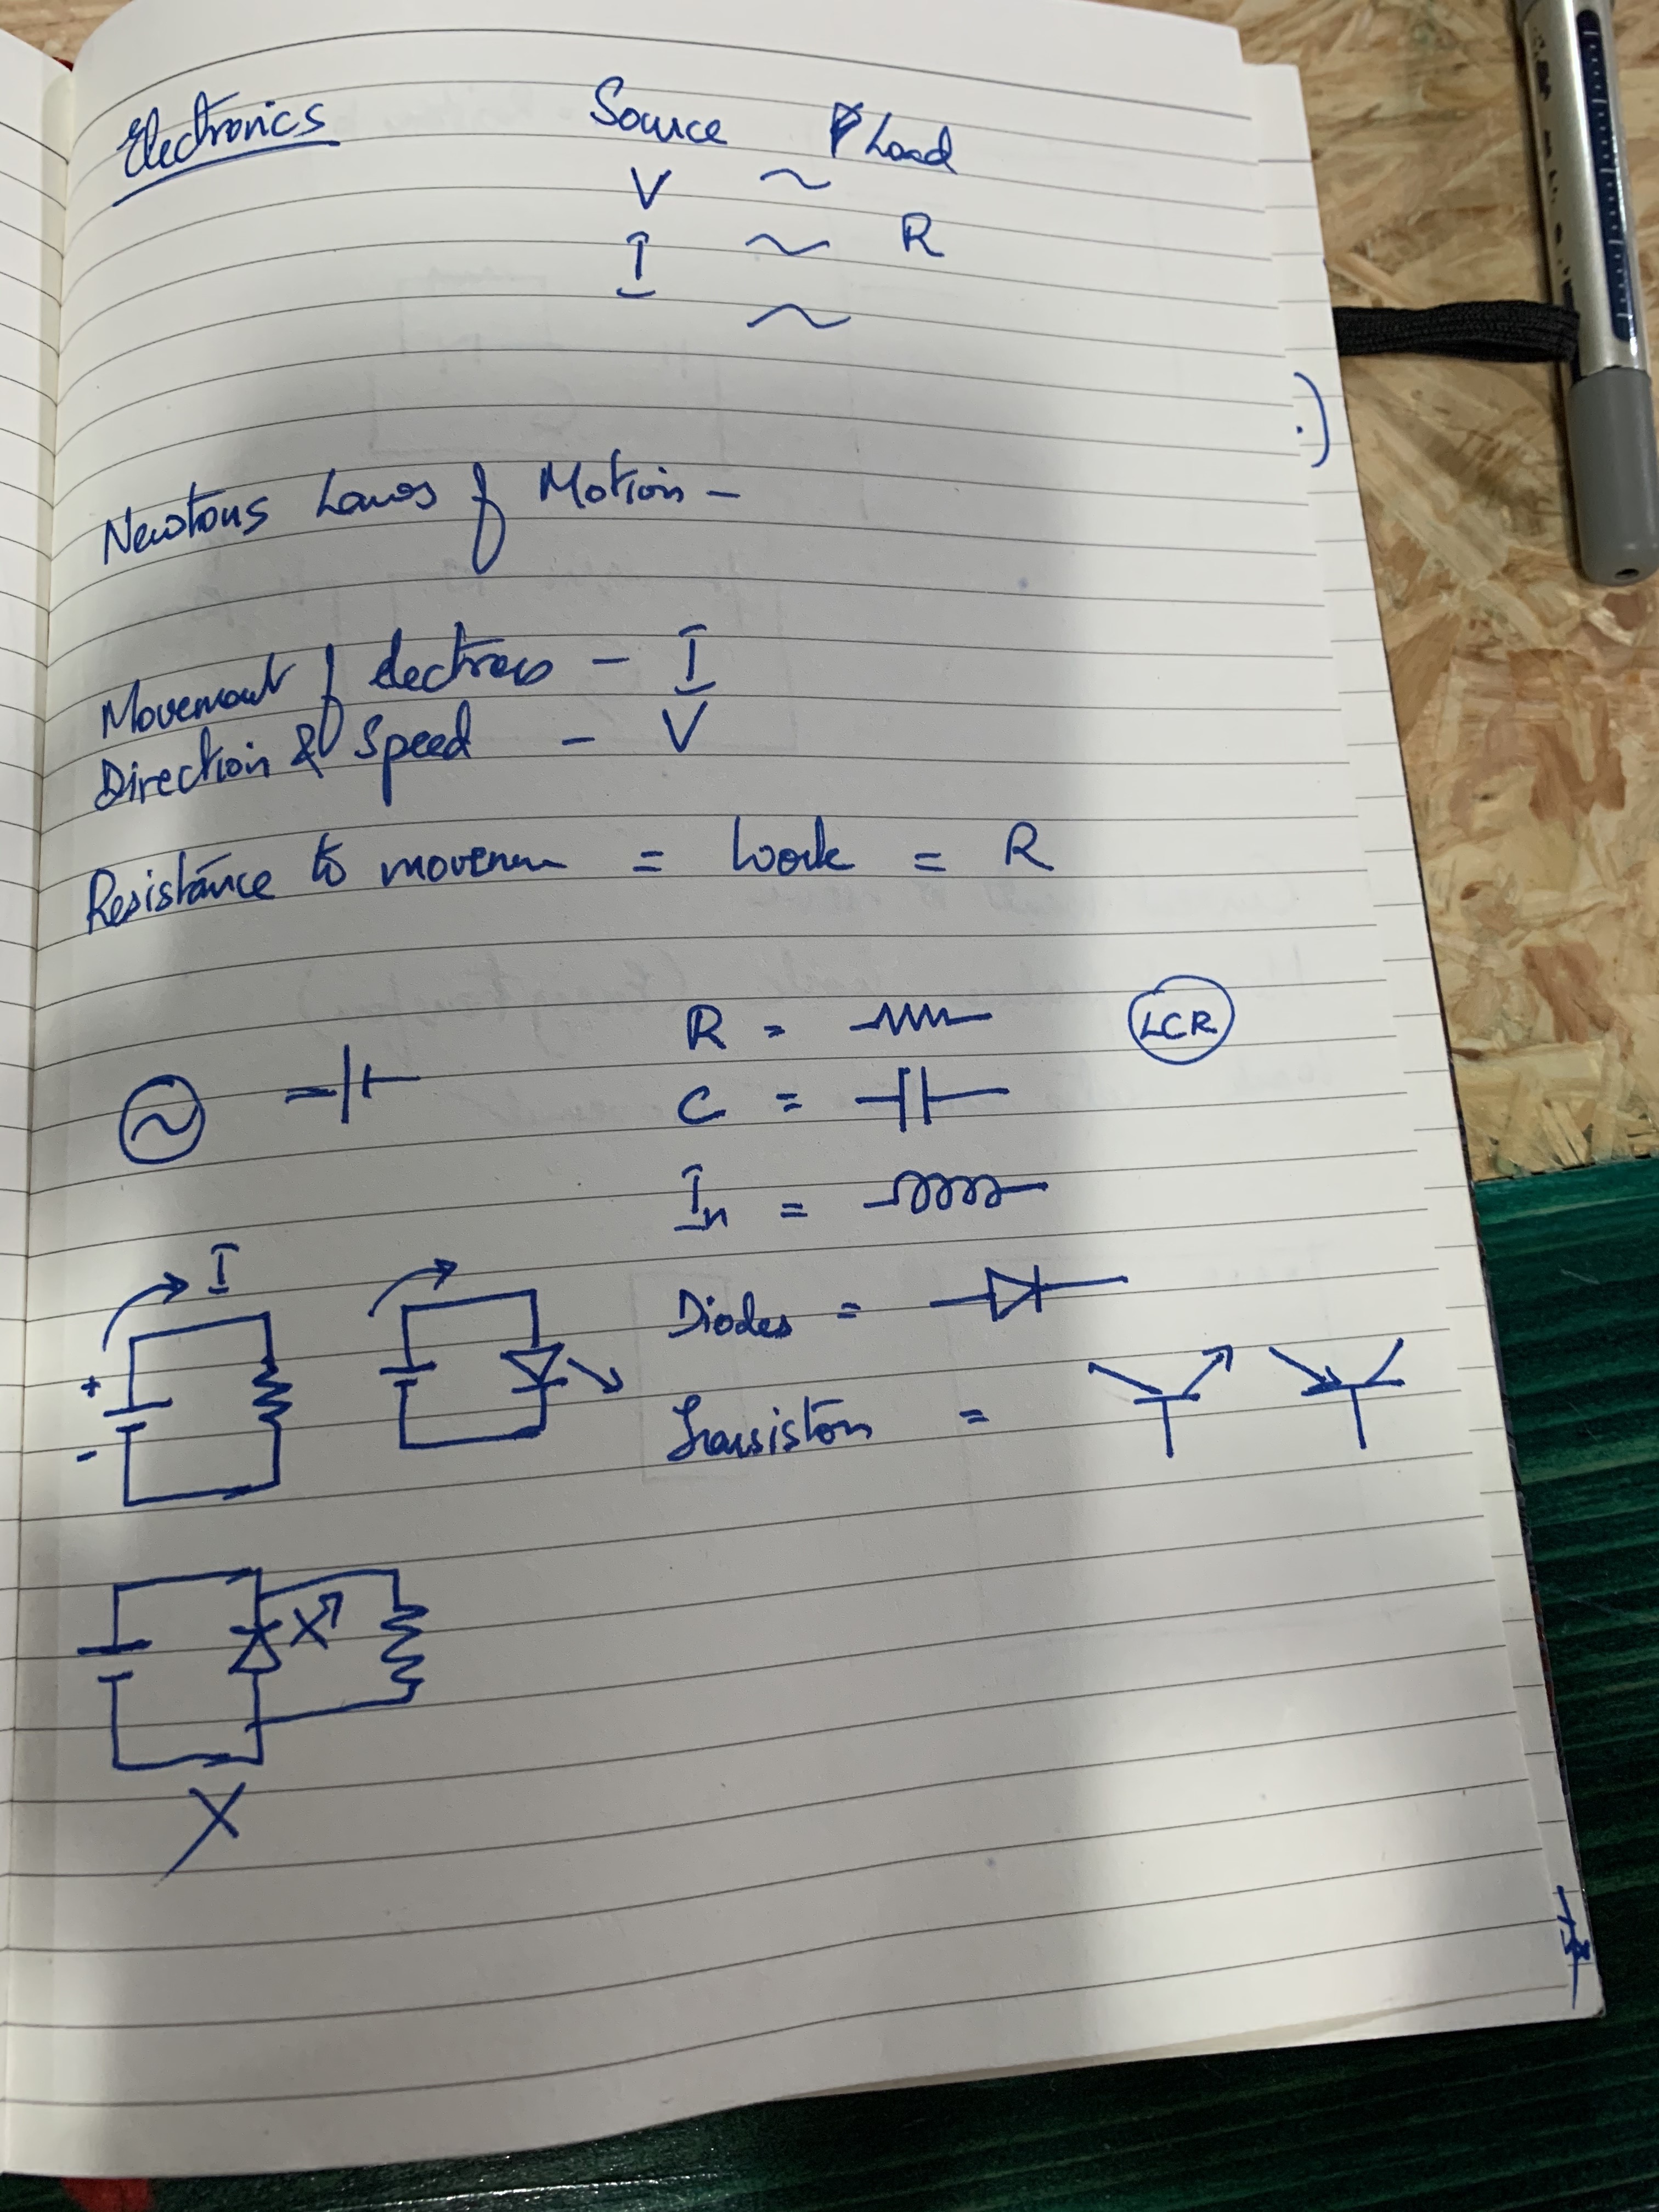
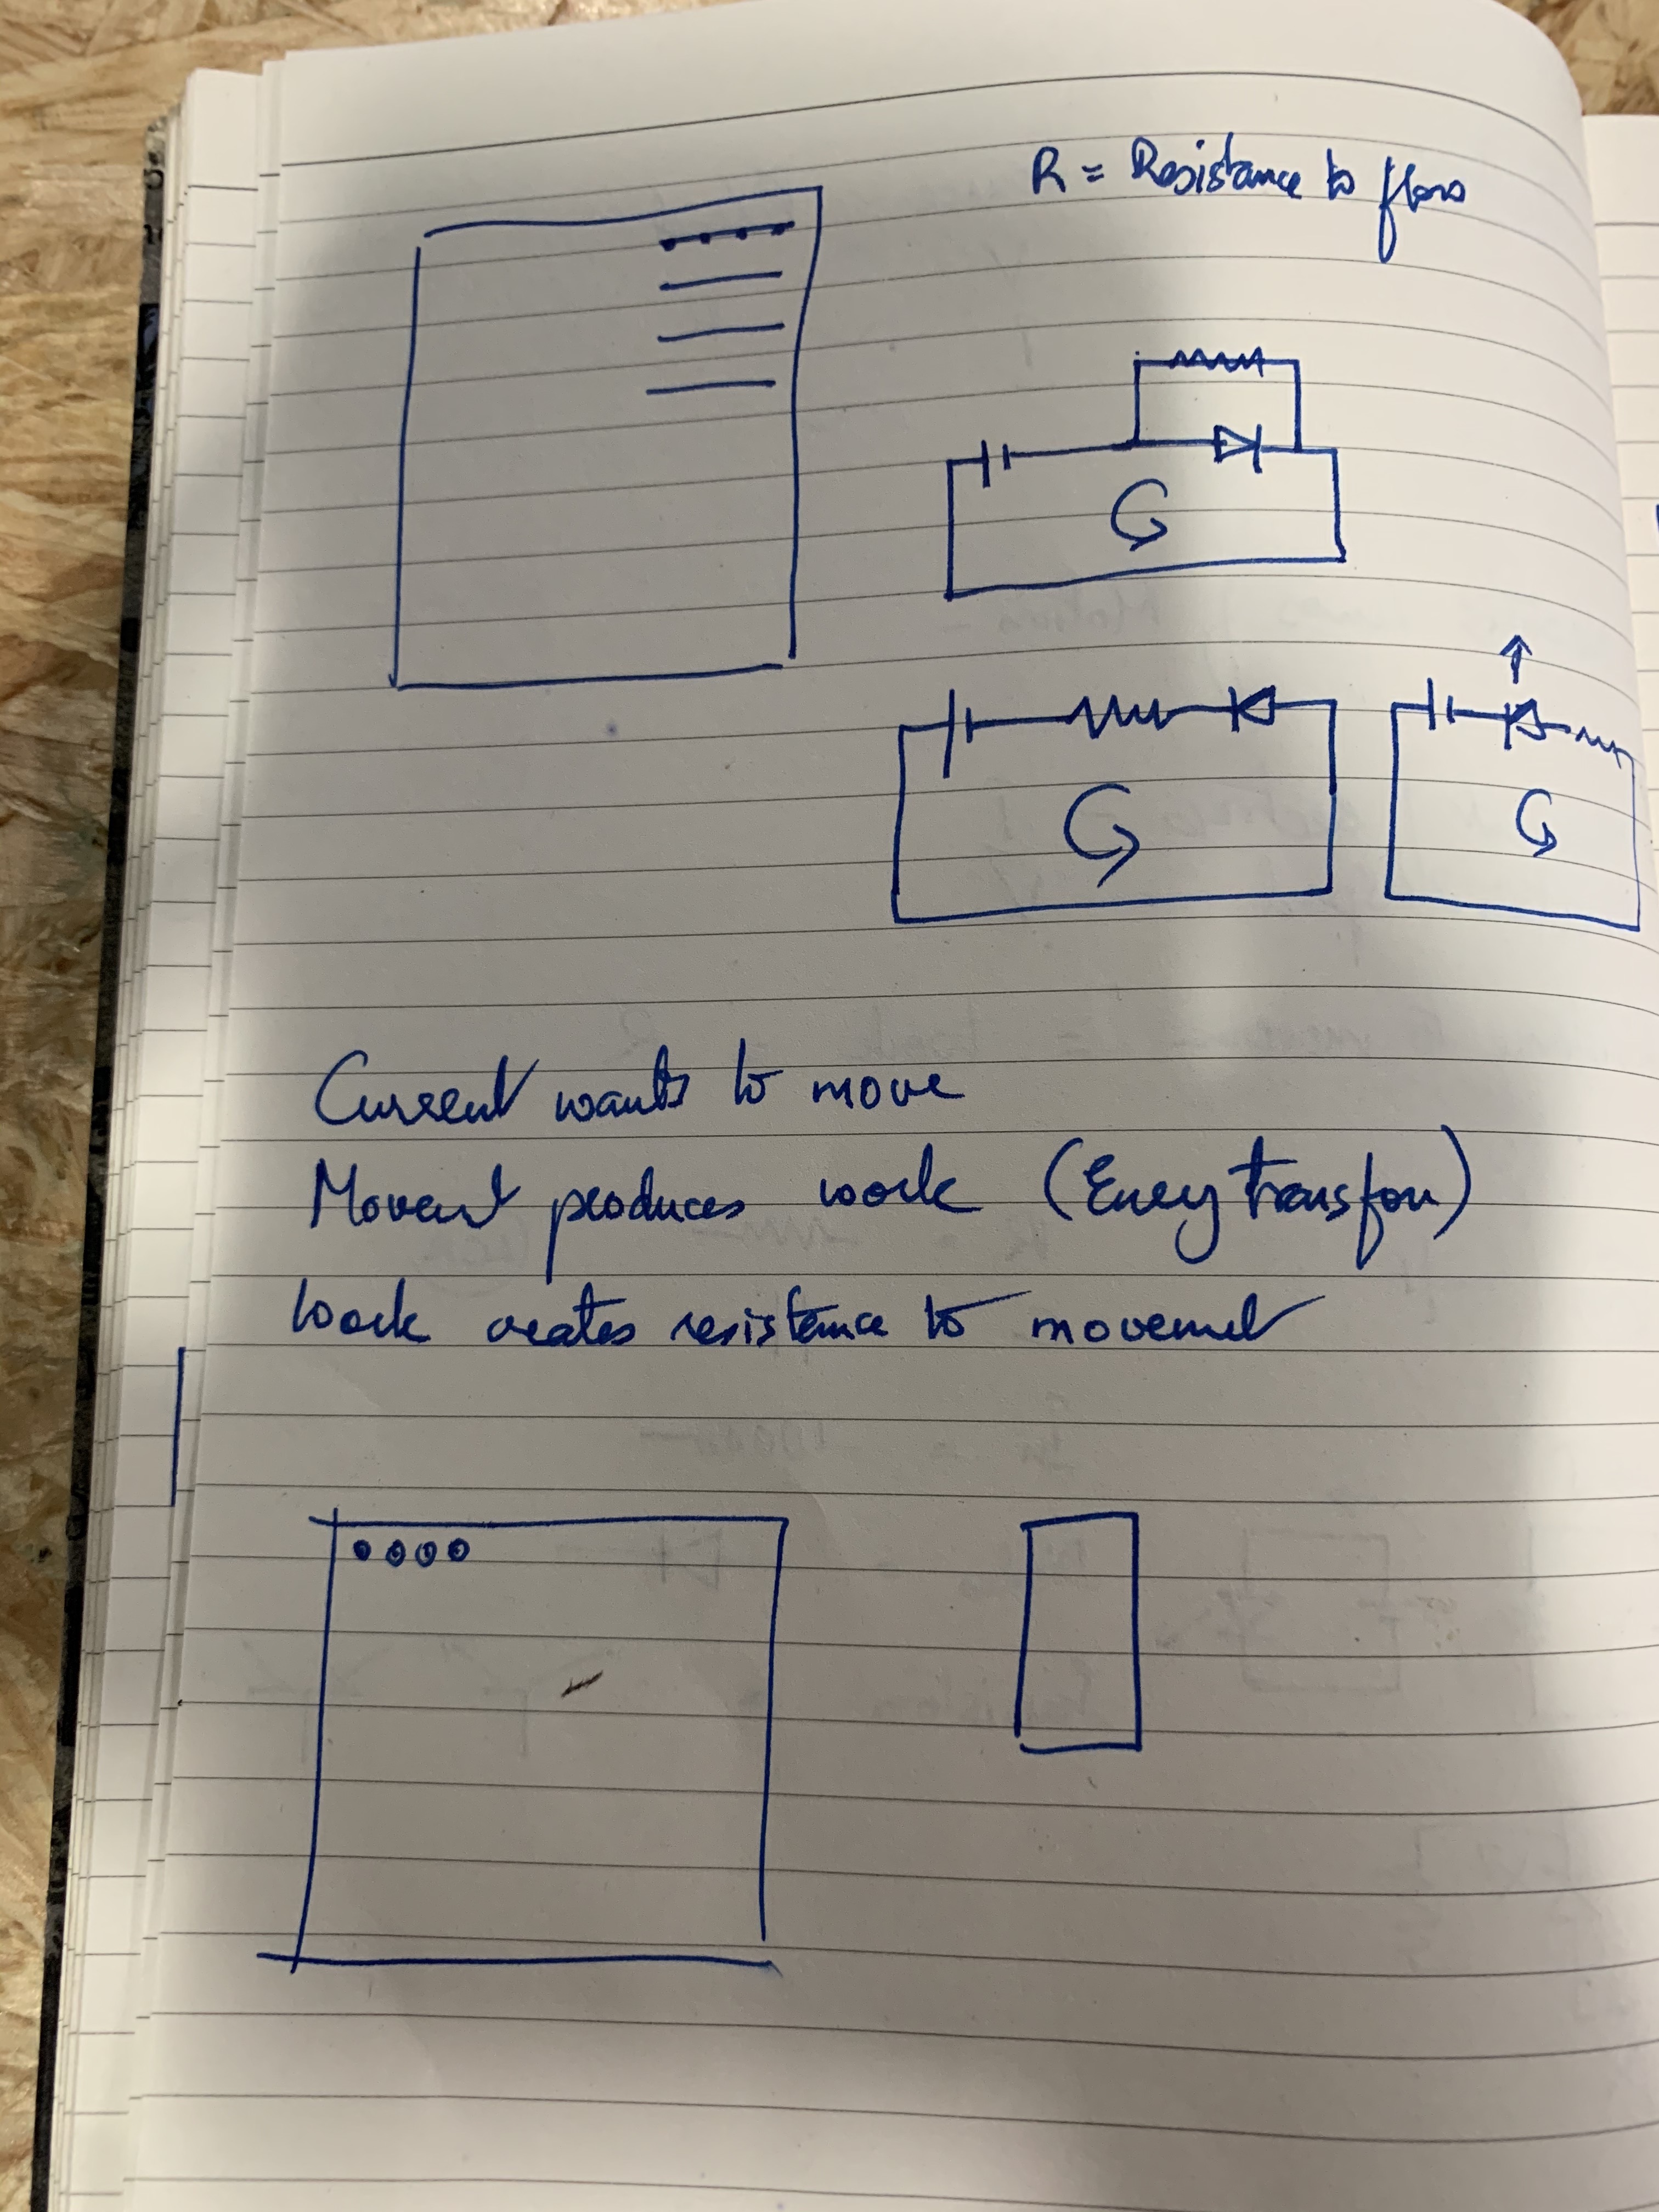
Here are three pictures on basic electronics that Richard drew out on a notebook while explaining:
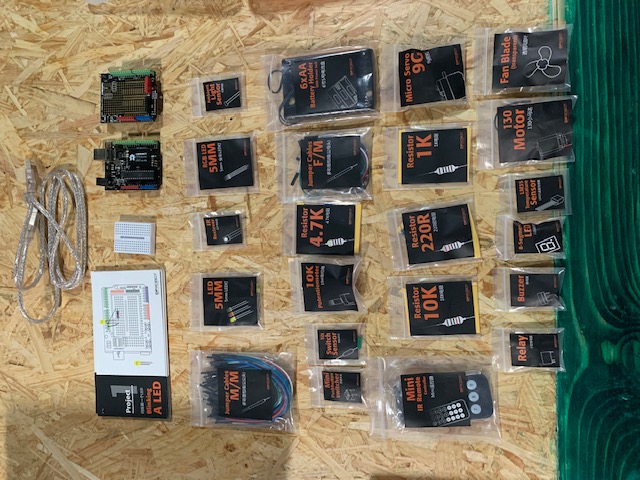
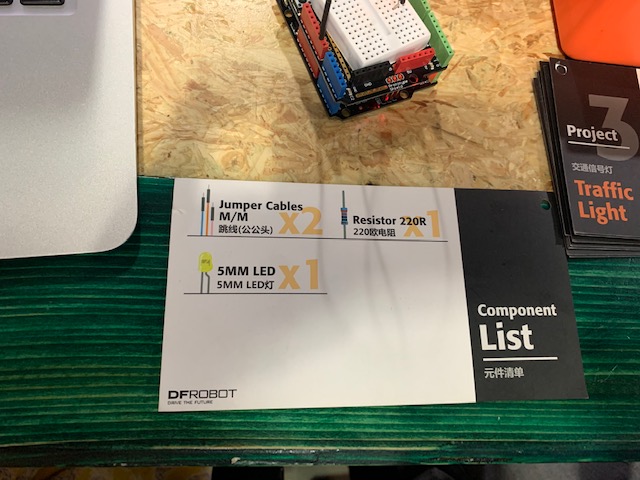
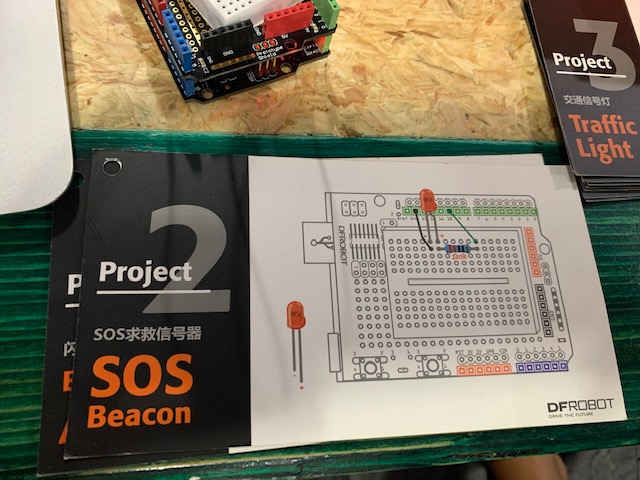
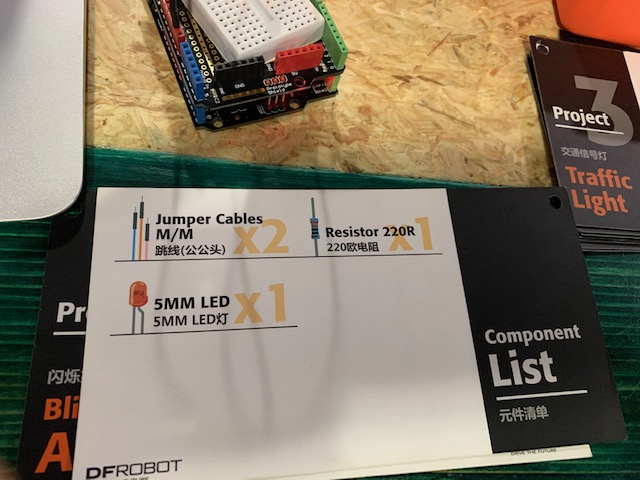
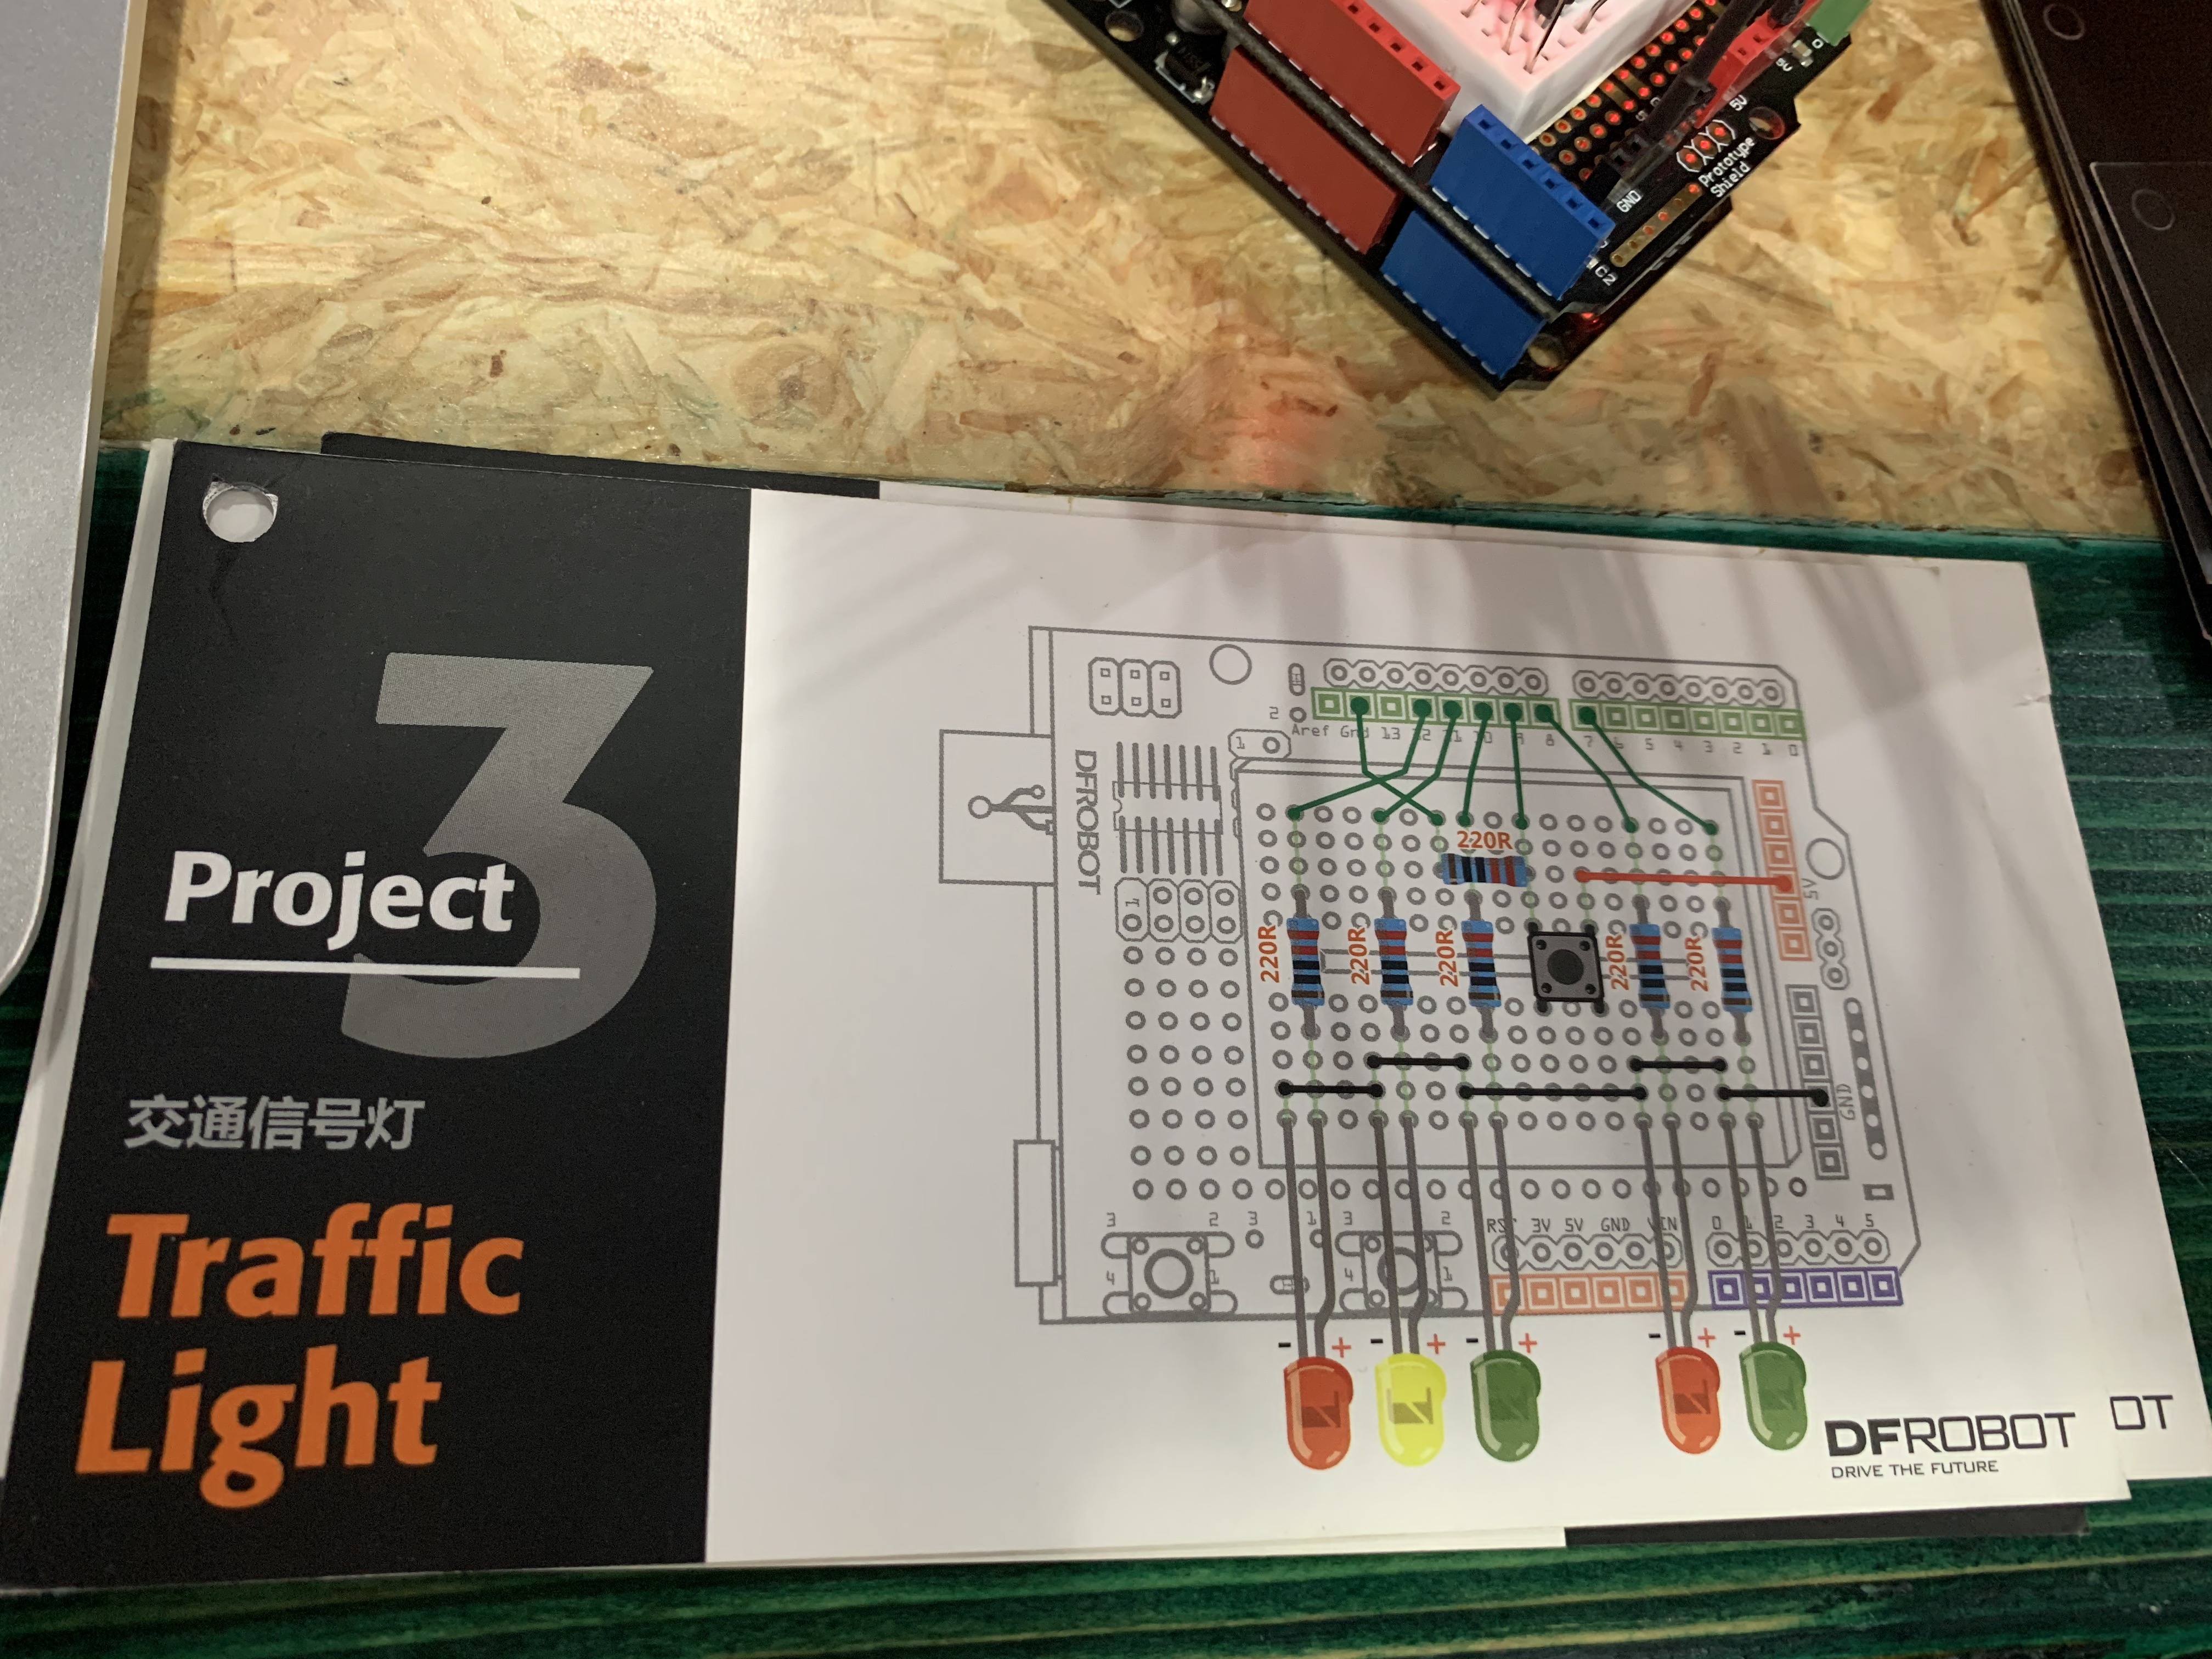
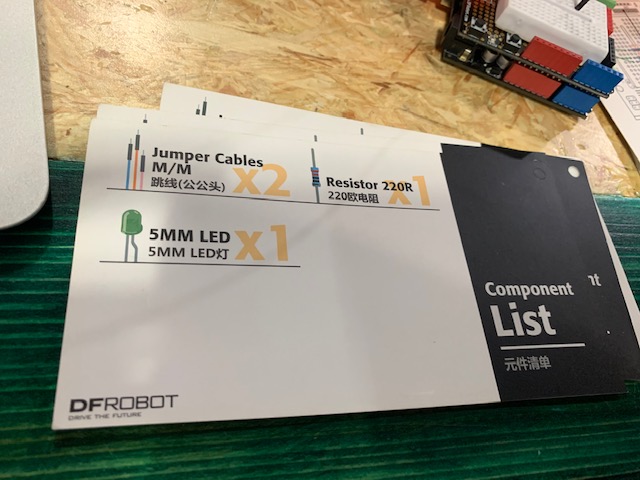
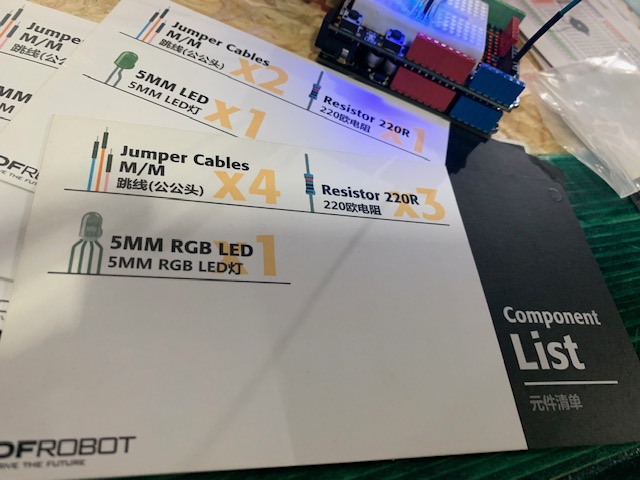
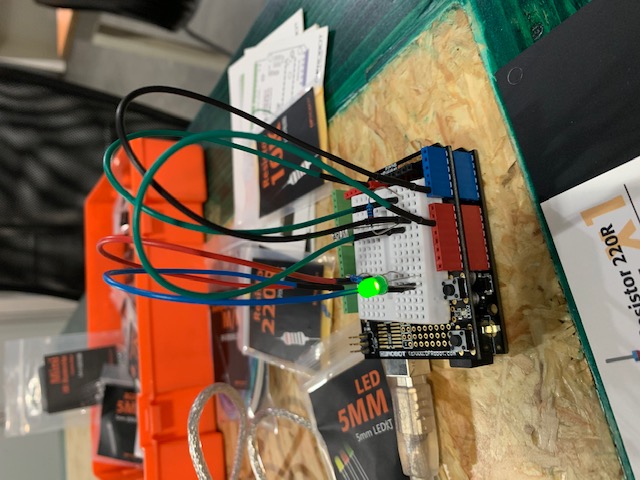
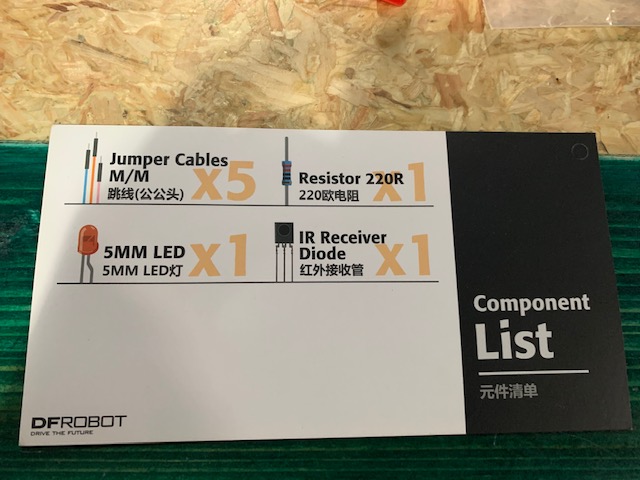
After this, I worked on DFRobot’s Beginner Kit for Arduino. This is what the kit looks like and these are the components that are available with the kit.

The kit has a series of 15 tasks or projects for a user to get comfortable with the components. I downloaded the Arduino IDE, which allowed me to write codes to programme the arduino to perform the tasks listed in the kit.
For the codes, I used the ones available on the DFRobot website. For me, the objective of using and working with the kit was to understand the capabilities of the multiple components in the kit, and also to understand the codes associated with each of the projects.
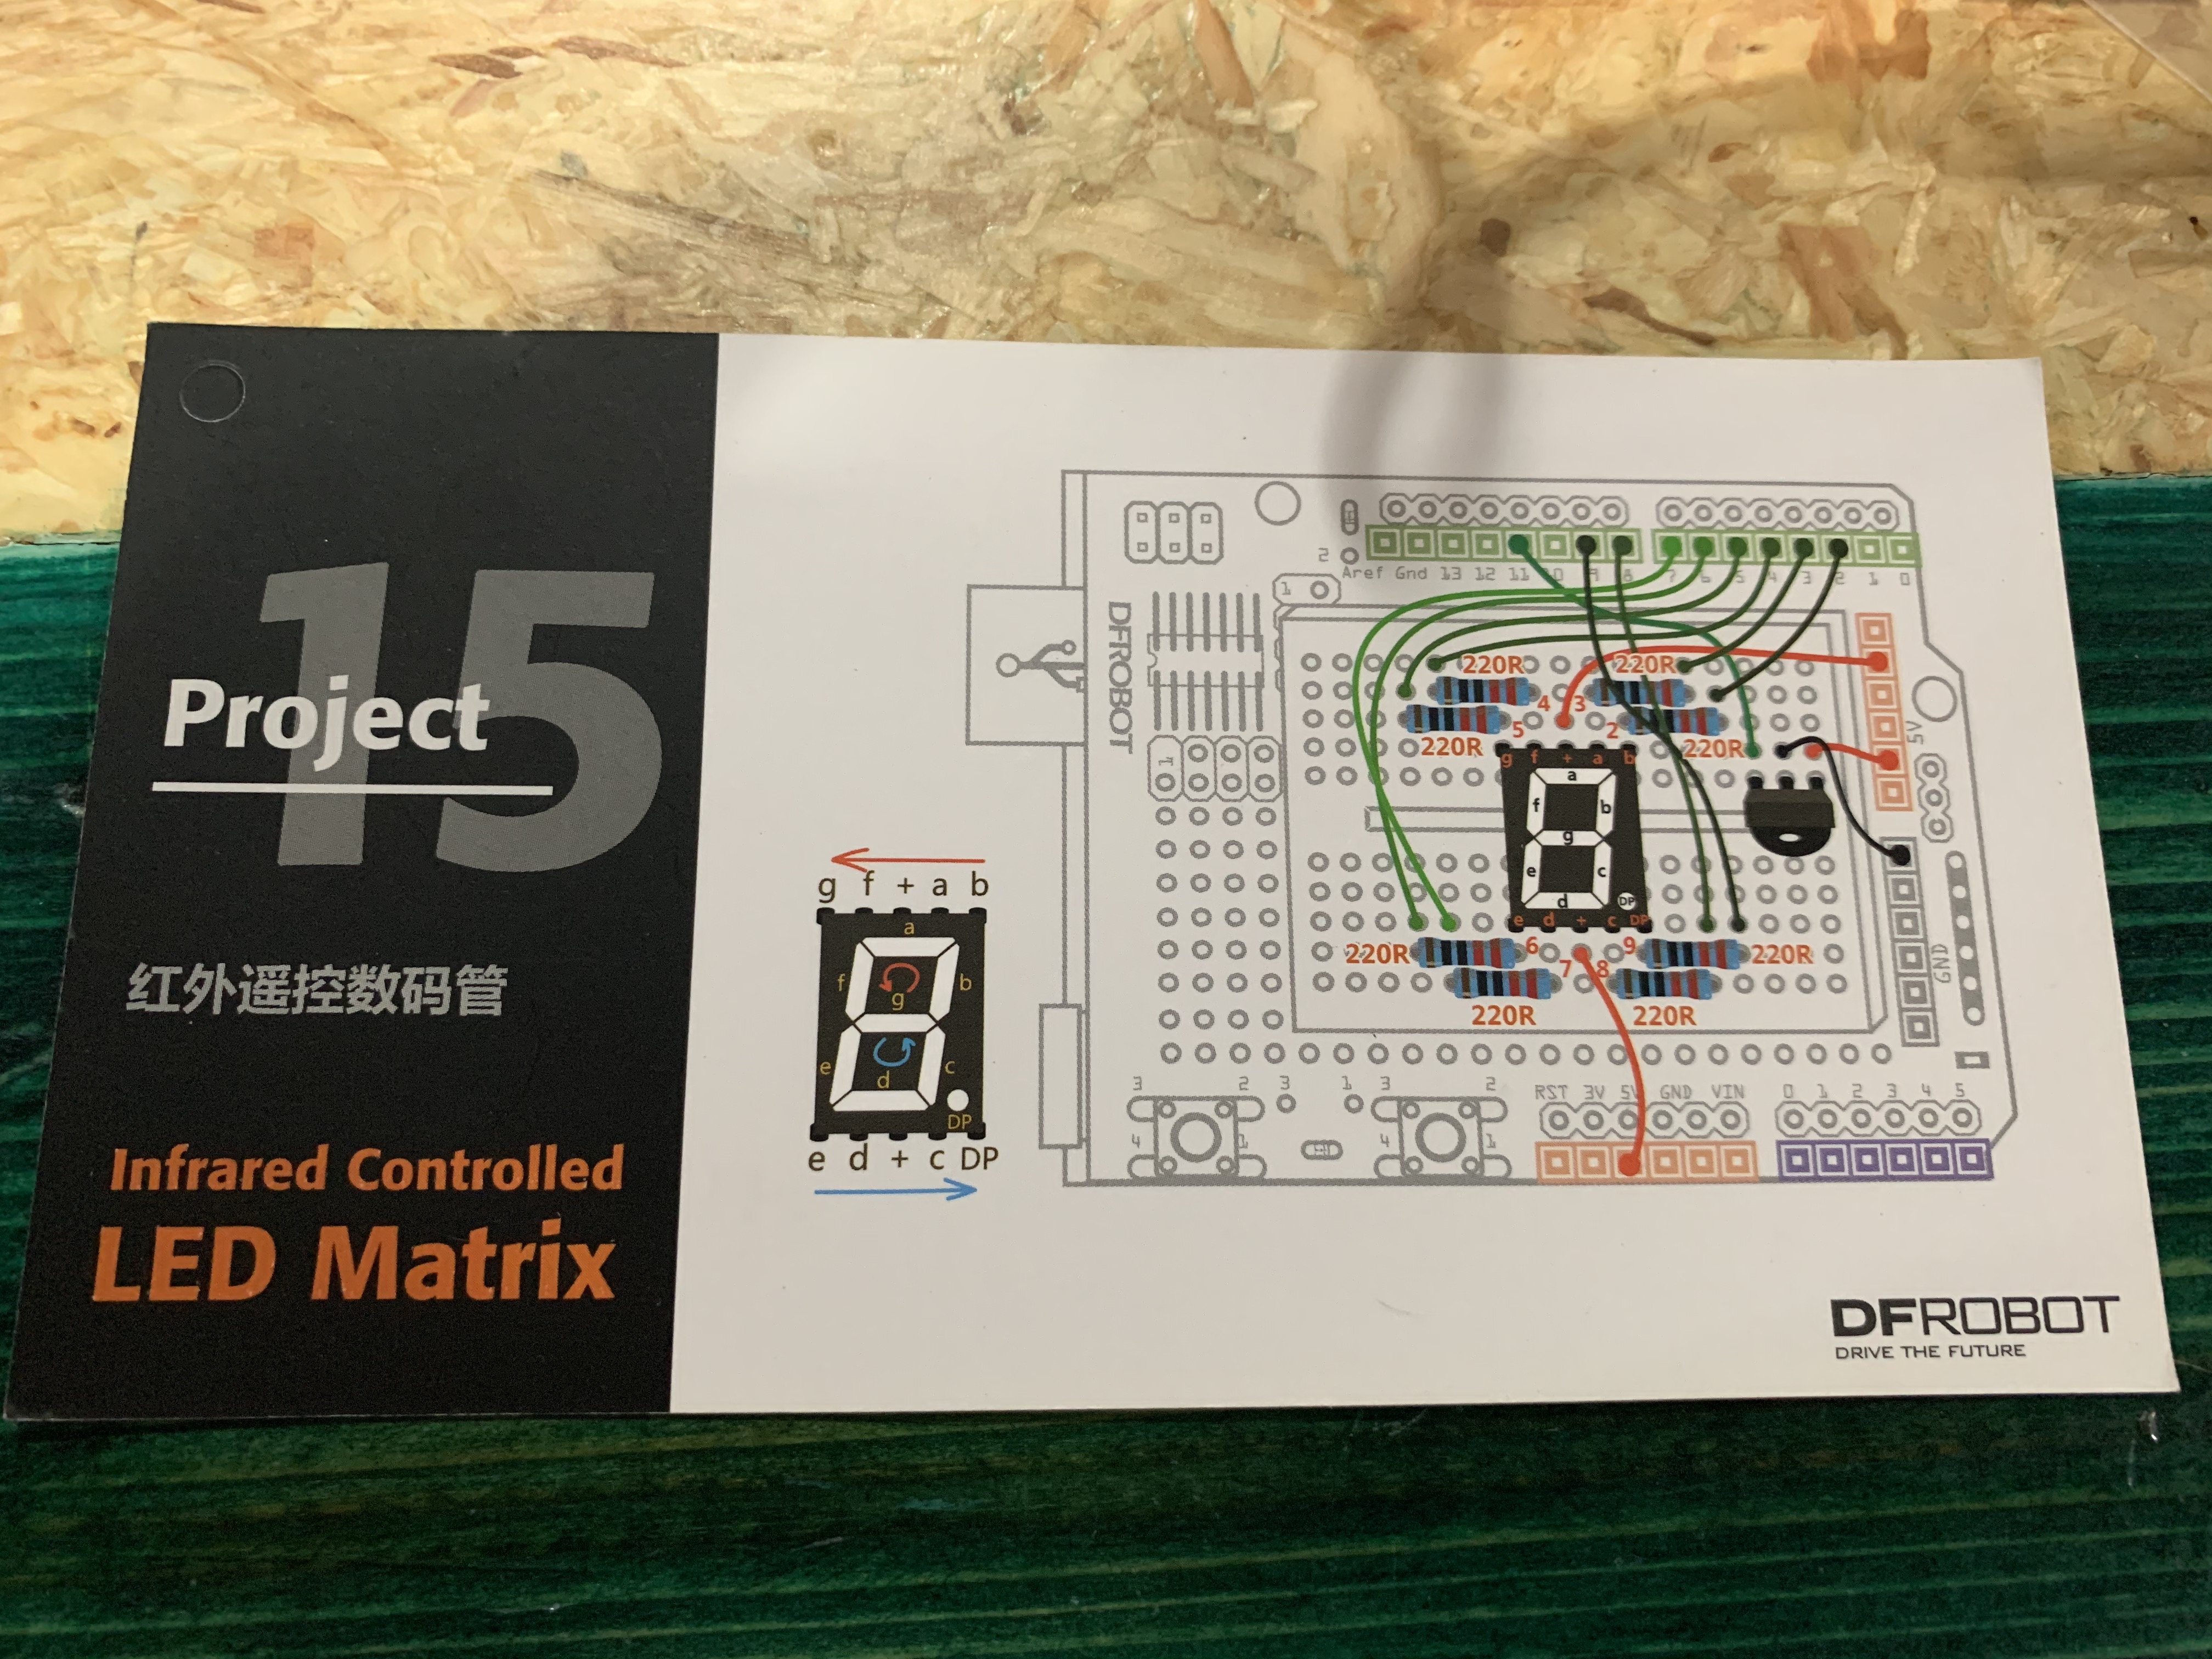
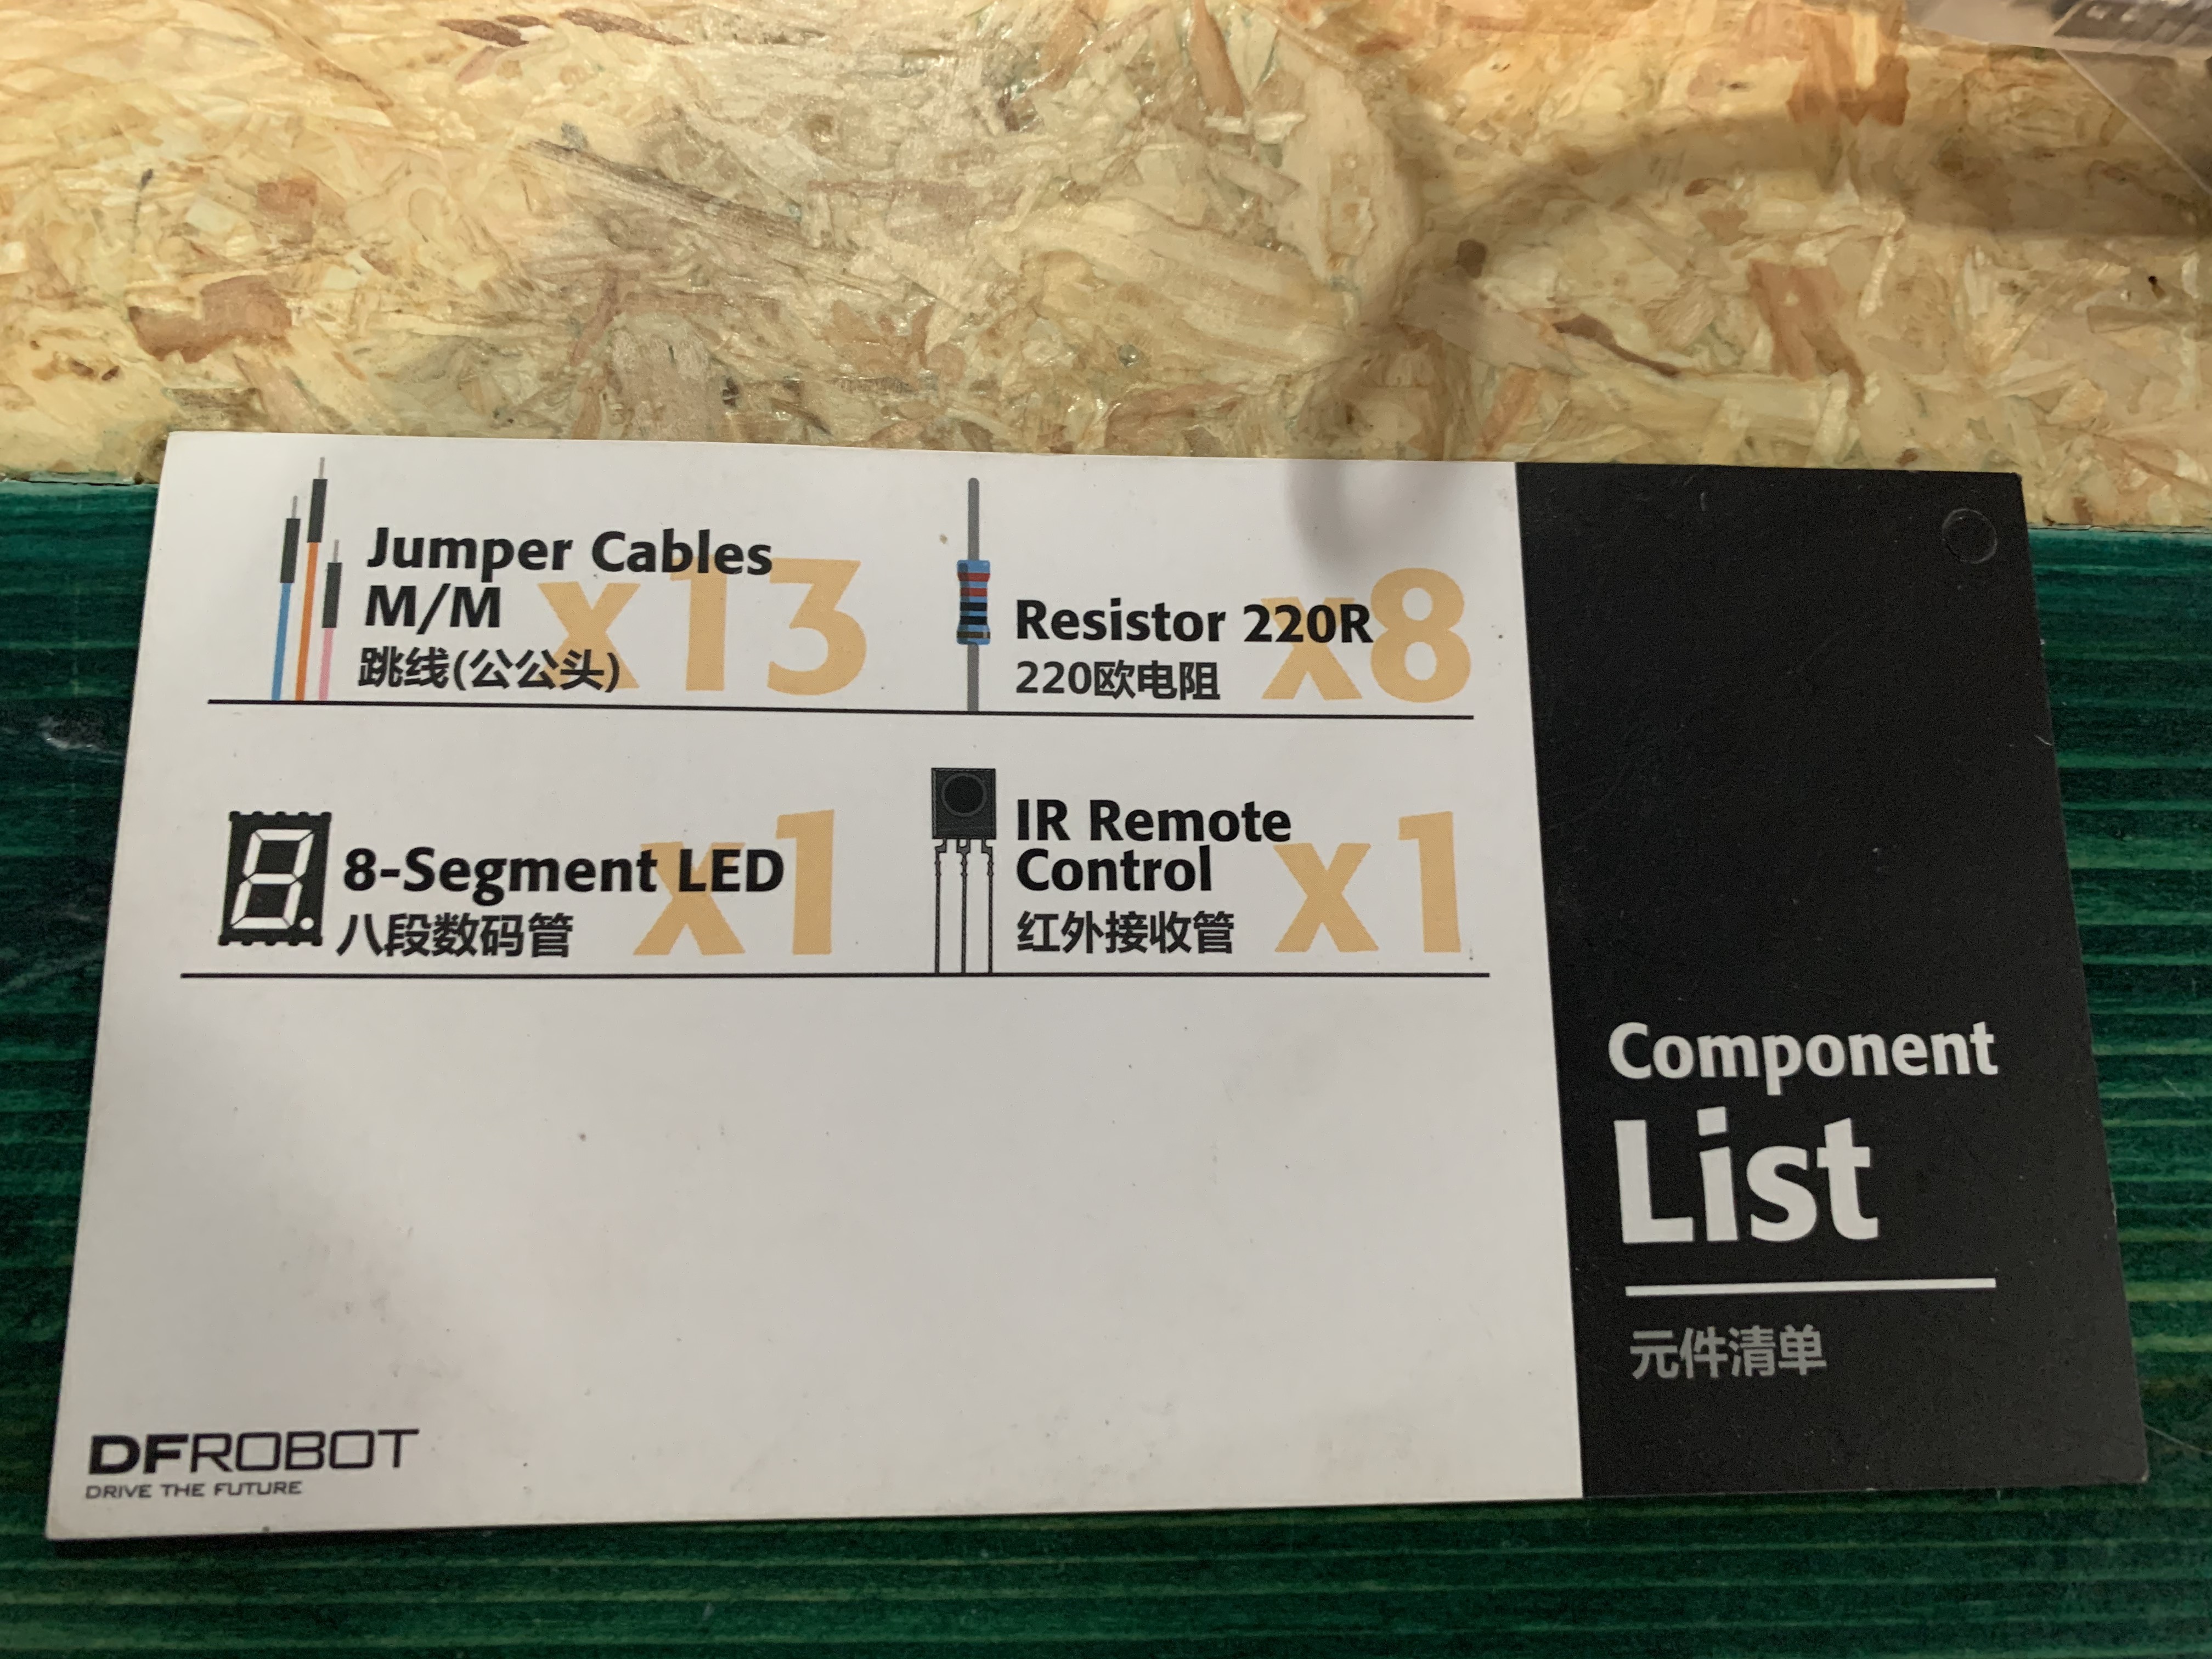
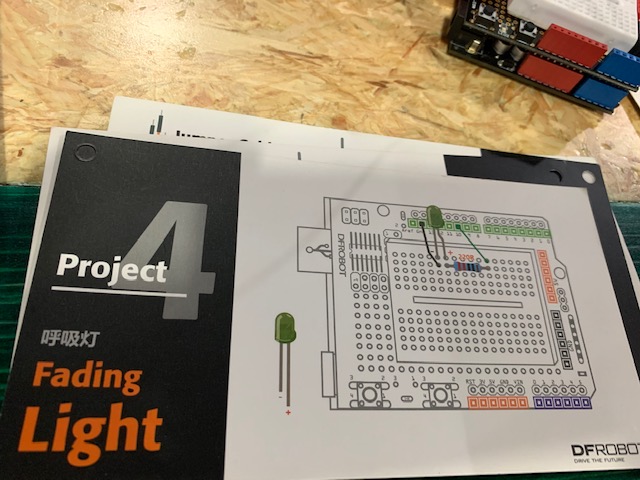
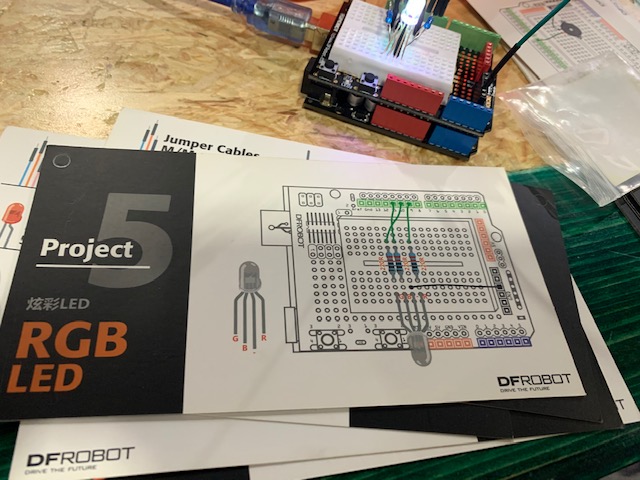
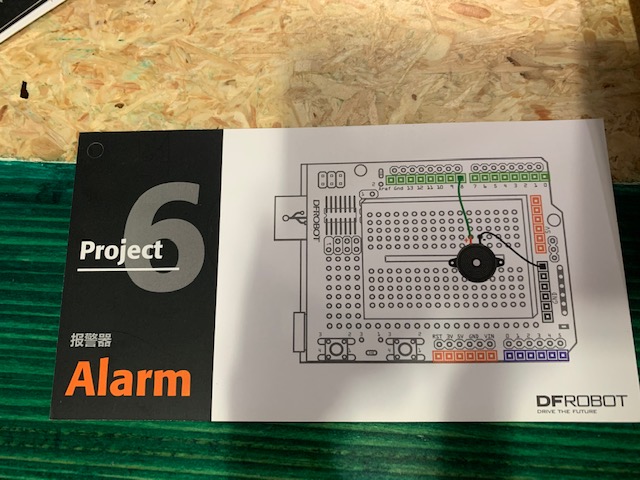
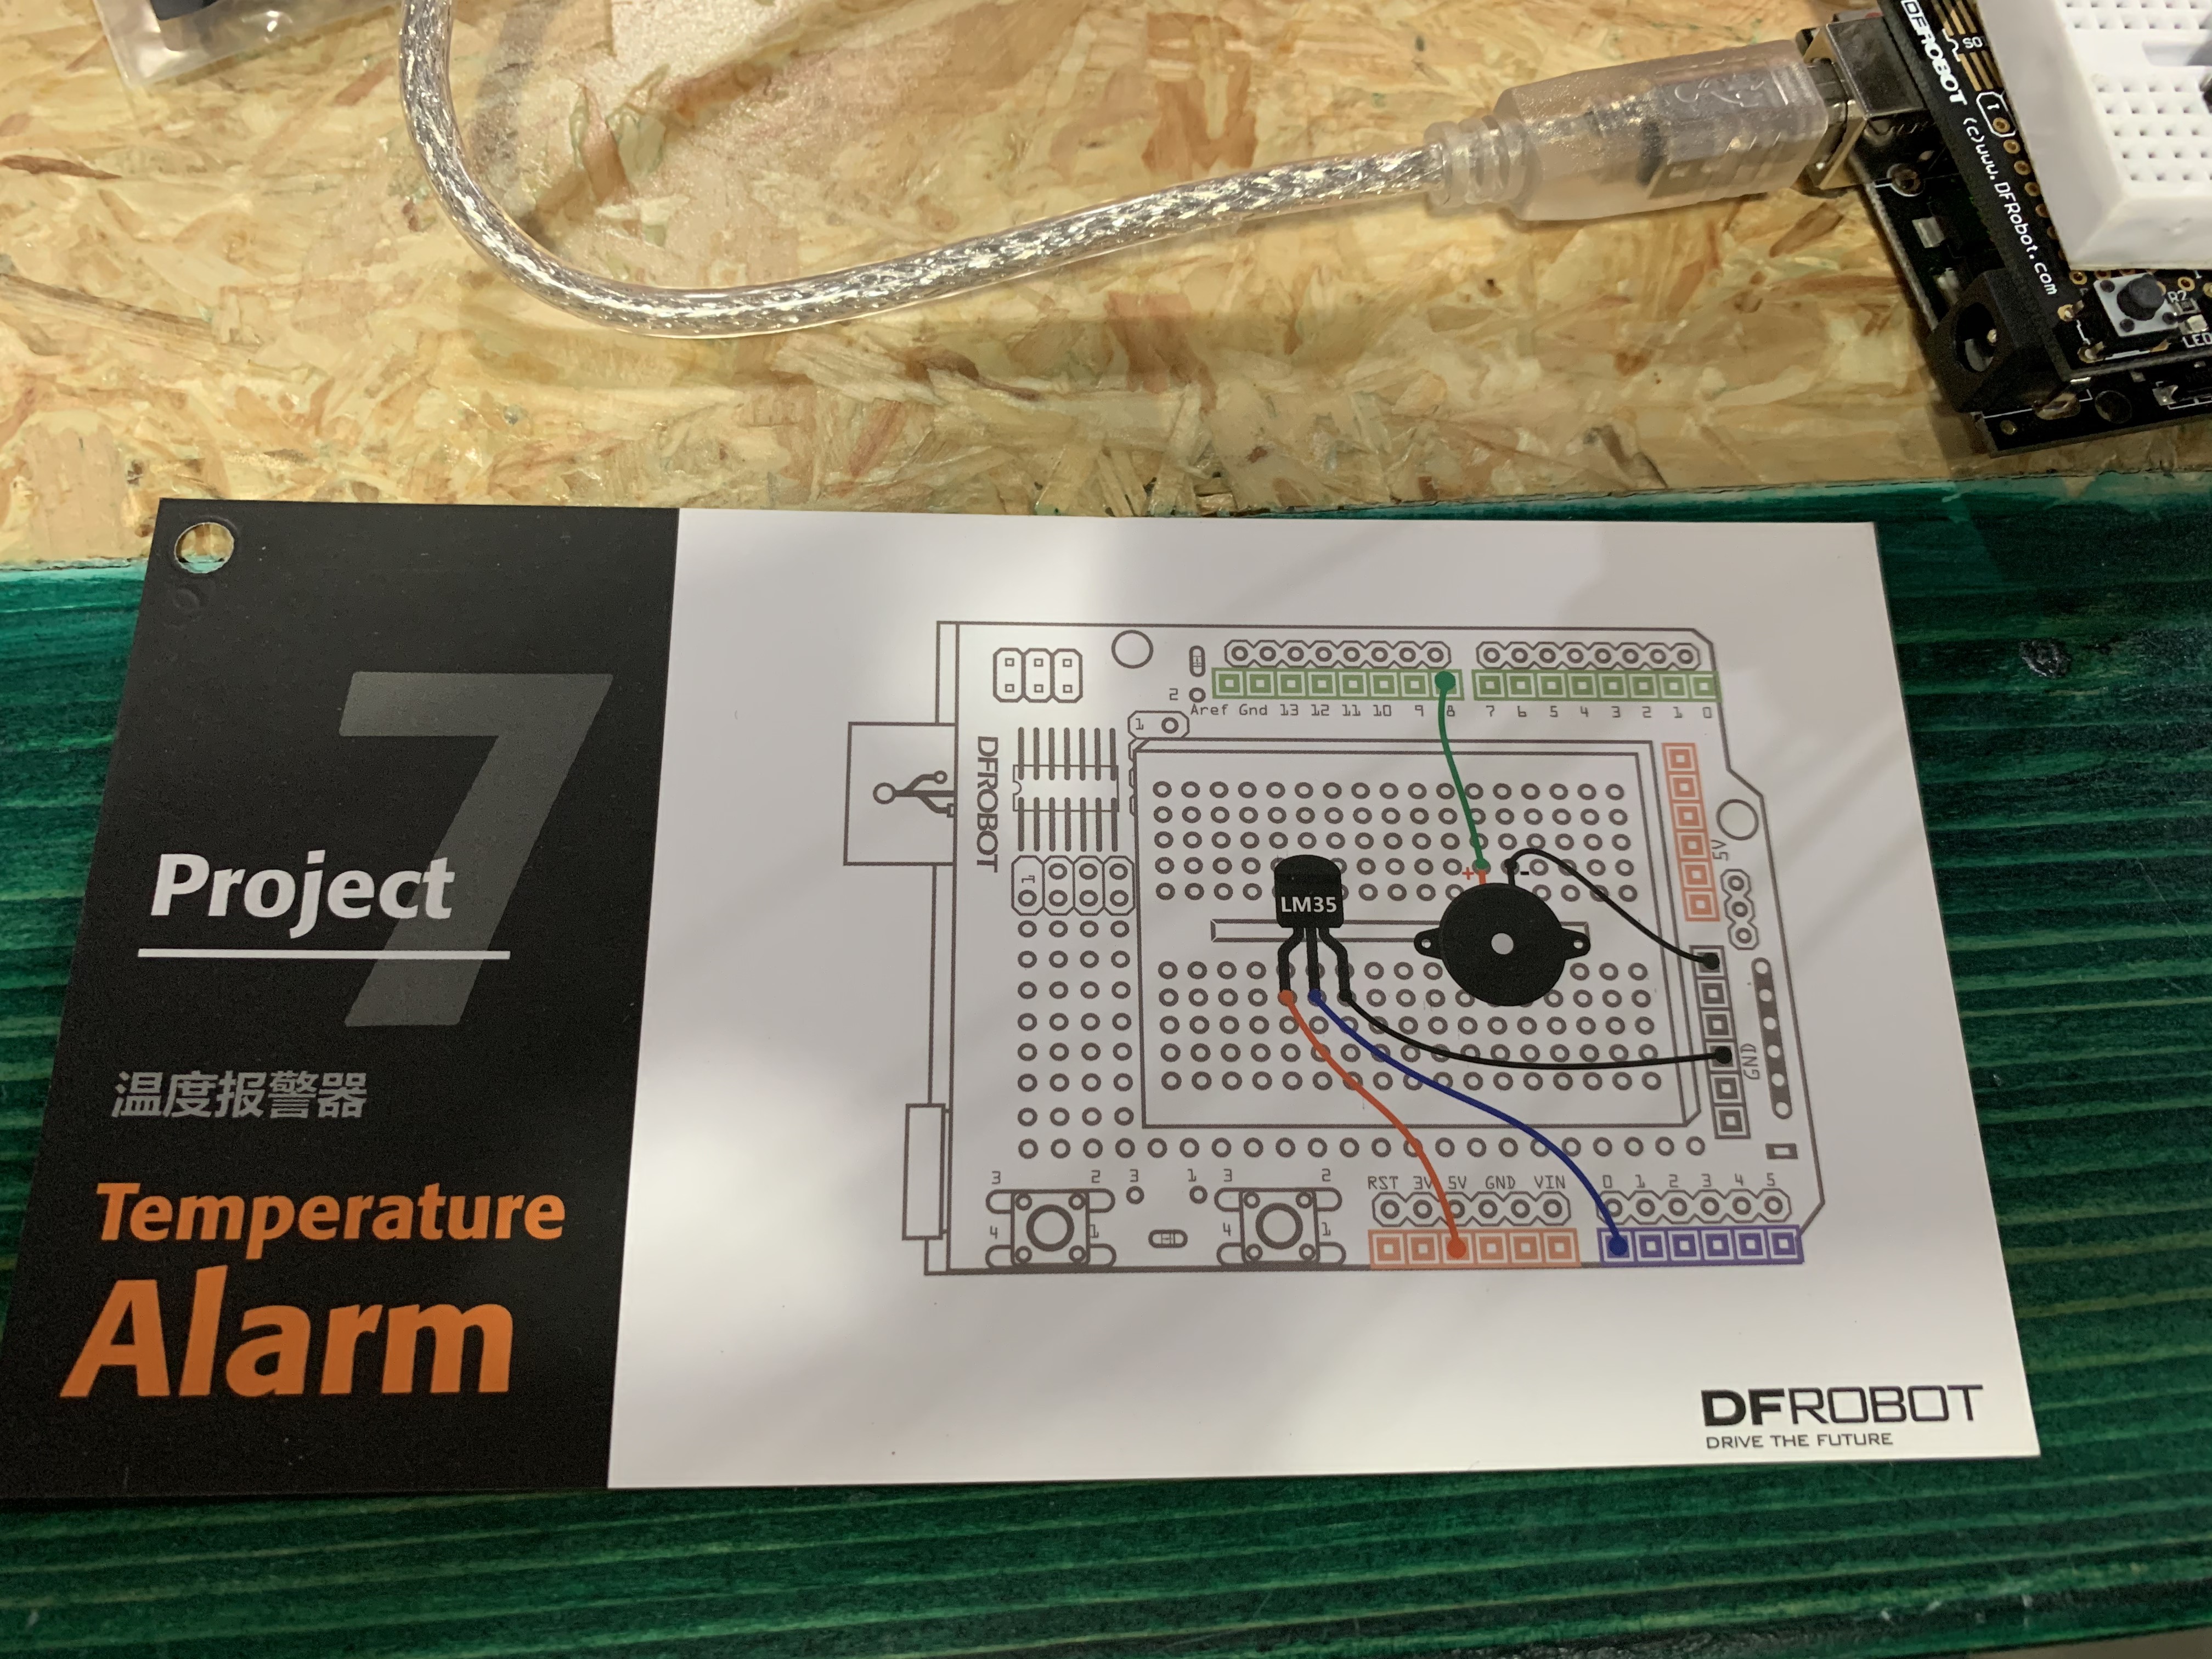
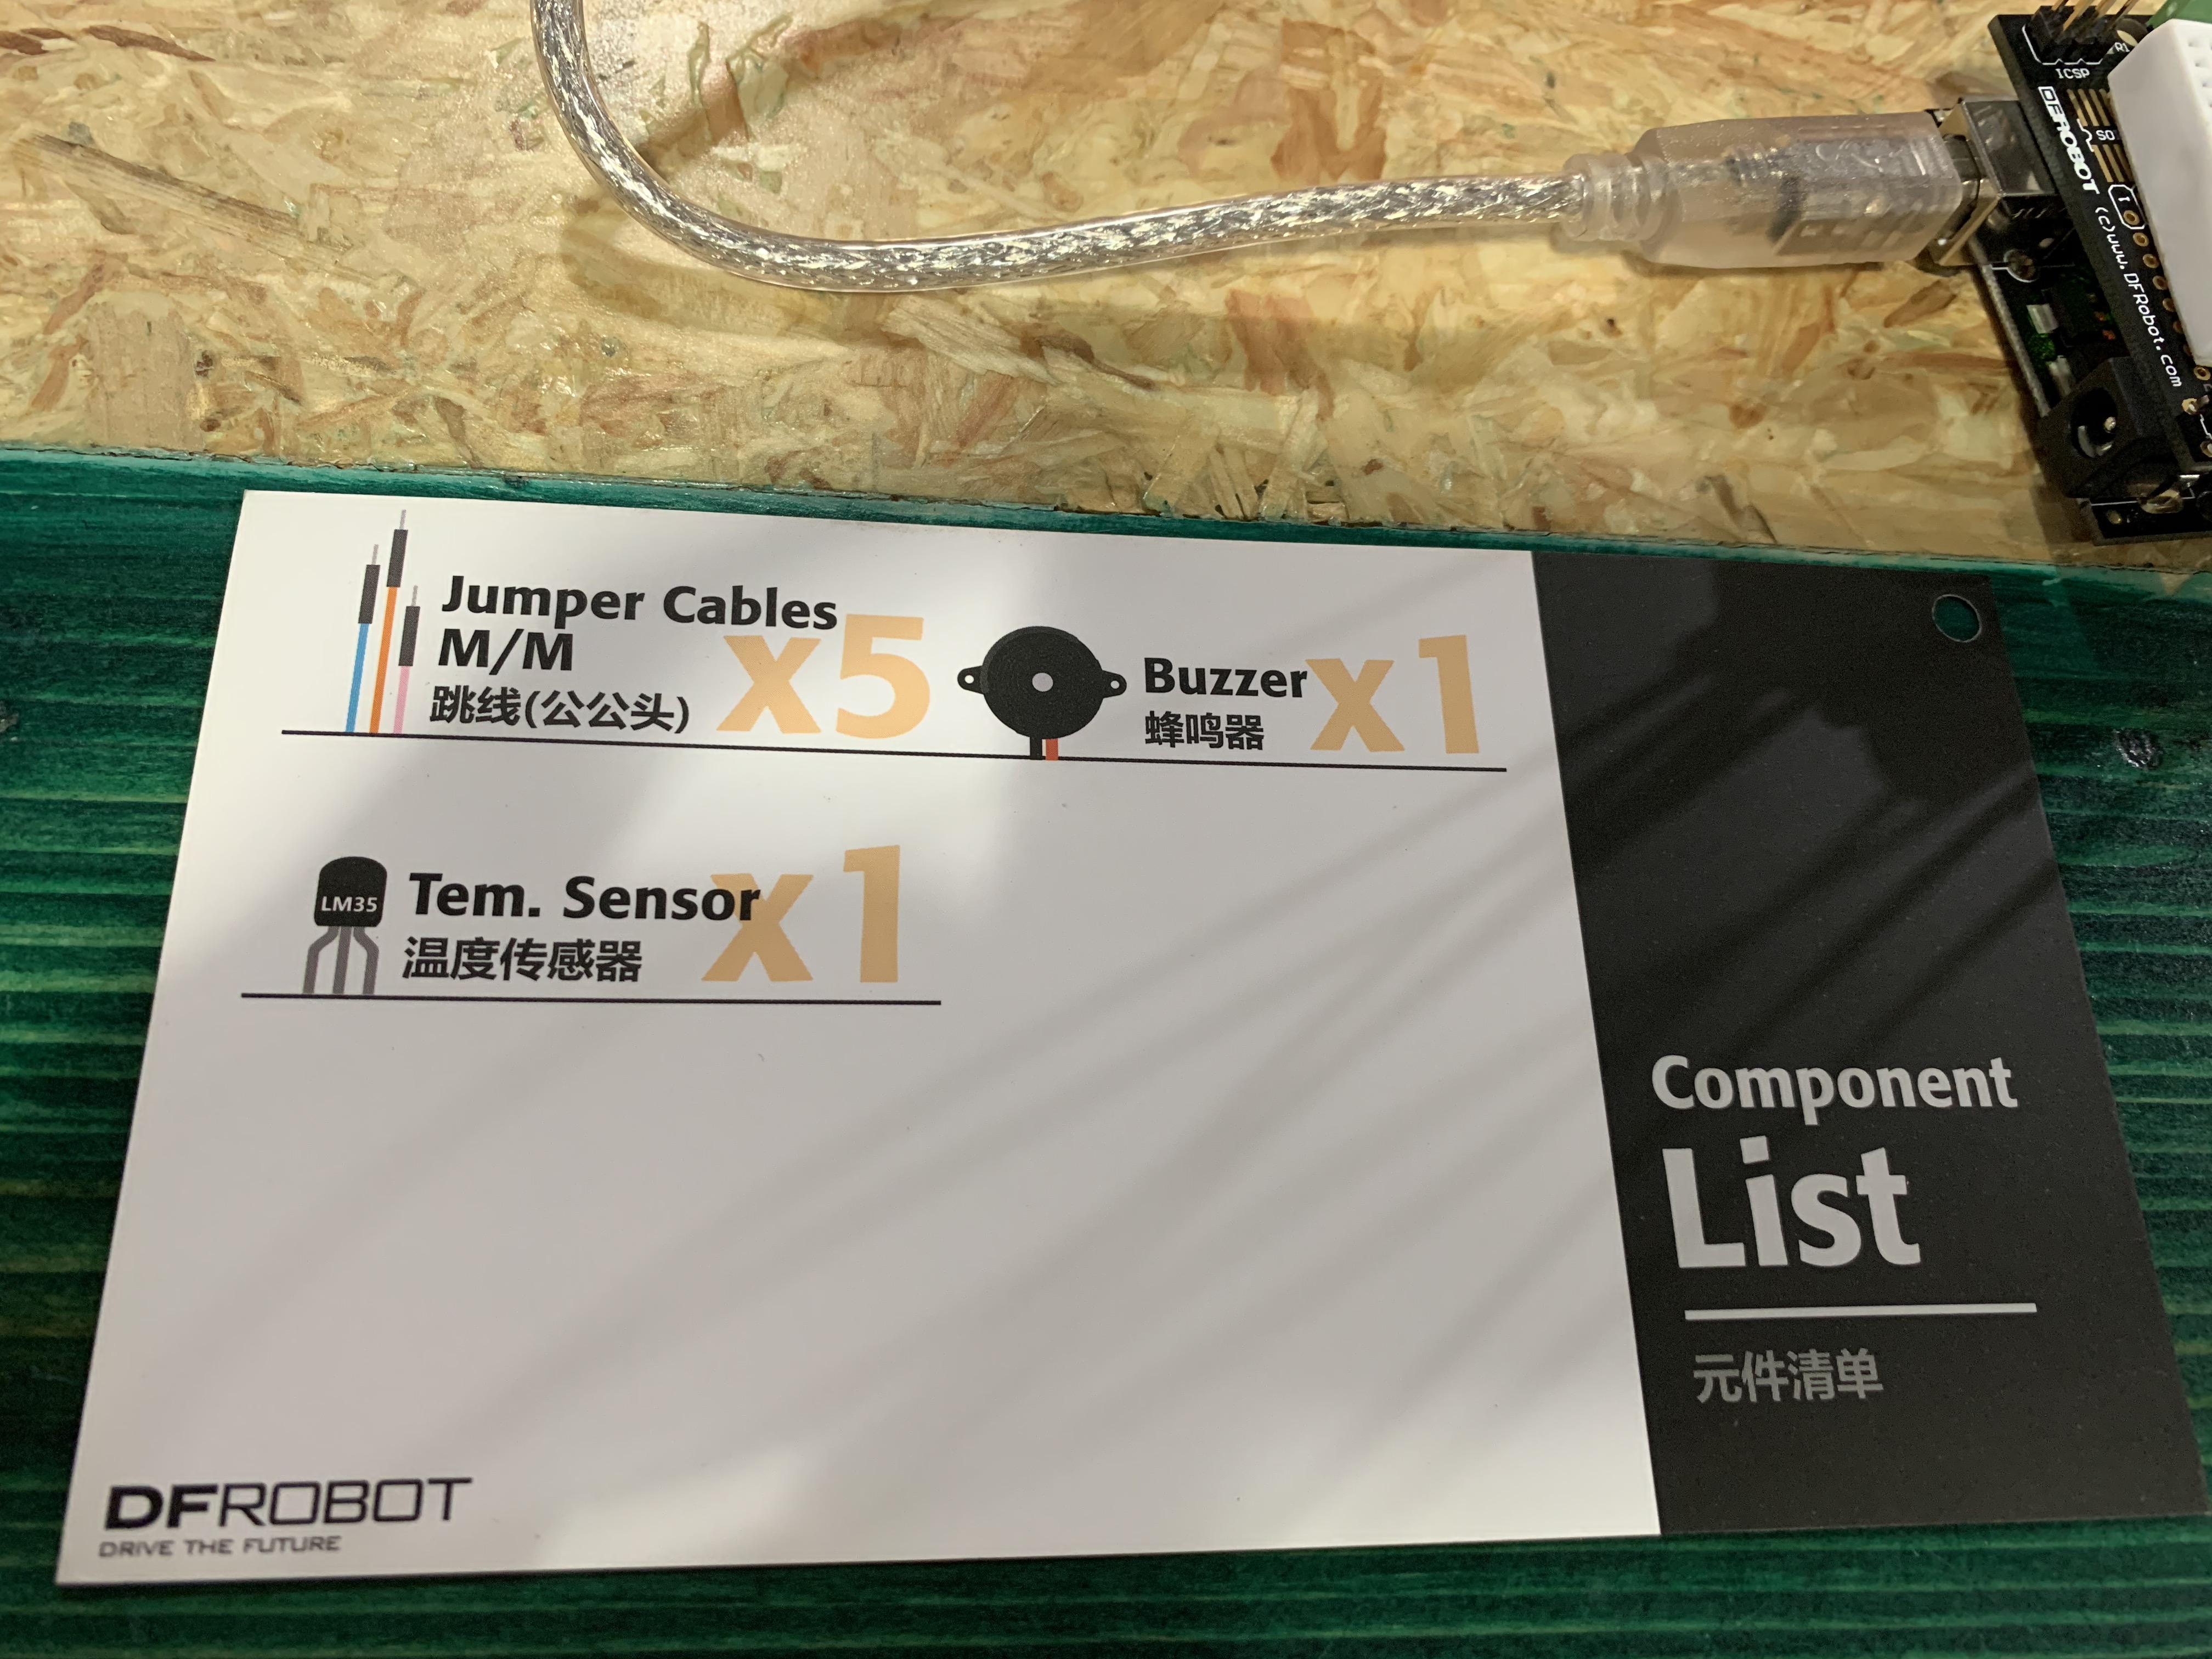
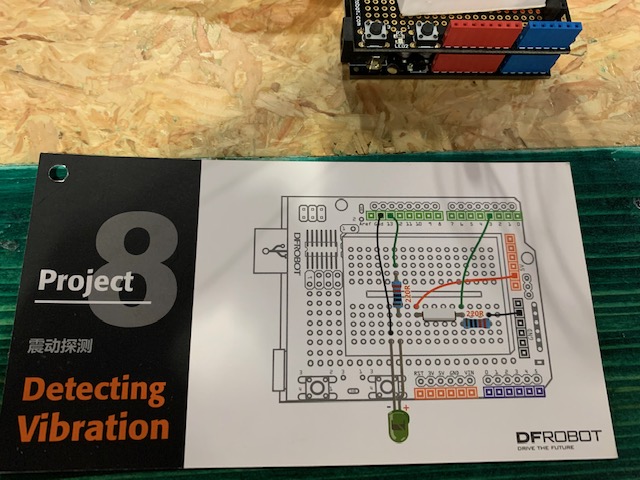
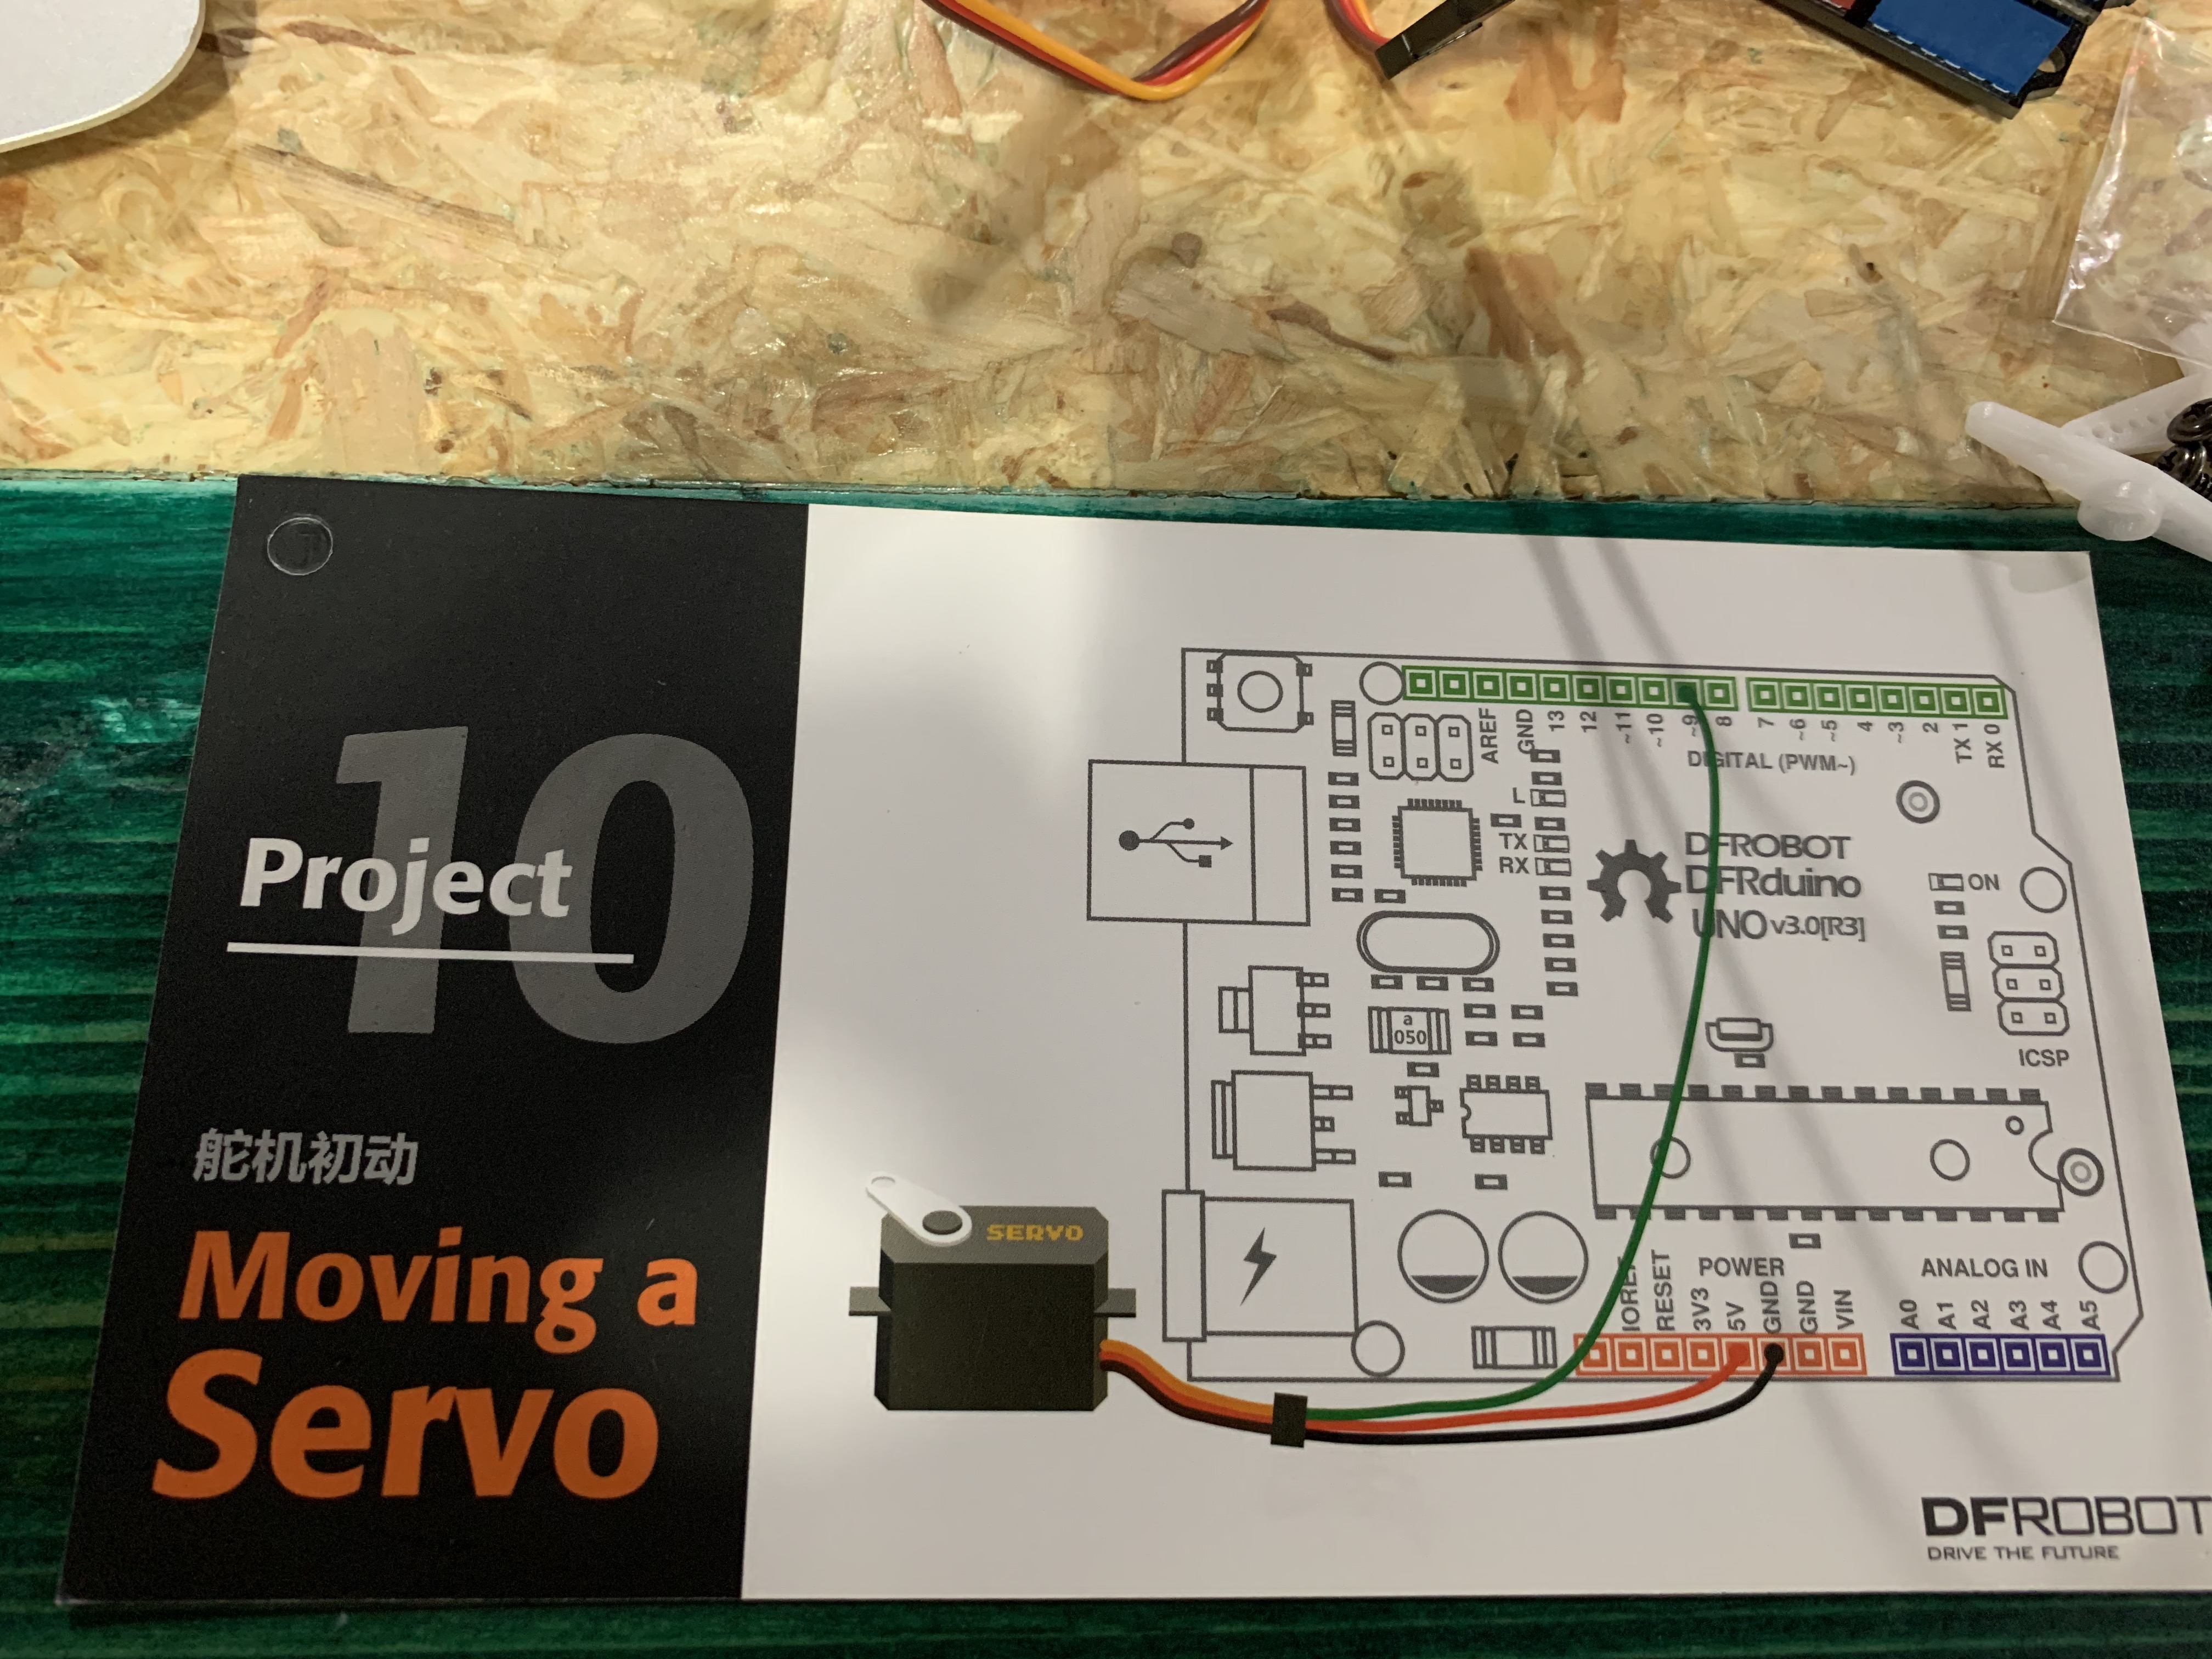
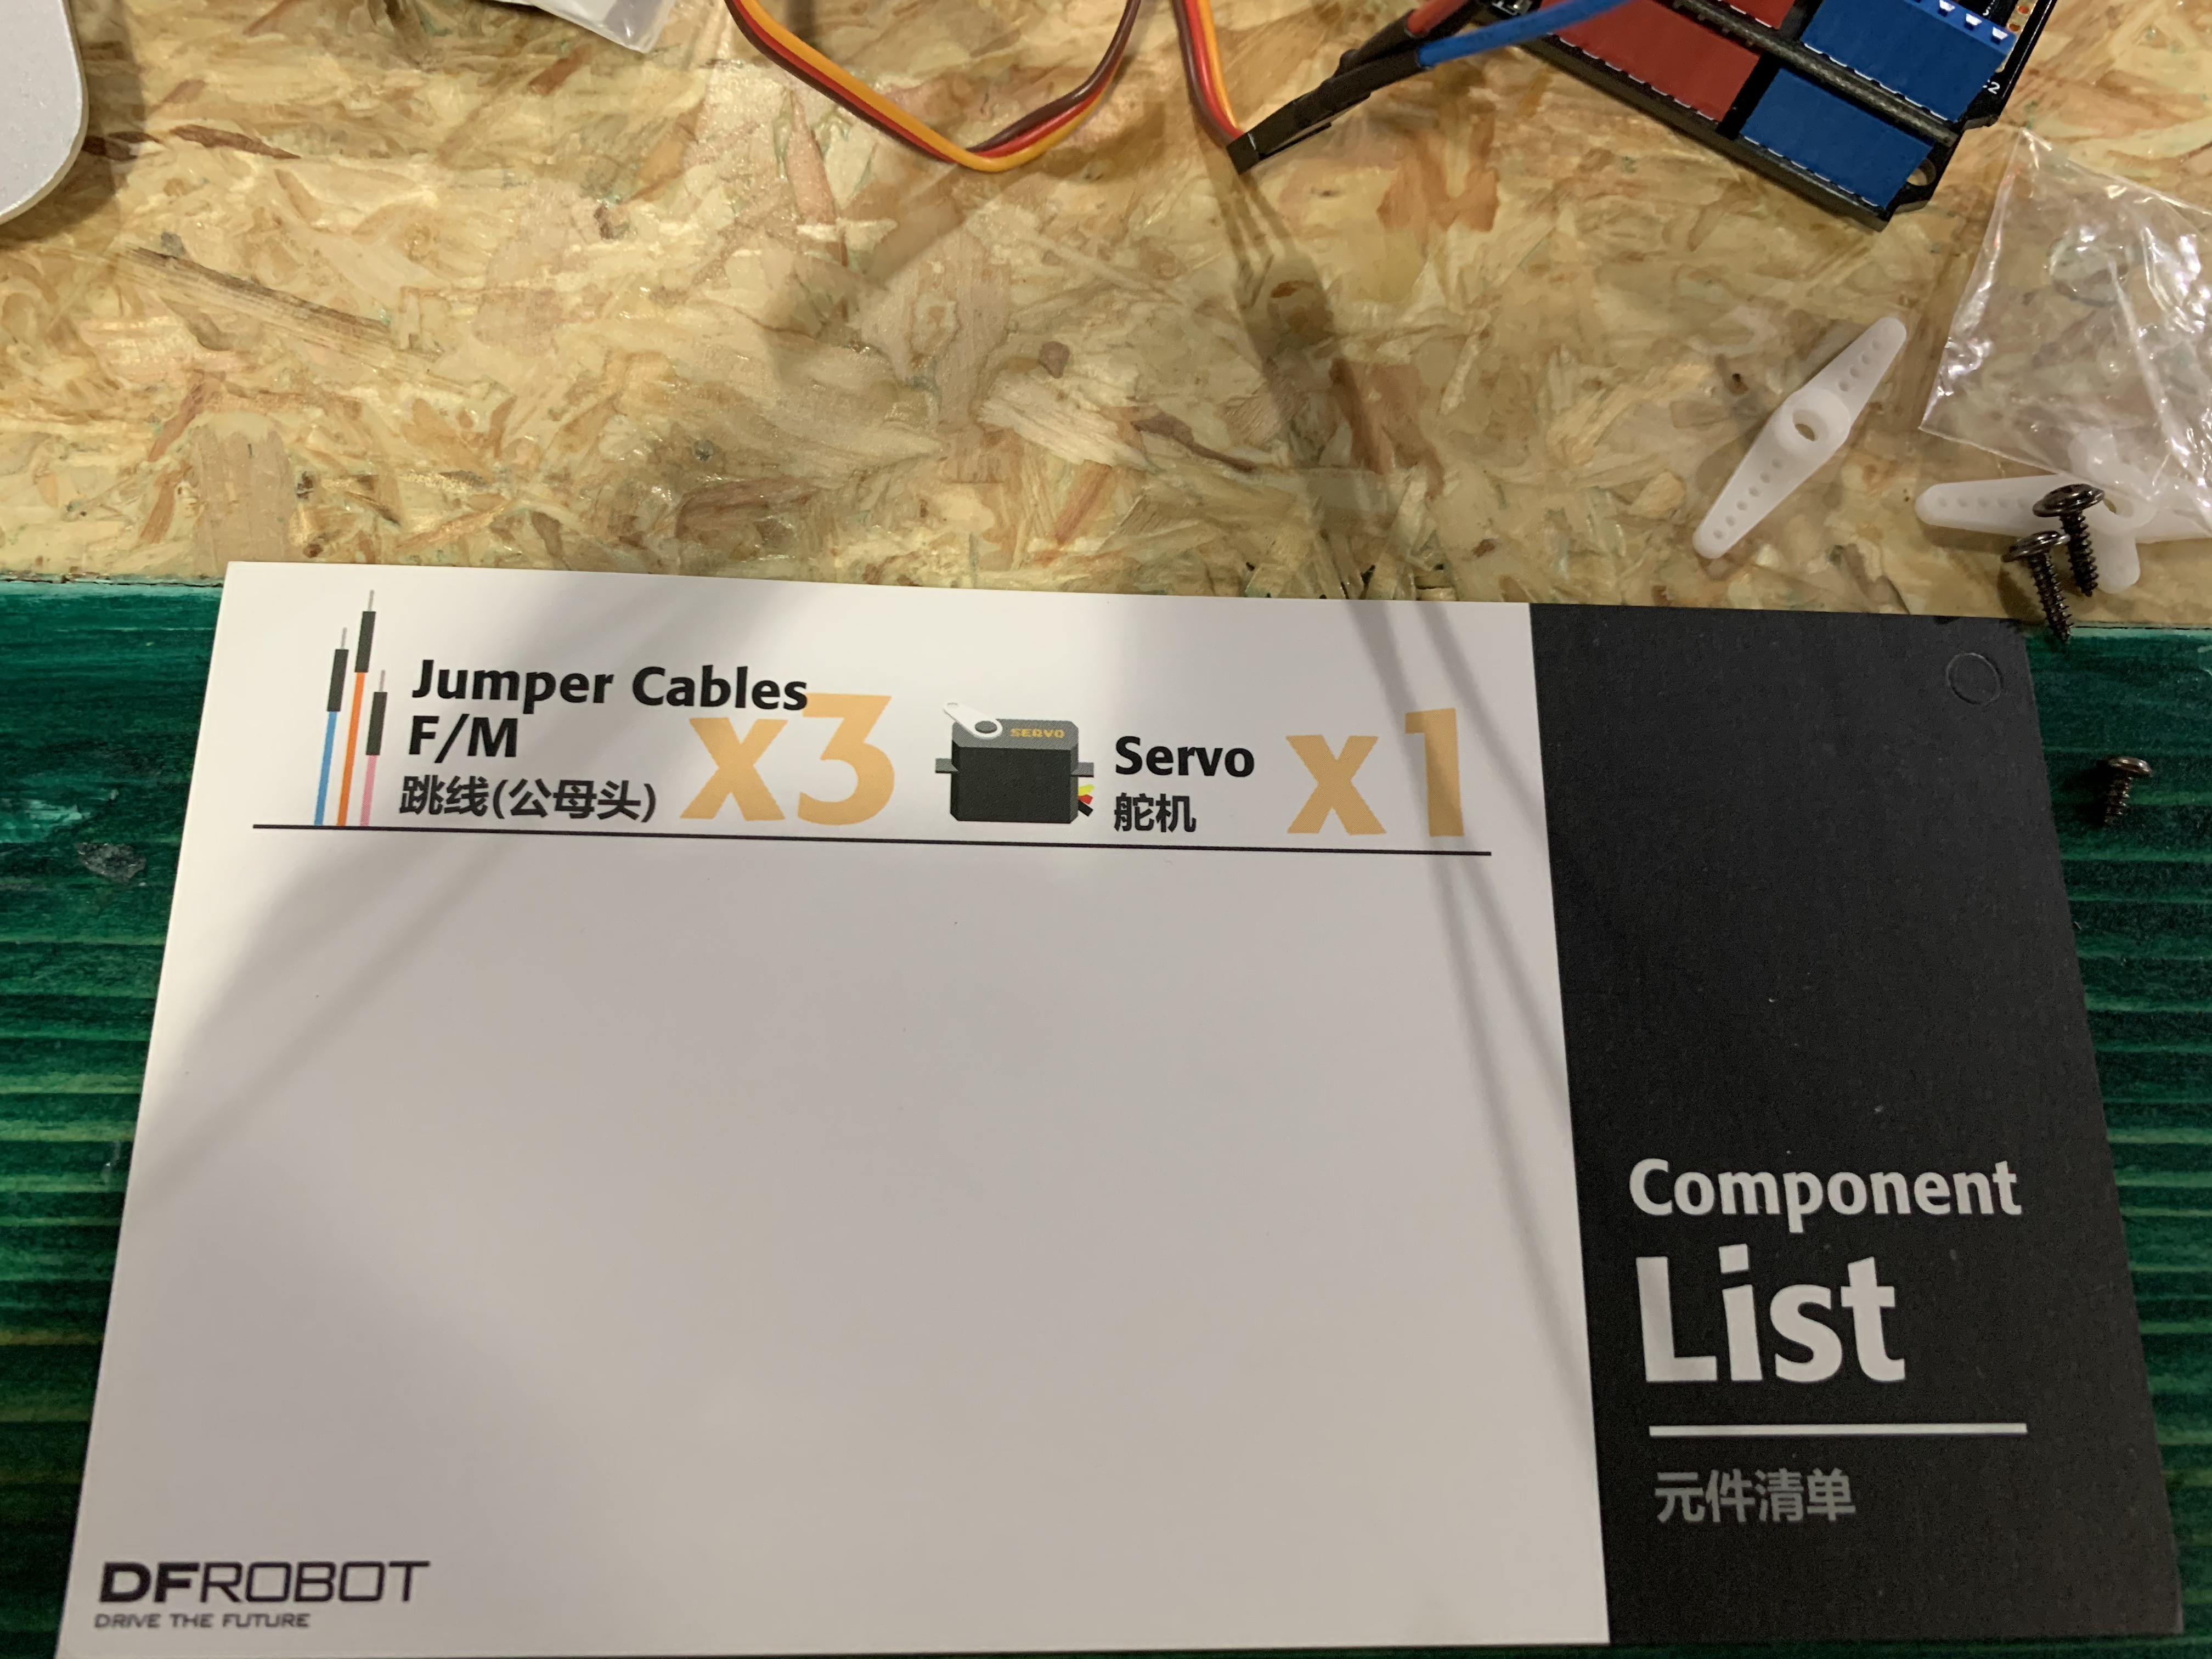
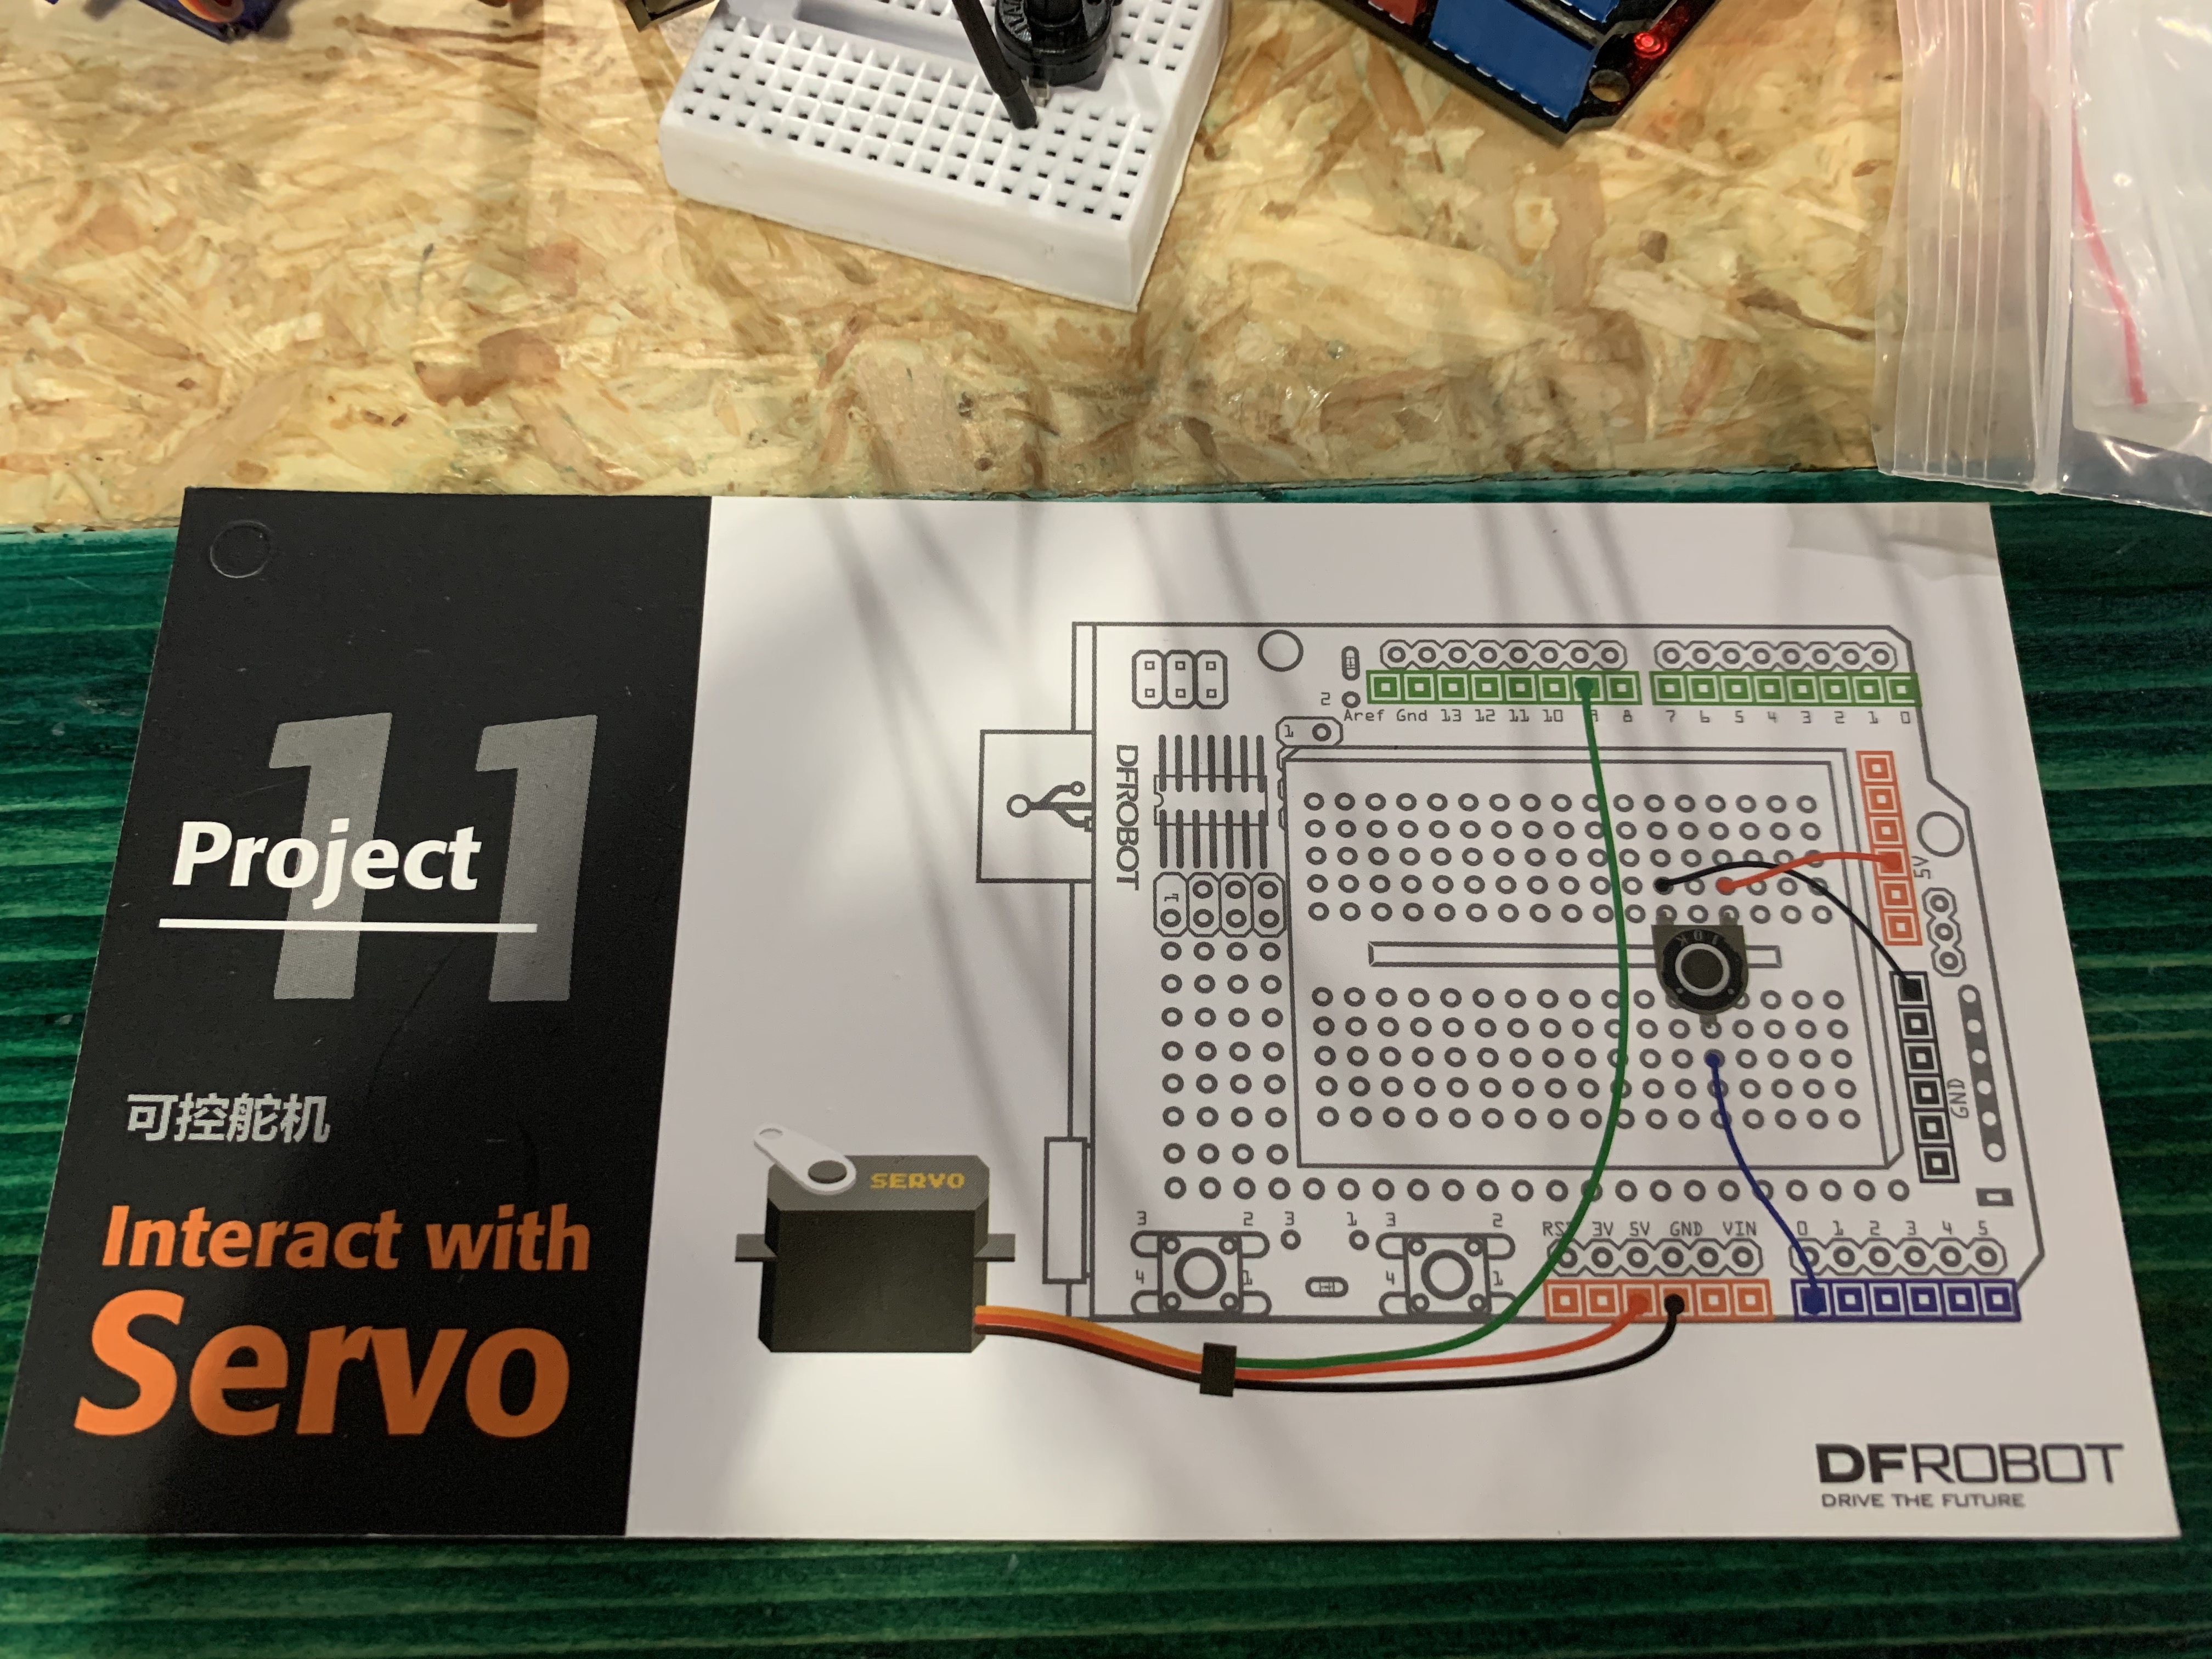
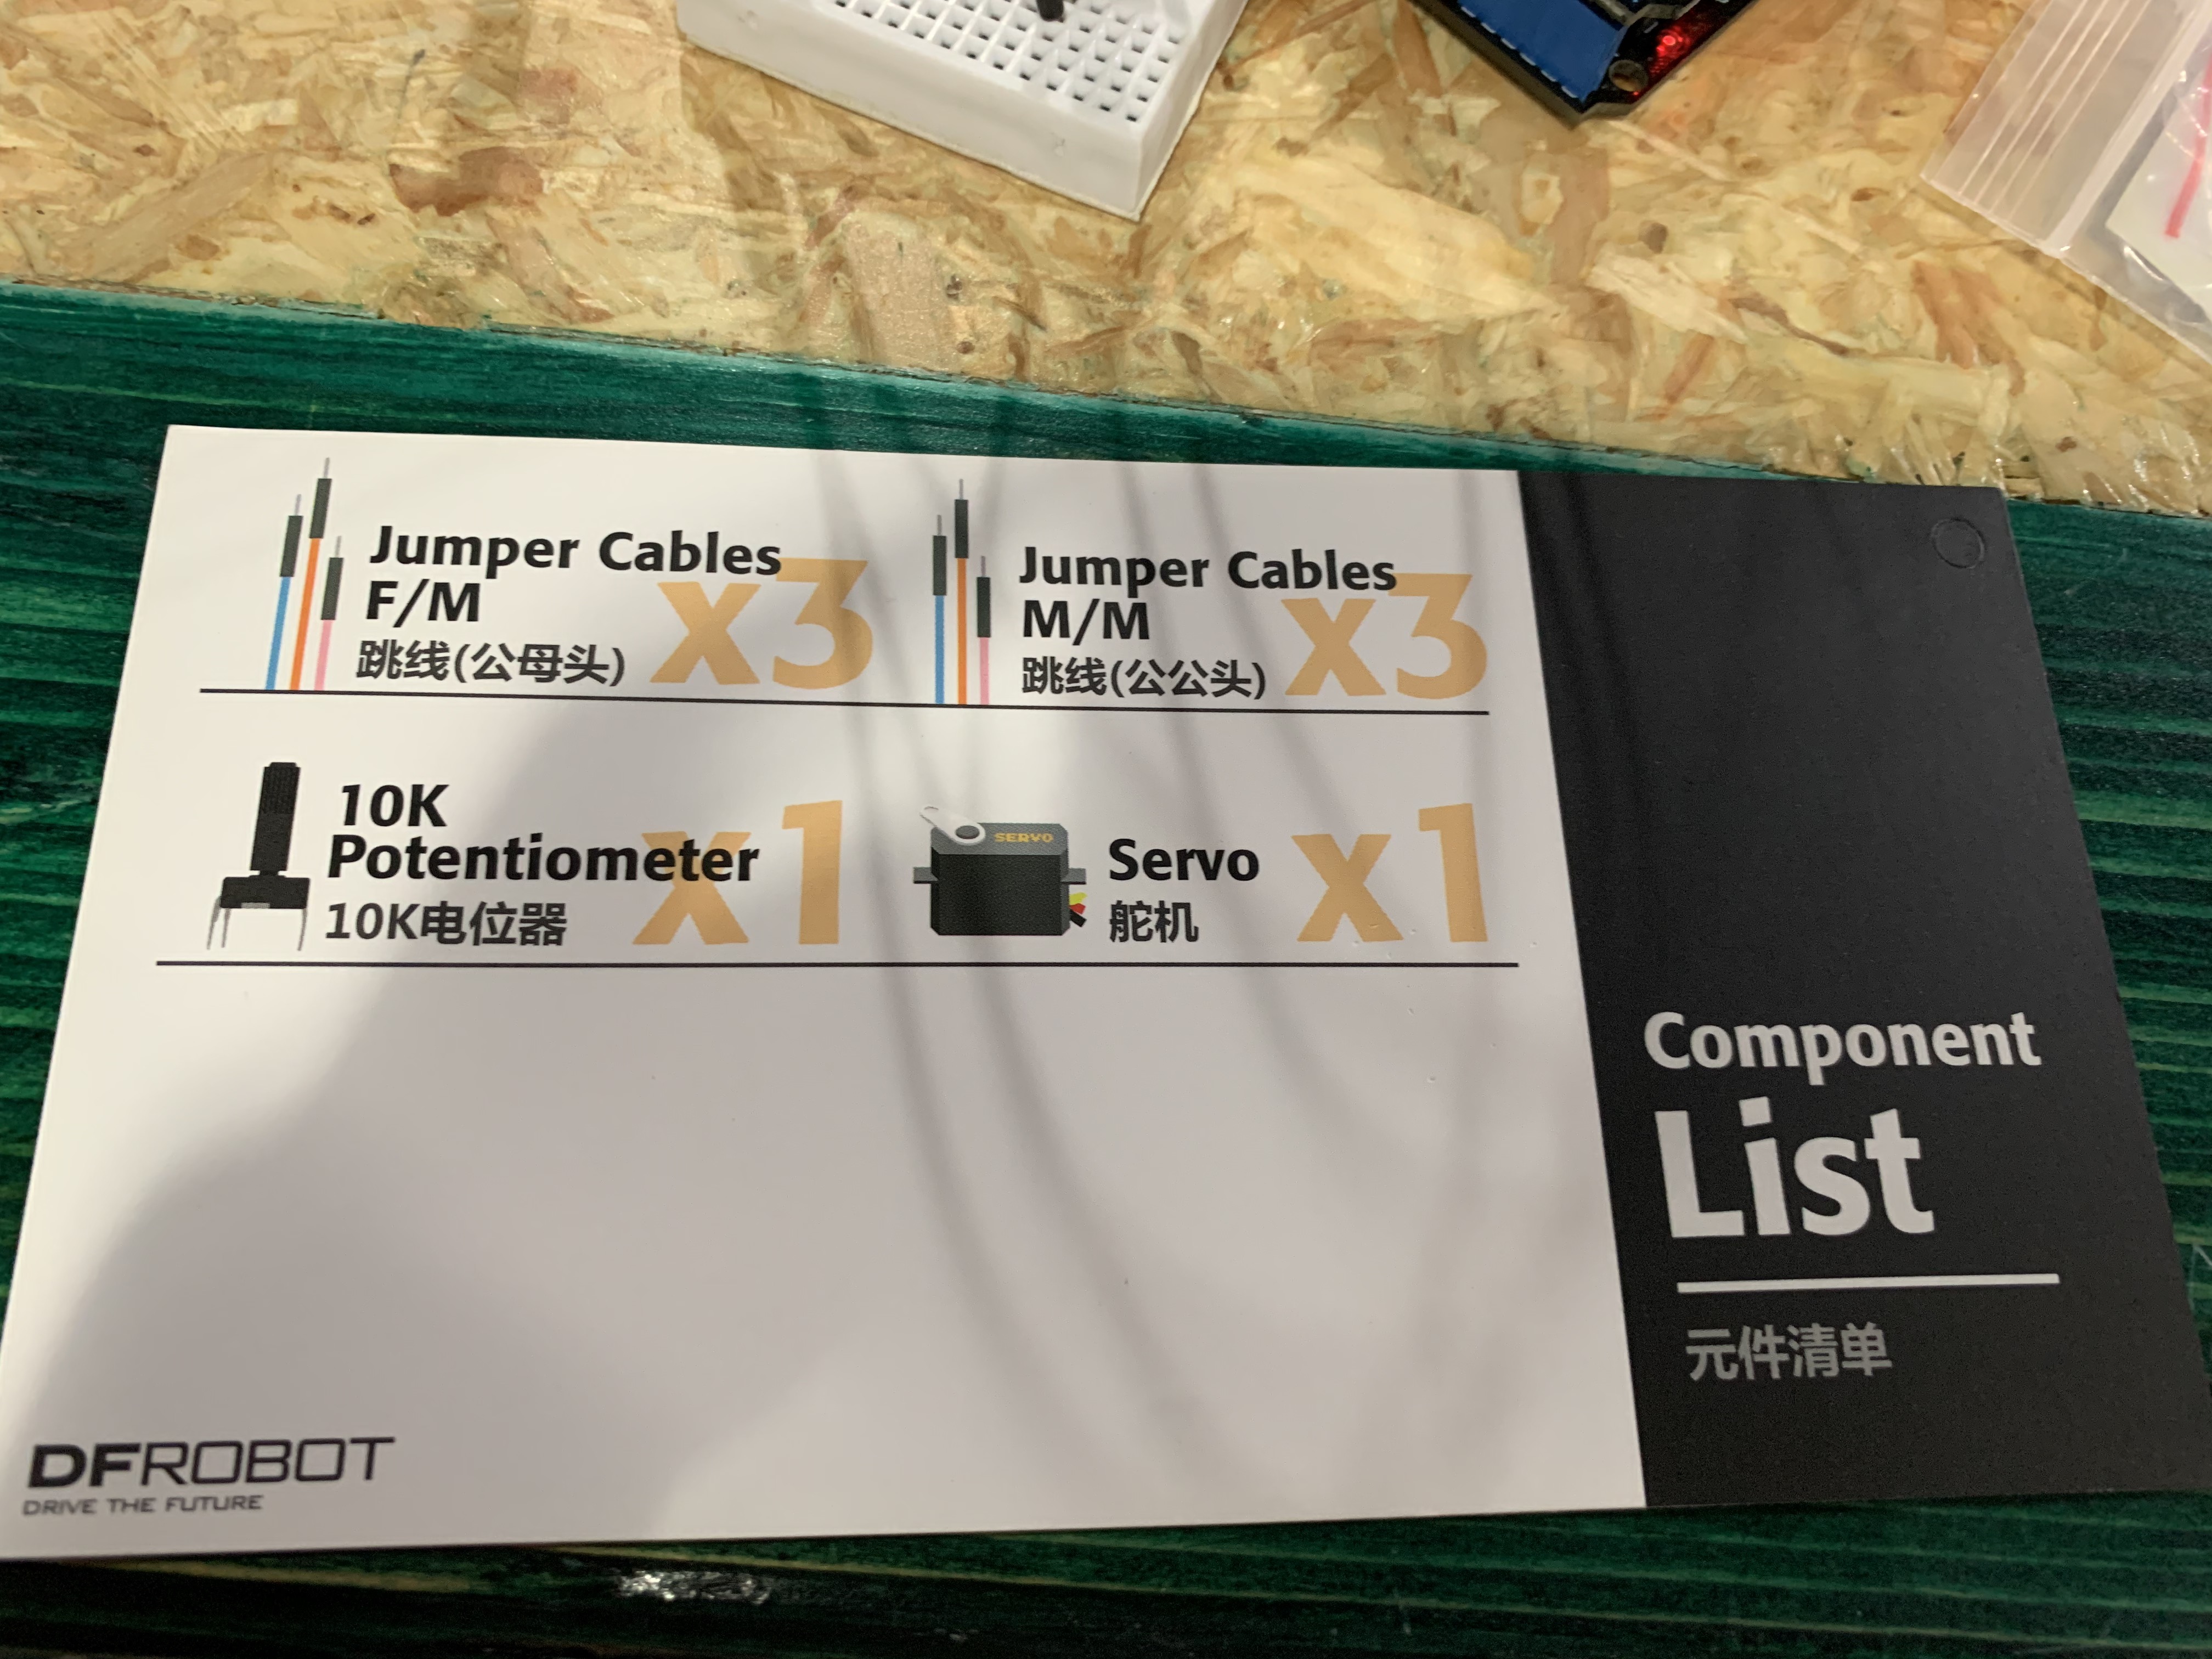
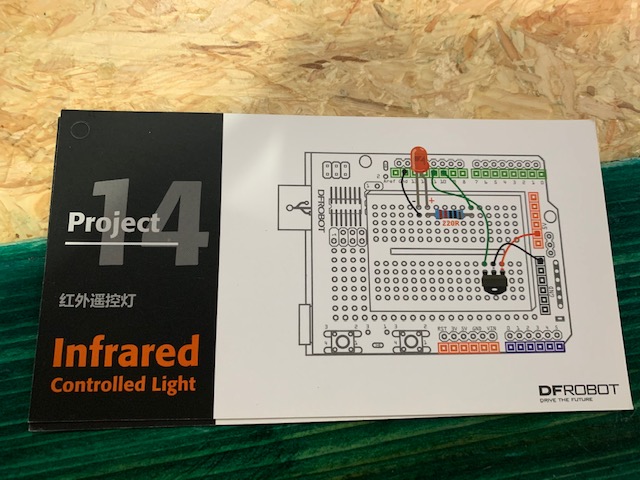
Here are pictures what each project was about, the components required to execute the project, and a video of the completed project.
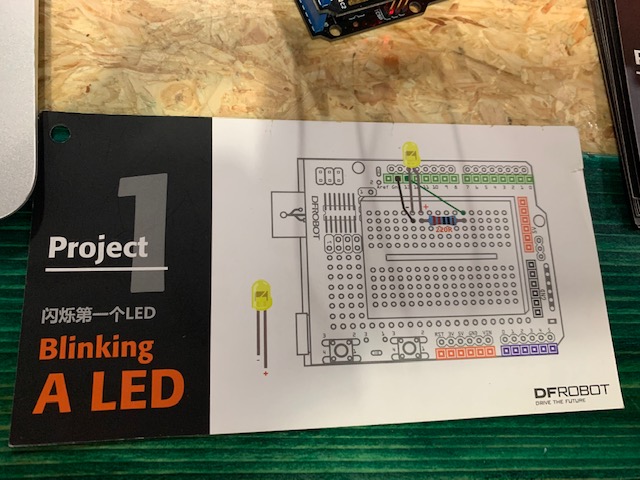
Project 1: Blinking a LED
Project 2: SOS Beacon
Project 3: Traffic light

Project 4: Fading light
Project 5: RGB LED
Project 6: Alarm

Project 7: Temperature Alarm
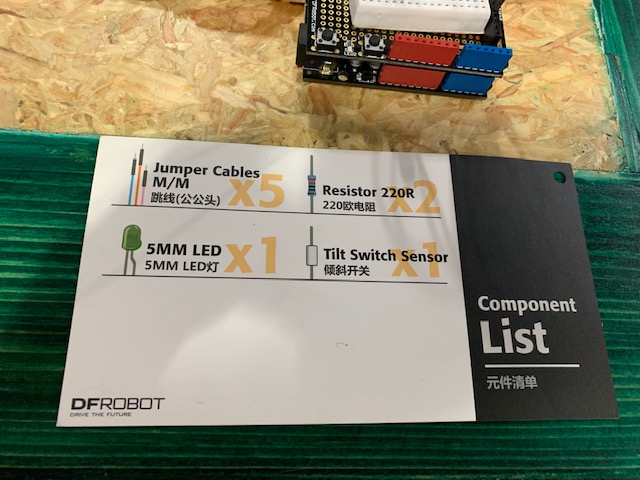
Project 8: Detecting Vibration
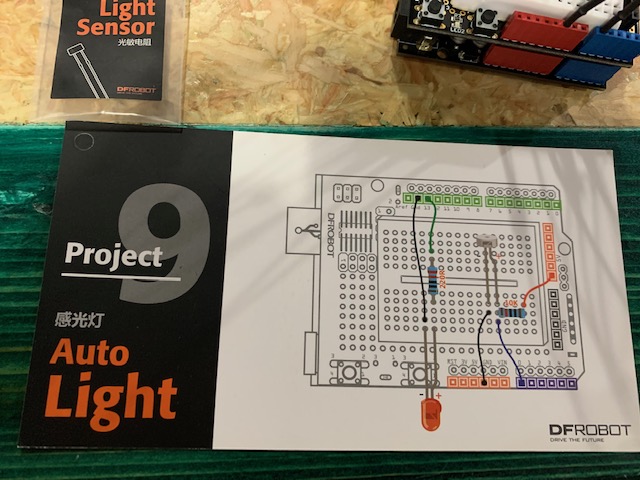
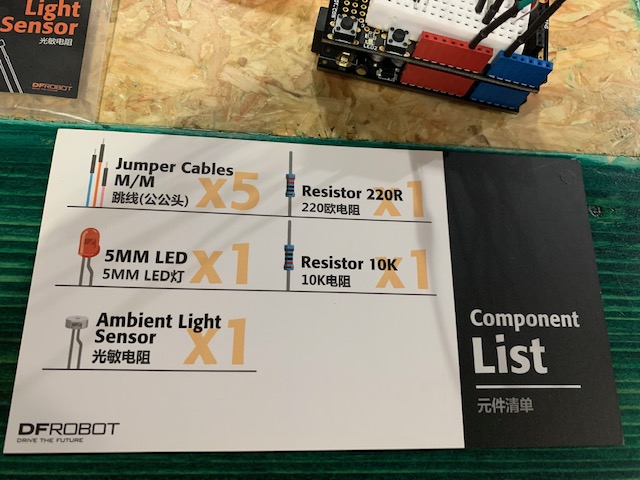
Project 9: Auto light
Project 10: Moving a Servo
Project 11: Interact with Servo
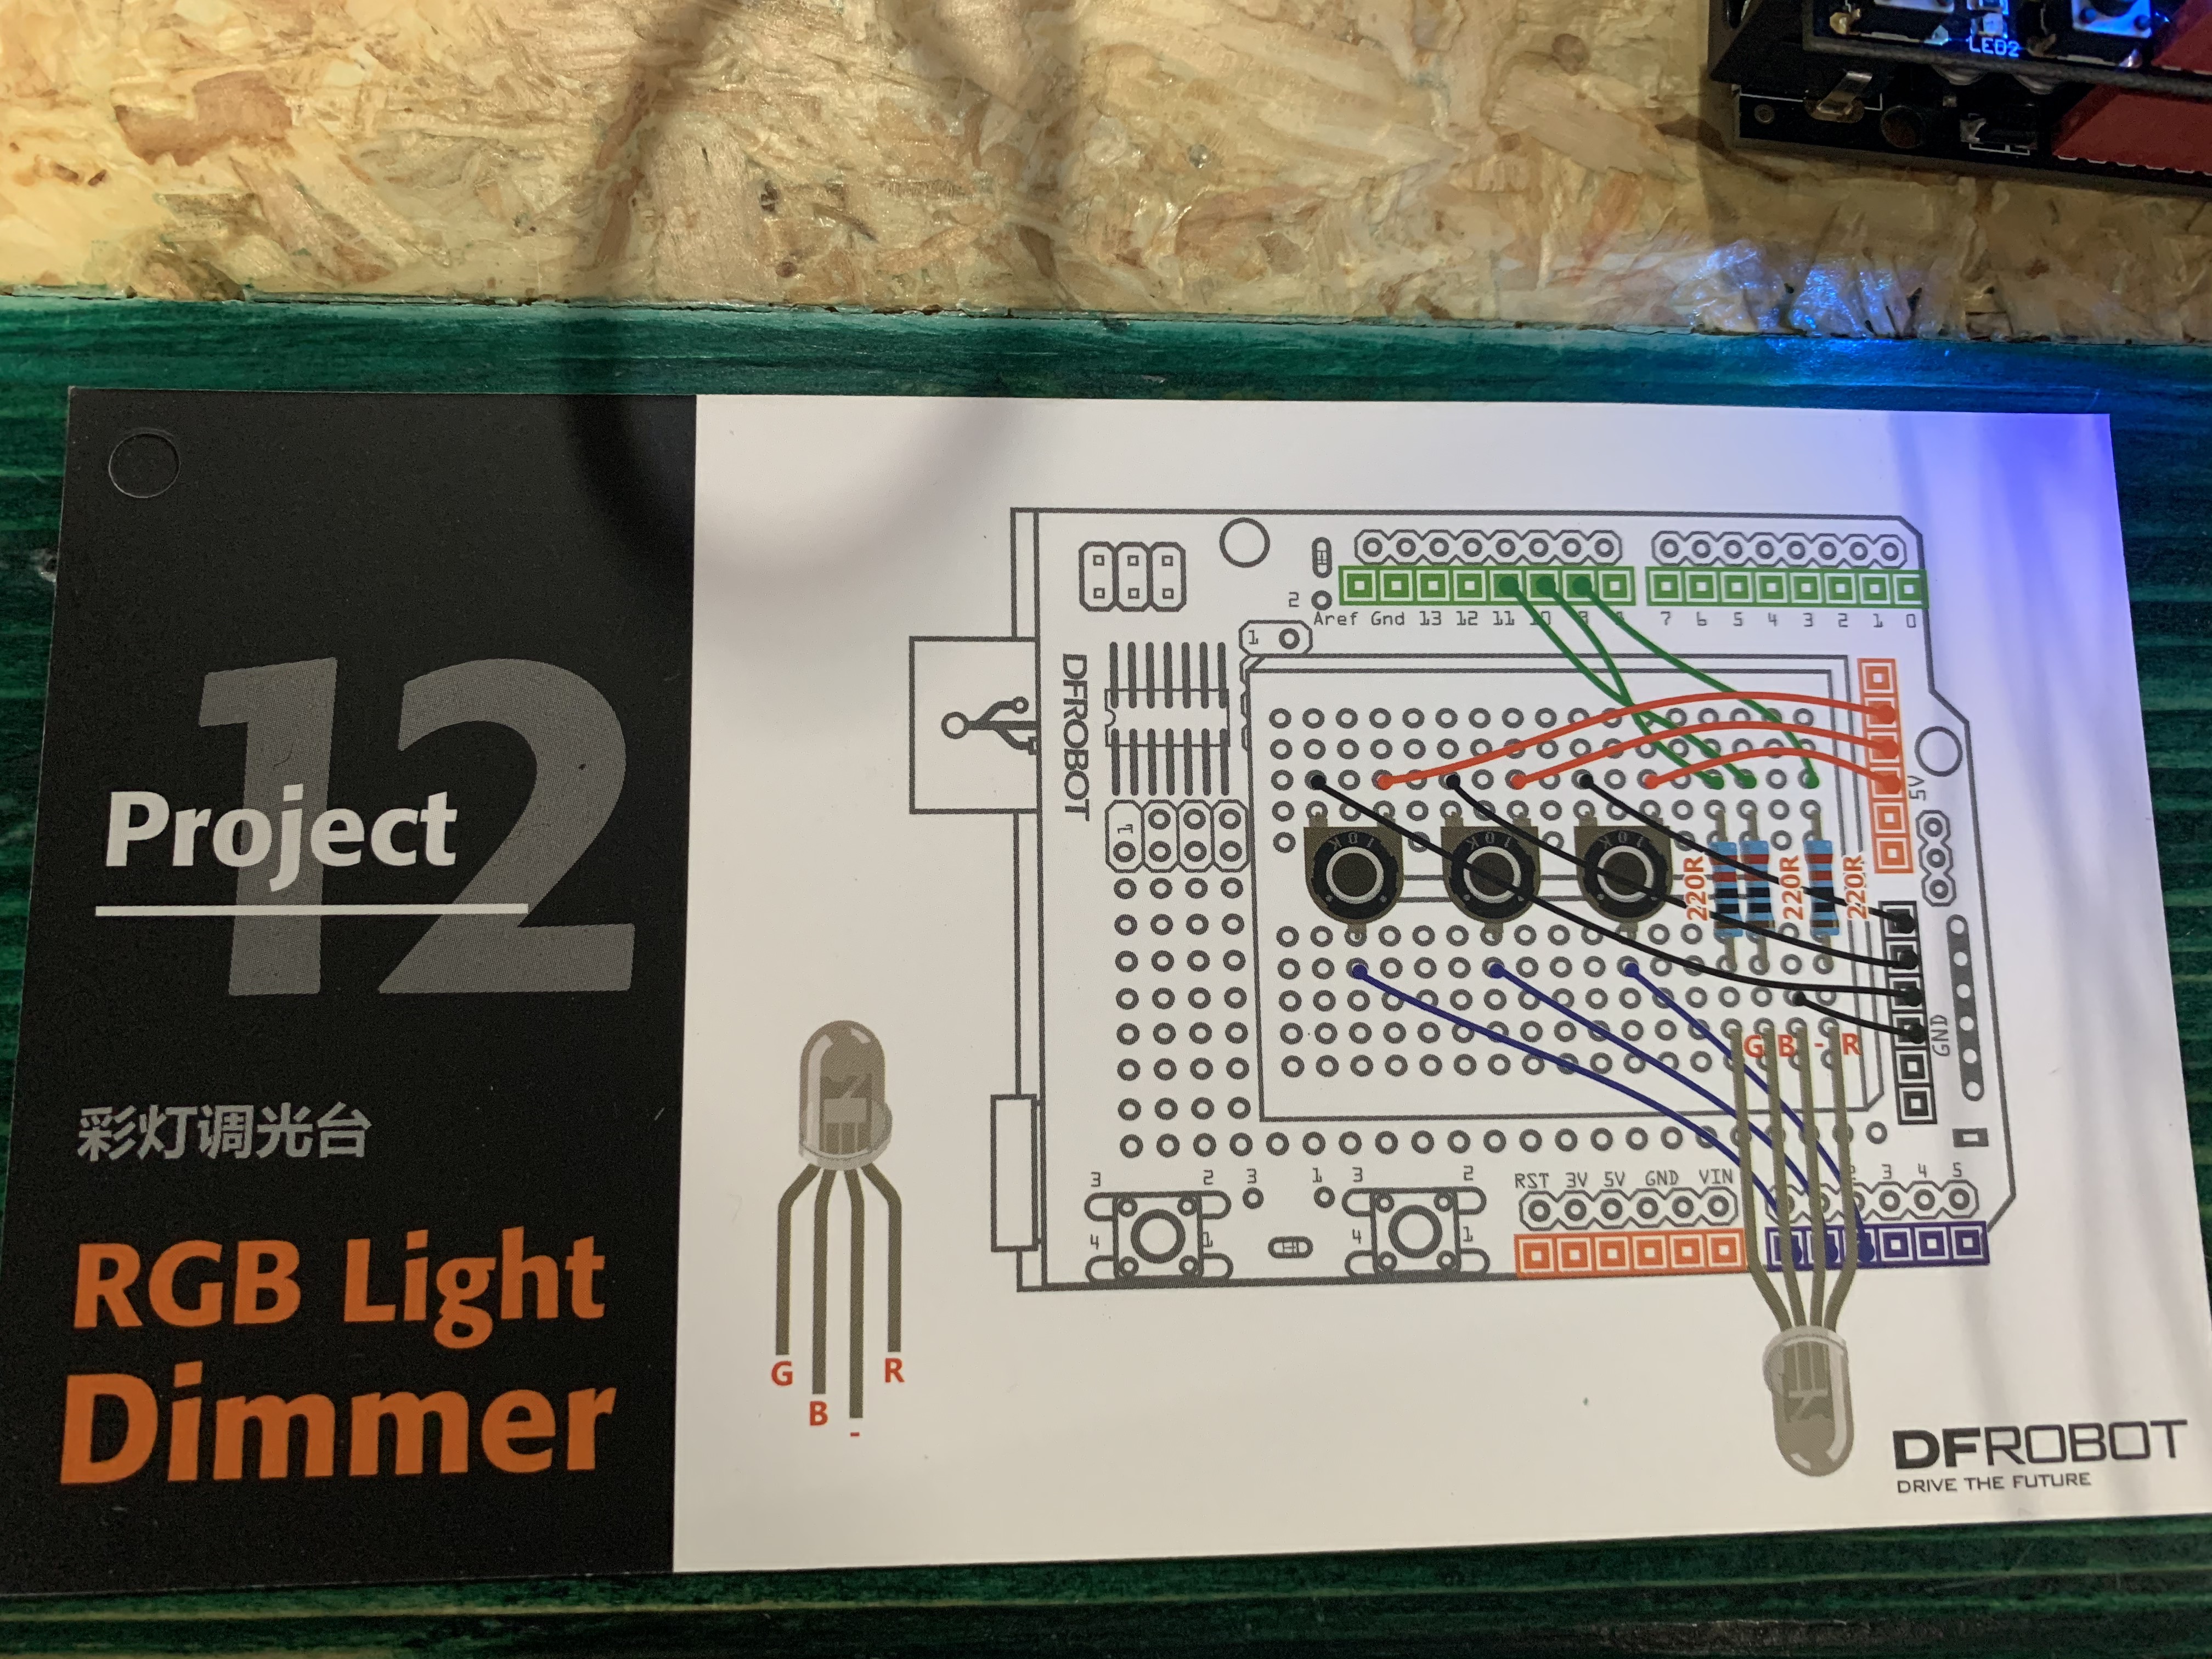
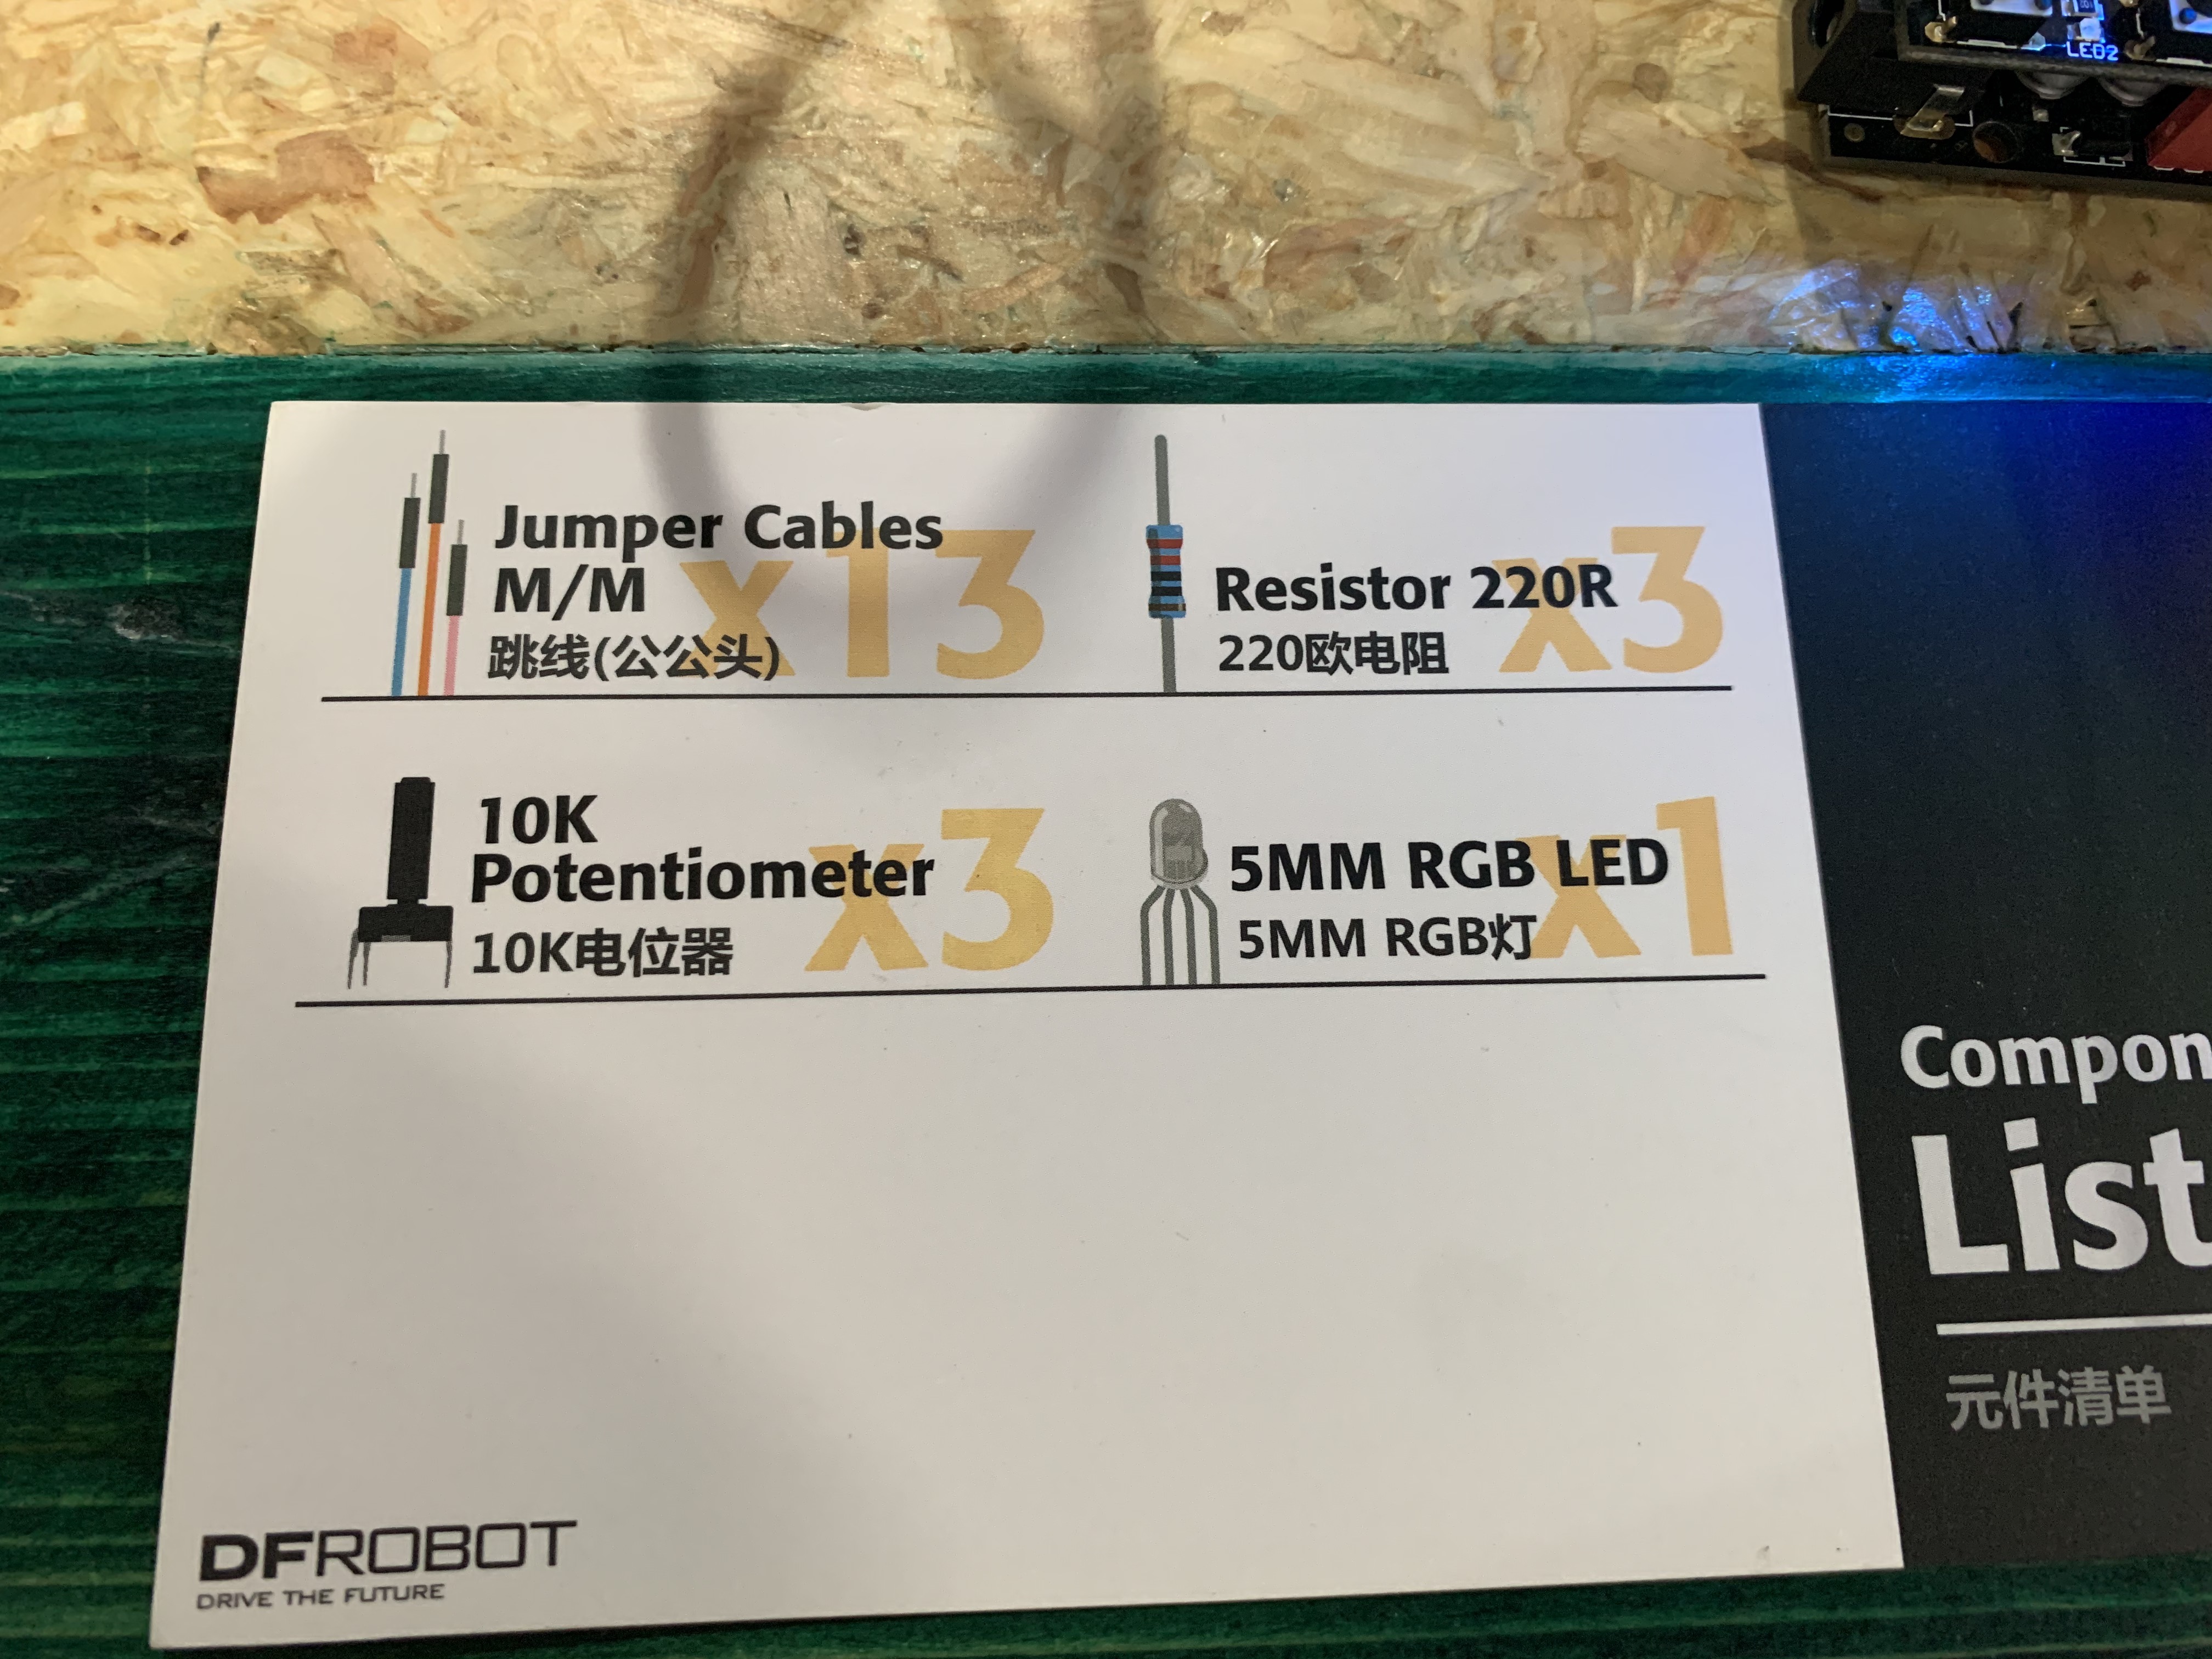
Project 12: RGB Light Dimmer
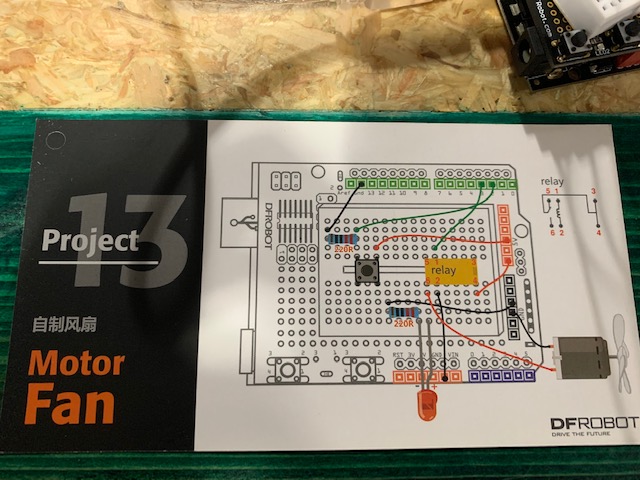
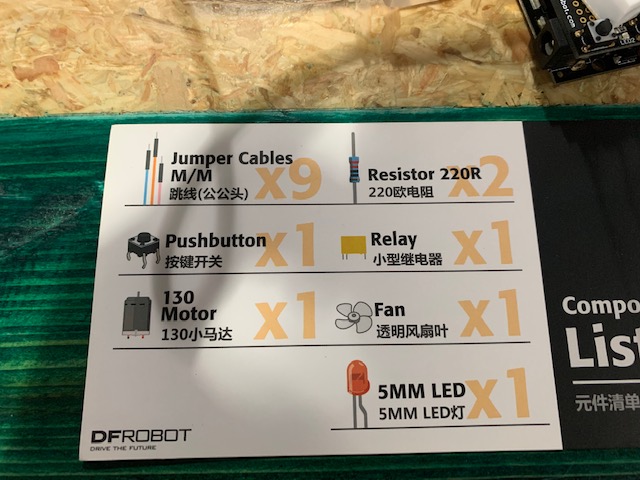
Project 13: Motor Fan
Project 14: Infrared Controlled Light
Project 15: Infrared Controlled LED Matrix